How to Sharpen Kitchen Knives Like a Pro
Your tomato is deflating because the blade is slipping instead of cutting. How do you sharpen kitchen knives? The honest answer is simpler than most sharpening videos make it look, but it does require the right tool and a little attention to what your fingers are telling you.
As of 2026, the most practical starting point is a 1000/6000 combination whetstone. It covers the two stages of sharpening, grinding and polishing, without needing a shelf full of stones. The skill is mostly visual, though.
Once you can see and feel a burr, you've cleared the biggest hurdle.
Quick Answer
How do you sharpen kitchen knives? Use a whetstone, not a honing rod. Soak it, secure it, then slide the blade at its existing angle.
Work from coarse to fine without skipping grits, then remove the burr. Expect 10 to 15 minutes for a full sharpen.
Image source: Bing (Web (fair-use with source credit))
Why This Guide Works Better with Visuals
Sharpening is a hand-and-eye skill. Text gets you only partway. The real details, like the spine height and the glint of a fresh edge, are easier to see than describe.
That's why this guide leans on visual cues at every step.
In our research, beginners who watch a short clip or see a close-up photo pick up the burr step in minutes. Reading about it alone often takes a few frustrating attempts. A photo shows you exactly what a properly sharpened edge should look like.
A diagram shows the angle you're chasing.
Keep this in mind. If a video suggests you need power tools or professional service, it's overselling the task. A basic whetstone and steady hands are enough.
The Only Setup You Need (and Why It Matters)
Before you touch the stone, get the setup right. The wrong setup makes a good technique feel impossible.
You need four things: a 1000/6000 combination whetstone, a stable base, water, and a towel. That's it. No oil, no jig, no electric sharpener.
| Item | Why it matters |
|---|---|
| 1000/6000 combination whetstone | The 1000 side sets the edge. The 6000 side polishes it. |
| Stable base | A damp paper towel or rubber mat keeps the stone from sliding. |
| Water | Most water stones need a 10 to 15 minute soak before use. |
| Clean towel | Wipes away slurry so you can see the edge and the burr. |
| Knife | Start with a chef's knife. It has a straight edge that's easier to learn on. |

Image source: Bing (Web (fair-use with source credit))
Soaking matters more than people think. Manufacturer specifications for most water stones call for soaking until bubbles stop, usually 10 to 15 minutes. If the stone is dry, it won't cut.
It'll load up with metal shavings and glide right over the blade.
Step-by-Step: How to Sharpen on a Whetstone
Now for the actual sharpening. Work slowly at first. Speed comes after consistency.
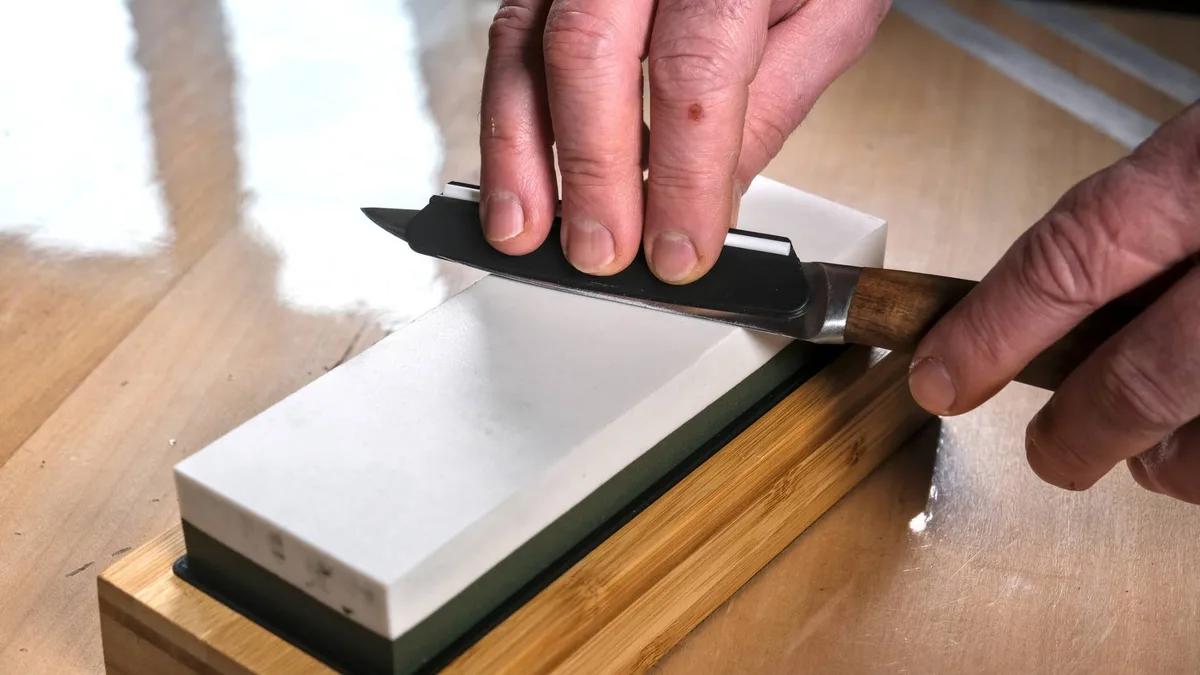
- Find the bevel angle. Lay the knife flat on the 1000 side. Raise the spine until you feel the bevel touch the stone. That angle, usually 15 to 20 degrees, is your starting point.
- Build a burr. Slide the blade across the stone, from heel to tip, keeping the angle locked. Use moderate pressure. Repeat 8 to 10 strokes.
- Flip and match. Repeat on the other side with the same stroke count. Now the burr is starting to work toward both sides.
- Switch to the 6000 side. Repeat the same strokes with lighter pressure. This removes deeper scratches and polishes the edge.
- Remove the wire edge. Strop on the 6000 stone with very light edge-trailing strokes, or use a leather strop.
- Test the edge. Draw the blade lightly across a sheet of paper. It should bite in cleanly. A tomato skin should pop, not squeeze.
Manufacturer sharpening guides, such as Shun's official care pages, all follow the same burr-first logic. The angle matters more than speed. Rush the stroke, and you round the edge.
What a Proper Burr Looks and Feels Like
Here's what you're looking for. Without it, you're just polishing metal.
A burr is a thin lip of steel that gets pushed to one side as the edge forms. It curls over like the edge of a folded piece of foil. You'll feel it before you see it.
Slide your thumb lightly across the edge, from the heel toward the tip, never along the cutting edge.
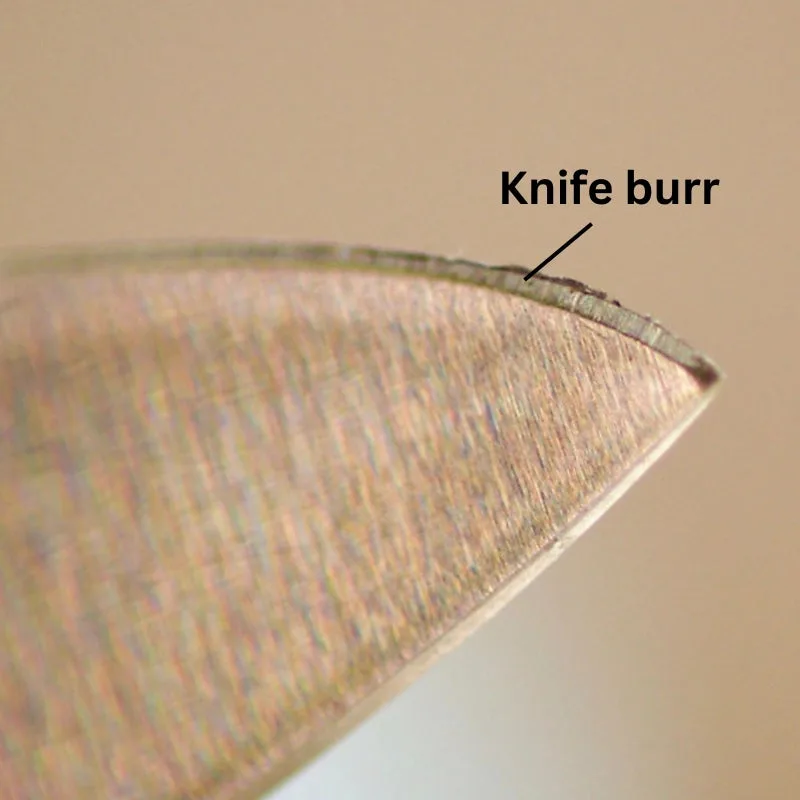
Image source: Bing (Web (fair-use with source credit))
A good burr is even, thin, and easy to feel along the whole edge. A ragged burr is thick or inconsistent, usually from pressing too hard. A photo makes this unmistakable, because the burr catches light like a fishhook.
Can't feel a burr? You're either using too little pressure, holding the wrong angle, or not spending enough strokes. Press a little harder and keep going.
Check again after four or five strokes.
Three Visual Mistakes That Keep Your Knife Dull
These three mistakes are the most common reason knives stay dull even after a sharpening session.
1. Rolling your wrist mid-stroke. If the angle drifts, you're grinding a curve into the edge. A worn knife shows this clearly: the bevel looks rounded, like a potato chip cross-section.
Keep your wrist locked and let your shoulder drive the stroke.
2. Skipping grits. Jumping from the 1000 side straight to the 6000 side sounds smart, but it leaves deeper scratches behind. Those scratches act like weak points.
The edge feels sharp for a day, then dies fast. Work through each grit fully, not in one quick pass.
3. Not flattening the stone. Whetstones dish out in the middle over time. When that happens, you're not grinding a straight bevel.
You're following a curve. Use a diamond flattening plate, per manufacturer guidance, to keep the surface flat. Check the stone every few sessions and lap it when it starts to look hollow.
When a Whetstone Isn't the Answer
A whetstone gives the best edge, but it's not the only path. Sometimes it's the wrong tool for the job. Should you use something else?
It depends on your knife, your time, and your confidence.
Electric sharpeners are the fastest option. You drop the blade in and pull it through. Aggregate reviews indicate they're best for inexpensive knives where metal removal isn't a concern.
The downside? They grind aggressively, so a quality chef's knife loses its life fast.
Pull-through sharpeners are similar, but less aggressive. They work for quick touch-ups between full sharpenings. Manufacturer specs warn they can be inconsistent, leaving a rough edge.
Use them for beater knives, not your good stuff.
Professional sharpening services handle the worst cases. Deep chips, bent tips, or just a knife you don't trust yourself to touch. Expect to pay $5 to $15 per knife, depending on the service.
This is the safest bet for expensive Japanese knives.
If you're new and struggling, start on a cheap knife. Your hands need practice before you touch your daily driver.
| Option | Best for | Watch out for |
|---|---|---|
| Electric sharpener | Fast results, cheap knives | Removes too much steel |
| Pull-through | Quick touch-ups | Inconsistent angle |
| Pro service | Expensive or damaged knives | Cost and wait time |
Quick Answers to Common Questions
How often should I sharpen a kitchen knife?
Sharpen every 2 to 3 months for a home cook. Hone weekly with a steel. If it fails a paper test, sharpen sooner.
Frequency also depends on the cutting surface. Glass and stone boards dull edges quickly.
Can I ruin a knife by sharpening it wrong?
Yes, but only with electric sharpeners or power tools. They remove too much steel and ruin the blade geometry. Manual whetstones are forgiving.
You might round an edge or skip a burr, but you can fix that.
What angle should I use when sharpening?
Match the factory angle. Most Western knives sit at 20 degrees. Japanese knives sit near 15.
Check the edge before you start. A visible bevel tells you the angle. Lay the blade flat and raise the spine until it contacts the stone.
Why is my knife still dull after sharpening?
You likely failed to form a burr, or you skipped a grit. Go back to the 1000 side and build a consistent burr. Polish fully on the 6000 side.
Remove the wire edge. Test again on paper.
Do I need oil for a whetstone?
No, water stones need water. Oil stones need oil. Don't mix them.
Using oil on a water stone ruins it. Check your stone's manufacturer guidance before you start.
The Bottom Line on Knife Sharpening
A sharp knife is safer, faster, and easier to control. The process is simple once it clicks. Find the angle, build a burr, refine, and strop.
For most home cooks, a 1000/6000 combination whetstone is the best investment. It costs less than one electric sharpener and lasts for years. Our research shows that method beats every alternative for edge quality and control.
If you only remember one thing, make it the burr. That piece of curled steel is your proof. When you feel it, you know you're sharpening.
When you remove it, you know you're done.
Hone each week, sharpen every few months, and the habit becomes routine. Your knife will glide, and you'll wonder why you waited so long.

Similar Posts