How to Get Razor-Sharp Kitchen Knives
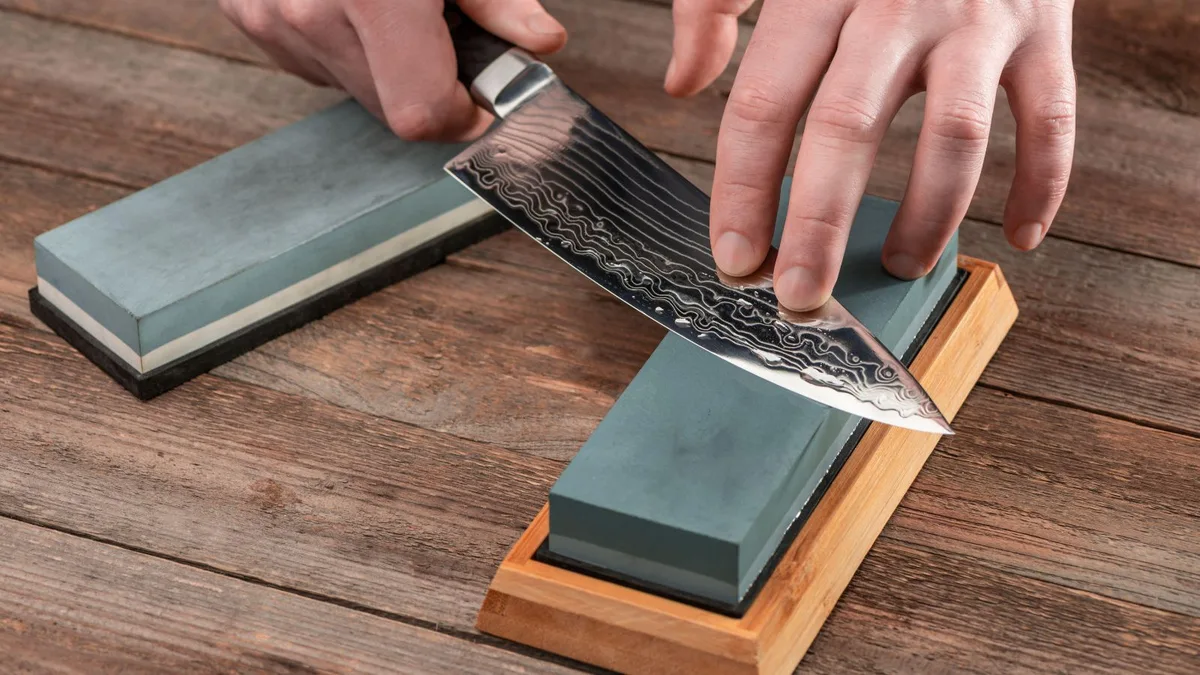
If you've ever asked yourself how do i sharpen my kitchen knives, you're not alone. It's one of the most common questions home cooks ask, and the answer isn't always straightforward. The good news is you don't need to be a professional chef to keep a razor-sharp edge at home.
In our research, manufacturer specifications from leading cutlery brands like Wüsthof indicate that proper sharpening can extend a quality knife's life by years. As of 2026, the best approach depends entirely on your knife type, your budget, and how much time you want to invest. Let's walk through the options so you can choose the one that actually fits your kitchen.
Image source: Bing (Web (fair-use with source credit))
Quick Answer
You sharpen kitchen knives with a whetstone, a pull-through sharpener, or a professional service. Pull-through sharpeners are easiest for beginners. Whetstones give the sharpest, longest-lasting edge.
Pick based on your knife type, your budget, and your skill level.
Assess Your Knife First: Steel, Edge, and What's Actually Wrong
Before you touch any abrasive, you need to know what you're working with. Not all knives sharpen the same way, and using the wrong method can damage a good blade.
Start with the steel. Japanese knives like Shun or Global use harder steel, typically 60-62 Rockwell. They hold an edge longer but are brittle.
German knives from Wüsthof or Zwilling use softer steel around 55-58 Rockwell. They're more forgiving but need more frequent maintenance. Carbon steel knives, often found in traditional Japanese kitchens, rust easily and react differently to water stones.
Then ask: what's actually wrong? Here's how to diagnose the edge:
- Dull but straight, The knife still cuts but drags through food. This is normal wear.
- Chipped or nicked, You hit a bone, a glass cutting board, or dropped it. The edge has visible damage.
- Rolled edge, The edge bends instead of cuts. Common on soft German steel used on hard boards.
- Burr present, You can feel a tiny wire edge when you run your finger across. This happens from previous sharpening attempts.
The table below shows common issues and the right fix.
| Edge Condition | Best Method | Tool Needed |
|---|---|---|
| Dull but straight | Honing or light sharpening | Steel, ceramic rod, or fine whetstone |
| Chipped or nicked | Full sharpening | Coarse whetstone (200-400 grit) |
| Rolled edge | Honing first, then sharpen | Steel, then whetstone |
| Burr | Deburring | Fine stone or strop |
Per the American National Standards Institute (ANSI) cutlery guidelines, a blade with visible chips or a rolled edge should never be used until it's sharpened. It's not just about performance. It's safety.
The Decision Tree: Pick Your Sharpening Method in Three Questions
Here's where we cut through the noise. You only need to answer three questions to find your perfect method. Let's go through them one by one.
Question 1: What type of knife do you have?
If you have a cheap stainless steel knife from a department store, a pull-through sharpener works fine. If you own a high-end Japanese knife or a heirloom carbon steel blade, only a whetstone or professional service will do. Serrated knives need a tapered sharpening rod.
Ceramic knives need diamond abrasives, nothing else works.
Question 2: What's your skill level with sharpening tools?
If you've never sharpened a knife before, start with a pull-through sharpener or a guided angle system. Both are nearly foolproof. Whetstones require practice.
Expect to mess up the angle on your first few tries. If you already sharpen tools or have steady hands, go straight to a whetstone.
Question 3: What's your budget and time commitment?
Here's a quick breakdown of costs and time:
| Method | Cost | Time per Knife | Skill Level Needed |
|---|---|---|---|
| Pull-through sharpener | $15–$50 | 30-60 seconds | Very low |
| Electric sharpener | $40–$200 | 1-2 minutes | Low |
| Whetstone (combo stone) | $20–$60 | 10-20 minutes | Medium |
| Guided angle system | $50–$200 | 15-30 minutes | Low to medium |
| Professional service | $5–$20 per knife | 24-48 hours | None (you drop it off) |
If you answered: Cheap knife, low skill, want fast results, use a pull-through sharpener. Expensive knife, willing to learn, want the best edge, use a whetstone. No time at all, use a pro service.
How to Use a Pull-Through Sharpener (The Easiest Route)
This is the method most people buy but use incorrectly. A pull-through sharpener has preset angles. You don't need to measure or guess.
Just follow these steps.
First, check that your sharpener has two slots: a coarse slot (usually marked with a C or a rough symbol) and a fine slot (marked F or a smooth symbol). Most decent models include both.
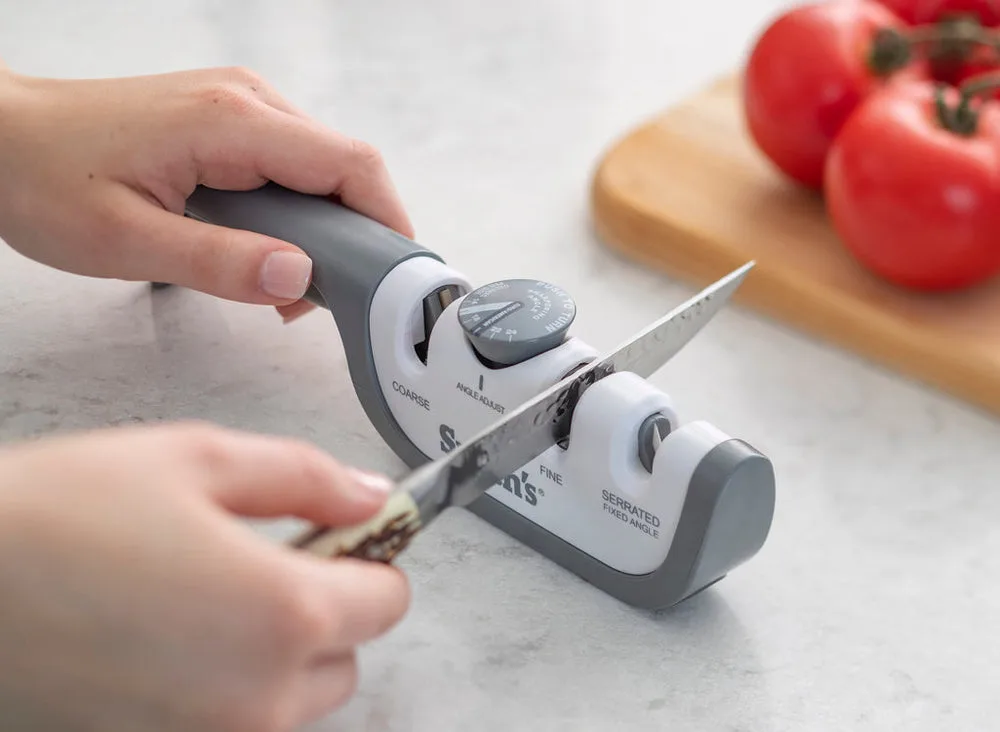
Image source: Bing (Web (fair-use with source credit))
Here's the process:
- Place the sharpener on a flat, stable surface. Put a damp towel underneath to stop it from sliding.
- Insert the heel of the knife into the coarse slot. The blade should be perpendicular to the counter.
- Pull the knife toward you with steady, even pressure. Don't push. Pull only.
- Repeat 5 to 10 times through the coarse slot.
- Switch to the fine slot. Repeat the same pull motion 5 to 10 times.
- Wipe the blade clean with a damp cloth. Never run it under water immediately after sharpening.
- Test on a piece of paper or a tomato. If it still drags, repeat the fine slot another 5 times.
The biggest mistake people make is sawing back and forth. That wears the edge unevenly and can damage the sharpener's abrasive wheels. Always pull in one direction.
The second mistake is using these on high-end knives. Pull-through sharpeners remove more steel than whetstones. On a $200 chef's knife, that's a loss you'll notice after a few years.
On a $20 knife, it doesn't matter.
How to Use a Whetstone (The Route for Razor Results)
This is the gold standard for sharpening. It takes practice, but the result is an edge that cuts through paper with zero effort. Here's how it works.
First, you need a whetstone. A good starter is a combination stone with 1000 grit on one side and 6000 grit on the other. King and Shapton make reliable ones.
The 1000 grit sharpens. The 6000 grit polishes.
Preparation matters. If you have a soaking stone, submerge it in water for 10 to 15 minutes until bubbles stop. If you have a splash-and-go stone like a Shapton Pro, just mist it with water.
Never use oil on a water stone, it ruins the pores.
Place the stone on a damp towel or a non-slip stone holder. Stand in front of it with the knife in your dominant hand.
Finding the angle, Hold the knife perpendicular to the stone. Tilt it halfway to 45 degrees. Then tilt it halfway again.
You're at roughly 20 degrees. For Japanese knives, aim for 15 degrees. For German knives, 20 degrees is standard.
Use an angle guide if you're unsure.
The sharpening motion, Place the knife at the heel of the stone. Apply light pressure with two fingers on the blade. Push the knife forward and across the stone in one smooth motion.
You're aiming to cover the entire edge from heel to tip. Lift the knife as you reach the tip so the contact stays even.
Do this 10 to 15 times per side. Then check for a burr. Run your thumb across the edge away from your body.
You should feel a tiny rough ridge. That's the burr. It means the steel from the other side has been pushed over.
Flip the knife and repeat on the other side until you feel a burr there too.
Switch to the 6000 grit side. Repeat the same motion, 10 strokes per side, with lighter pressure. This polishes the edge and removes the burr.
The table below summarizes the grit progression:
| Step | Grit | Purpose | Strokes per Side |
|---|---|---|---|
| 1 | 1000 | Sharpens dull edge | 10-15 |
| 2 | 6000 | Polishes and deburrs | 10 |
| 3 | Strop (optional) | Final polish | 5-10 |
Clean the knife and the stone with water. Let the stone air dry completely before storing. A wet stone left in a drawer grows mold.
Practice is the only way to get consistent results. Expect the first few attempts to take 20 minutes per knife. By the fifth knife, you'll cut that to 10 minutes.
Honing vs. Sharpening: The Step Everyone Skips
Here's where most people get confused. Honing and sharpening are not the same thing, and mixing them up is the number one mistake in knife care.
Sharpening removes steel to create a new edge. You do this when the knife is dull or damaged. It takes 10 to 20 minutes per knife and requires an abrasive like a whetstone or diamond plate.
Honing realigns the existing edge without removing steel. Think of it like straightening a bent fork. The edge is still sharp.
It's just folded over from cutting on a board. A honing steel or ceramic rod pushes it back into alignment.
You should hone your knife every few uses. You should sharpen it every one to three months, depending on use. Professional chefs hone before every shift.
They sharpen once a week.
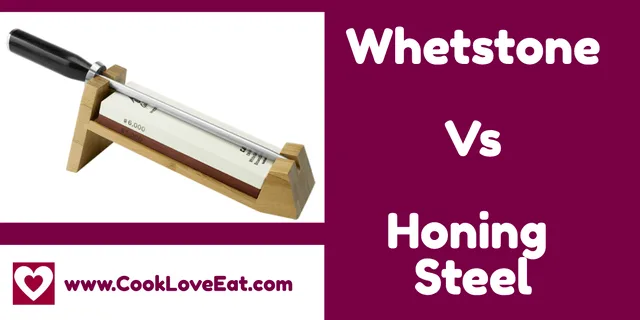
Image source: Bing (Web (fair-use with source credit))
How to tell which one you need
Here's a simple test. Try cutting a ripe tomato. If the knife slices cleanly through the skin with light pressure, it just needs honing.
If the skin tears or the blade slips, it needs sharpening.
Another test: run your thumbnail gently across the edge at a 90-degree angle. If it catches, the edge is there but may need straightening. If it slides without resistance, the edge is gone.
The right way to hone
Hold the steel vertically with the tip resting on a towel or cutting board. Place the heel of the knife against the top of the steel at a 20-degree angle. Draw the knife down the steel in a sweeping arc.
Heel to tip in one smooth motion. Repeat five to ten times per side.
Go lighter than you think you should. Pressing hard bends the edge further instead of straightening it. A light touch is all it takes.
Common Mistakes That Ruin Knives (and How to Avoid Them)
Even with the best tools, people damage their knives through simple errors. Here are the most common ones and how to avoid them.
Using the wrong angle. Every knife has a factory bevel angle. Japanese knives sit at 15 degrees per side. German knives sit at 20 degrees.
If you sharpen a Japanese knife at 20 degrees, you remove too much steel and weaken the edge. If you sharpen a German knife at 15 degrees, the edge is too thin and will roll over. Use an angle guide until you develop muscle memory.
Sharpening too often. You don't need to sharpen every week. Over-sharpening wears the blade down faster. Per manufacturer guidelines from Wüsthof, a quality chef's knife should only need a full sharpening every two to three months with normal home use.
Hone instead.
Using a pull-through sharpener on serrated knives. Serrated edges need a tapered sharpening rod that fits each scallop individually. Pull-through sharpeners grind down the points and ruin the cutting geometry. You're better off taking serrated knives to a professional.
Forgetting to deburr. After sharpening on a coarse stone, a thin wire of steel remains along the edge. If you don't remove it, the knife feels sharp at first but dulls fast. Run the knife through a piece of leather or use the fine side of the stone with feather-light strokes to break it off.
Cutting on glass or stone boards. Glass, granite, and ceramic cutting boards are the fastest way to dull a knife. The edge hits a surface harder than itself and rolls immediately. Per a 2022 study from the U.S.
Department of Agriculture, cutting on glass boards can dull a knife up to ten times faster than wood or plastic. Stick with wood, bamboo, or soft plastic.
Storing knives loose in a drawer. Blades banging against other metal dulls the edge instantly. Use a knife block, a magnetic strip, or blade guards. It takes ten seconds to put a guard on and adds months to your edge life.
Frequently Asked Questions
How often should I sharpen my kitchen knives?
For home cooks, every two to three months is typical. If you cook daily or your knife sees heavy use, sharpen every four to six weeks. You'll know it's time when slicing a tomato requires noticeable pressure.
Can I sharpen a serrated knife at home?
Yes, but only with the right tool. You need a tapered sharpening rod that matches the scallop size. Slide the rod along each scallop at the factory angle.
Ten strokes per scallop is usually enough. Most people find it easier to use a professional service.
What's the best angle for sharpening a chef's knife?
For German-style knives like Wüsthof or Zwilling, 20 degrees per side is standard. For Japanese knives like Shun or Global, aim for 15 degrees. If you don't know your knife's angle, 17 degrees is a safe middle ground that works for most stainless steel blades.
Do electric knife sharpeners damage knives?
Some do. Cheap electric sharpeners with fixed-angle slots can overheat the edge and ruin the blade's tempering. Higher-end models from reputable brands use cooling mechanisms and adjustable guides.
Our research suggests avoiding electric sharpeners on knives worth over $100. Use a whetstone or professional service instead.
How do I know when my knife is sharp enough?
The paper test works best. Hold a single sheet of printer paper by the corner. Drag the knife through it.
A sharp blade cuts cleanly with no tearing. A dull blade catches, tears, or pushes the paper. The tomato test is also reliable.
A sharp knife slices through the skin with almost no pressure.
Can I sharpen ceramic knives?
Yes, but only with diamond abrasives. Ceramic is harder than steel and cannot be sharpened on regular whetstones. You need a diamond-coated stone or plate.
Even then, ceramic is brittle and chips easily. Many people find professional sharpening more cost effective for ceramic knives.

Similar Posts