The Easiest Instant Pot Yogurt Recipe
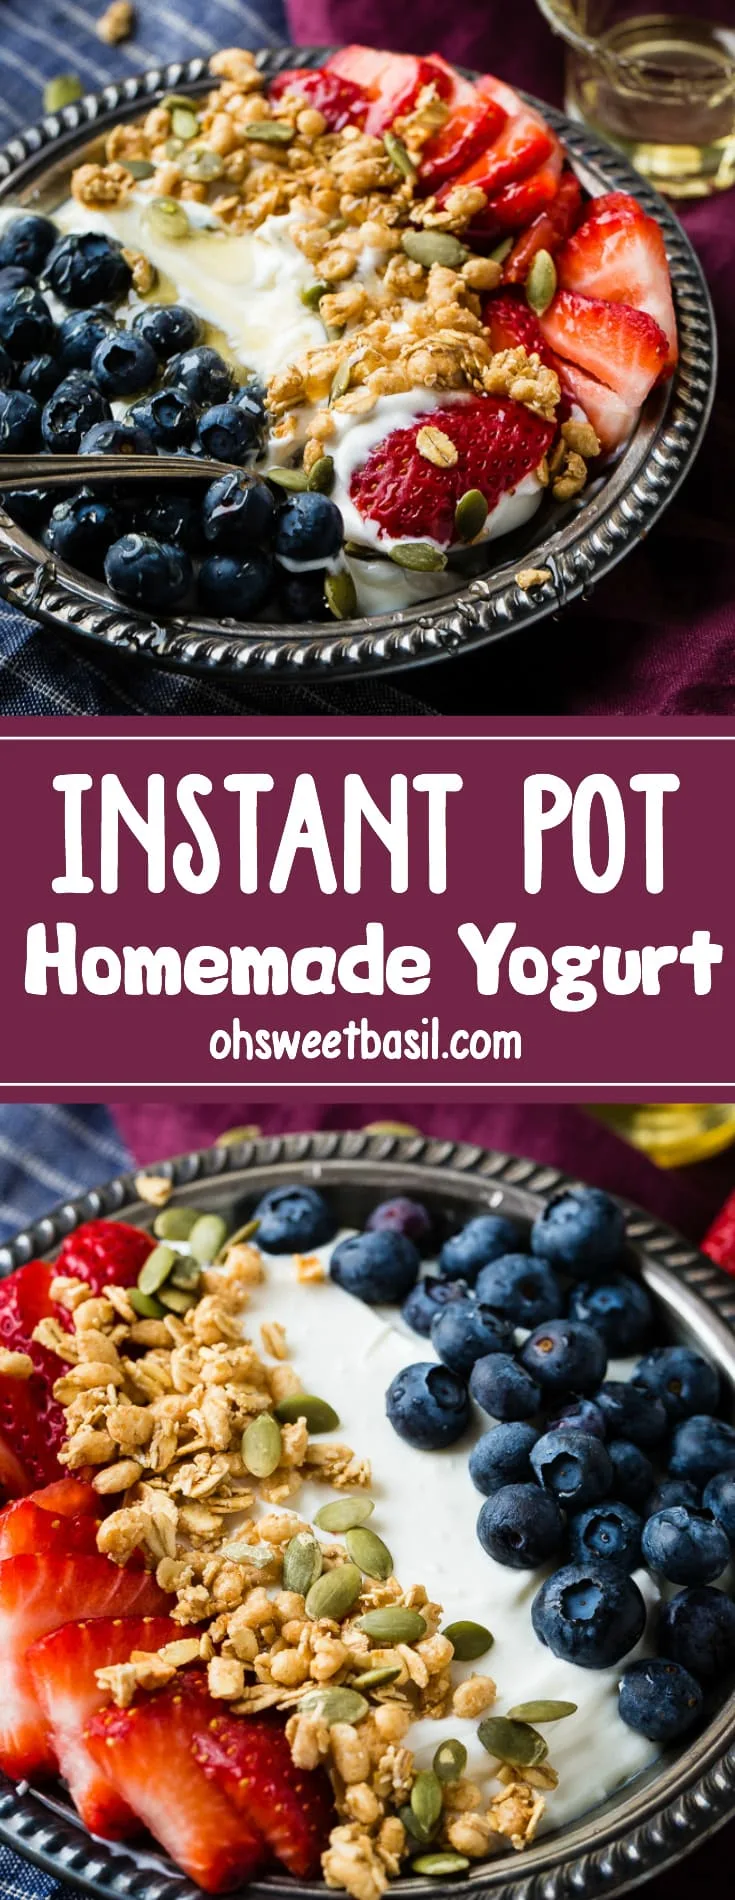
You've probably tried an instant pot yogurt recipe, followed every instruction, and still ended up with a pot of thin, sour-smelling milk. If that's you, take a breath. The recipe wasn't the problem.
The process just didn't line up with your milk, your starter, or your specific Instant Pot model.
The good news is that every failure has a known fix. Yogurt cultures multiply best between 105°F and 115°F (40°C to 46°C), and the Instant Pot holds that band automatically once you understand its cycle. As of 2026, most models with a Yogurt button run two phases: a boil phase and an incubation phase.
Nail those two phases and you'll get creamy, consistent yogurt every batch.
Image source: Bing (Web (fair-use with source credit))
The Real Problem with Homemade Instant Pot Yogurt
Plenty of people try an instant pot yogurt recipe, follow every step, and still end up with a pot of thin, sour-smelling liquid. If that's you, don't blame yourself. The recipe was probably fine.
The process just didn't match your variables.
Yogurt fails in predictable patterns. Thin, drinkable yogurt means the milk wasn't scalded long enough or the starter was weak. Grainy, separated yogurt means the culture hit milk that was still too hot.
Bitter, sharply sour yogurt means fermentation ran too long. Yogurt that never sets usually points to milk that can't coagulate, like ultra-pasteurized milk in the traditional method.
Here's the core issue. The Yogurt button isn't a magic wand. It's a precise temperature controller for a biological process.
Every variable matters: milk fat, starter freshness, fermentation time, and your specific model.
Think of it as a decision tree. Is your yogurt thin? Check the scalding temperature first.
Is it separated? Check the milk temperature before adding the starter. Is it too sour?
Shorten the next incubation. Did it never set? Confirm the starter has live cultures.
Get familiar with that logic and you'll stop blaming the machine. You'll start fixing the actual variable, which is the most satisfying part of making yogurt at home.
The Quick Answer: You Have More Control Than You Think
Heat milk to 180°F and cool it below 115°F. Whisk in 2 tablespoons of live-culture yogurt per quart. Incubate for 8 to 12 hours.
Refrigerate for 4 to 6 hours. That's the entire formula behind a great Instant Pot yogurt recipe.
The numbers are the secret. Hit them correctly and the Instant Pot handles the rest. Miss them in either direction and no amount of extra time fixes the result.
You'll see variations everywhere, but they're the same method with a different clock. Eight hours gives mild, balanced yogurt. Ten hours shifts things a bit more tart.
Twelve hours produces a sharp, sour profile and a noticeably thicker curd, because more acid forces more whey out of the proteins.
Keep it simple for your first batch. Use the default 8-hour cycle on most Instant Pot models. That's a safe starting point for any milk type.
After one batch you'll know exactly which way to adjust.
If your model has a Yogurt Boost feature, it holds a slightly lower temperature for a gentler fermentation. Some cooks prefer it for creamier results, but it's not required. The standard Yogurt button already gives you everything you need.
And if you're using a newer Duo Plus or Ultra model, check the manual for the custom timer. It lets you dial in the exact hour instead of accepting the default.
What's Actually Happening Inside That Pot
How the Yogurt Button Works
Press the Yogurt button once, and the Instant Pot starts its boil phase. The inner pot heats milk to roughly 180°F (82°C). When it gets there, the machine beeps and holds the temperature briefly.
This step exists for a reason most recipes skip: heat changes the structure of milk proteins.
That shift is called denaturing. The whey proteins unwind and reattach, which lets the milk form a firmer curd later. Skip scalding, and your yogurt comes out thin no matter how long you ferment it.
The Two Phases: Scalding and Fermenting
The machine can't cool your milk for you. After the boil phase finishes, you remove the inner pot or leave the lid off and wait. The milk has to drop below 115°F (46°C) before any live culture can survive.
Once you add the starter and return the pot, press Yogurt again to start the incubation phase. The machine holds a steady band between 105°F and 115°F (40°C to 46°C). That warmth keeps bacteria multiplying.
They feed on lactose, produce lactic acid, and lower the pH. When acidity rises enough, the proteins coagulate into yogurt.
The temperature is locked in by the machine. The time is yours. Per the official Instant Brands website, the standard cycle runs eight hours on most models, and adjusting the timer changes the final flavor.
Your Step-by-Step Game Plan
Choosing Your Milk (and Why It Matters)
Whole milk gives the thickest batch because the butterfat supports a denser curd. Two percent works well too. Skim milk turns out thin and needs straining to feel substantial.
Stick with regular pasteurized milk for the traditional boil method.
Ultra-pasteurized (UHT) milk resists coagulation in that method and often yields watery yogurt. Keep it for the cold-start shortcut in the next section.
Phase by Phase, in Numbers
| Phase | Target | Time | What It Does |
|---|---|---|---|
| Boil | 180°F (82°C) | 5 to 10 min hold | Denatures milk proteins |
| Cool | Below 115°F (46°C) | 30 to 45 min | Protects live cultures |
| Incubate | 105°F to 115°F | 8 to 12 hrs | Bacteria ferment the milk |
| Cold set | 40°F (4°C) | 4 to 6 hrs | Firms the curd and flavor |
Phase 1: The Boil, Heat It Right
Add milk to the inner pot. Press Yogurt once to start the boil. Stir every few minutes so the bottom doesn't scorch.
Phase 2: Cool It Down Without Killing the Culture
Lift out the inner pot and set it on a cooling rack or in a sink of ice water. Stir occasionally. Wait until the milk drops below 115°F.
Phase 3: Add the Starter the Right Way
Temper the culture first. Mix two tablespoons of starter into a cup of warm milk in a small bowl, then whisk it back into the pot. That step prevents cold shock.
Phase 4: Incubating, Set the Timer and Walk Away
Return the pot. Press Yogurt again. Set the timer for 8 to 12 hours.
Close the lid and leave it closed. Every peek drops the temperature and stretches the fermentation.
Phase 5: The Cold Set, Don't Skip It
Spoon the finished yogurt into jars. Refrigerate at least 4 hours. Warm yogurt tastes thinner and more sour than the same batch after it chills.
The cold set changes everything.
Making It Greek or Thick
The Simple Strain Method
Want thicker yogurt? Stop forcing it during incubation and strain instead.
Line a fine-mesh sieve with three layers of cheesecloth, or rest it over a large bowl. Spoon in the yogurt. Cover loosely and refrigerate.
Thirty minutes gives a loose, skyr-like texture. Two to four hours produces the thick, spreadable consistency people expect from Greek yogurt. Leave it overnight and you're close to labneh, nearly as thick as cream cheese.
The liquid that drains off is whey. Keep it. It adds body to smoothies, replaces buttermilk in pancakes, and gives bread dough a nice tang.
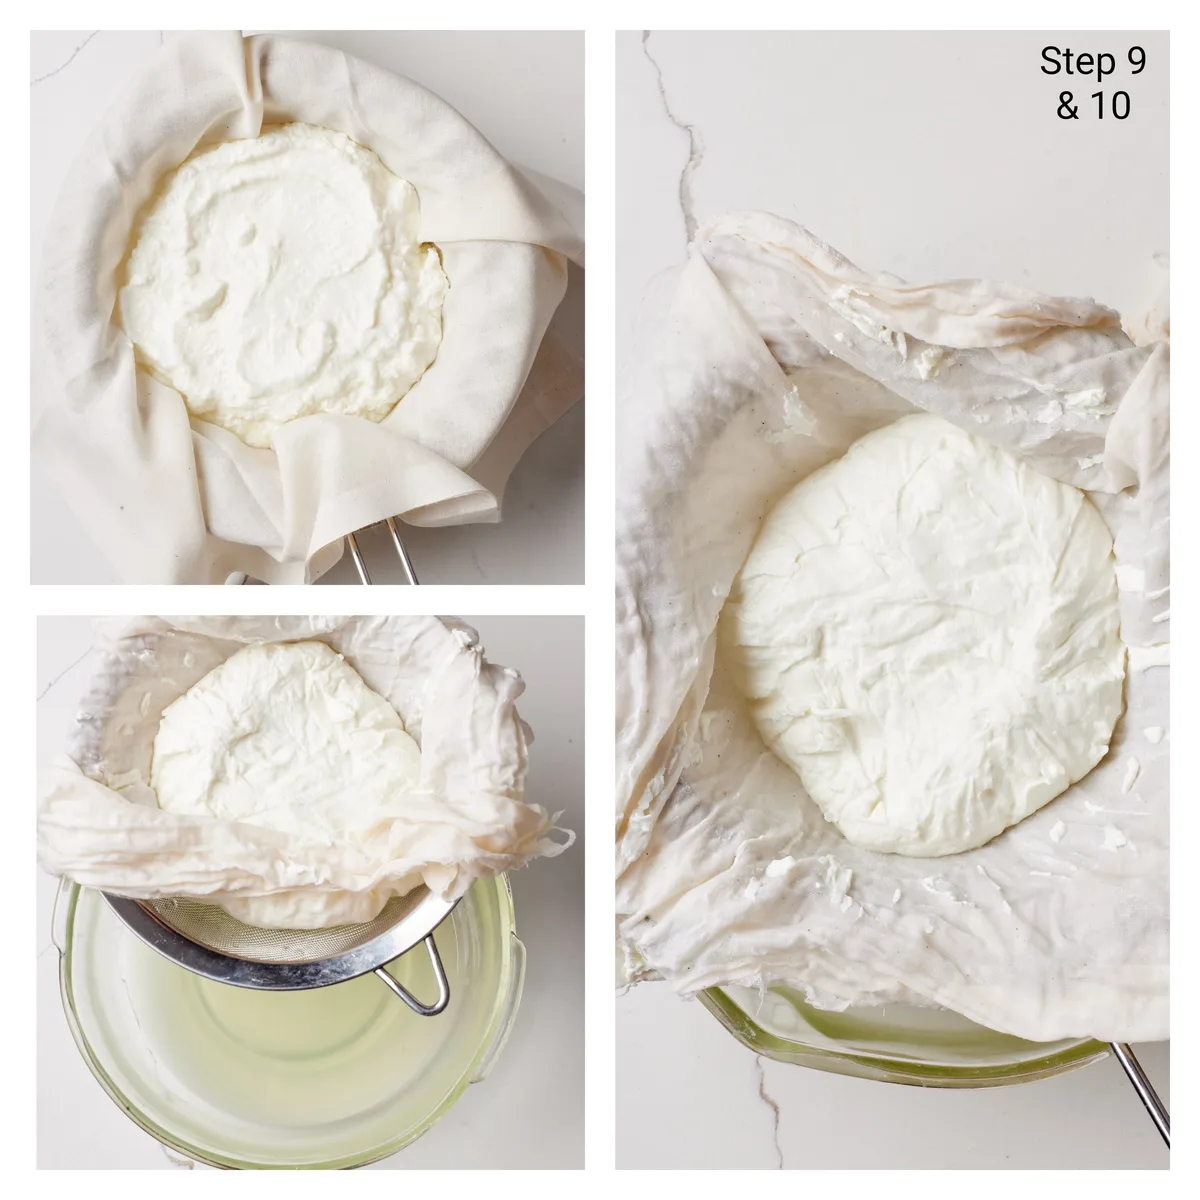
Image source: Bing (Web (fair-use with source credit))
The Cold-Start Shortcut (When It Works)
There's one case where you can skip the boil entirely. If your carton says ultra-pasteurized or UHT, whisk the starter directly into cold milk, close the lid, and press Yogurt. The milk has already been heat-treated, so the proteins are primed to coagulate without scalding.
Remember, this shortcut only works with UHT milk. Regular pasteurized milk needs the traditional boil.
Want thickness without any straining? Whisk two tablespoons of non-fat dry milk powder into each quart before the boil. That extra protein creates a denser curd from the start.
Per USDA food safety guidance, homemade cultured dairy belongs in the fridge promptly. Don't leave finished yogurt on the counter for hours before its final chill.
The Five Mistakes That Wreck Your Yogurt Every Time
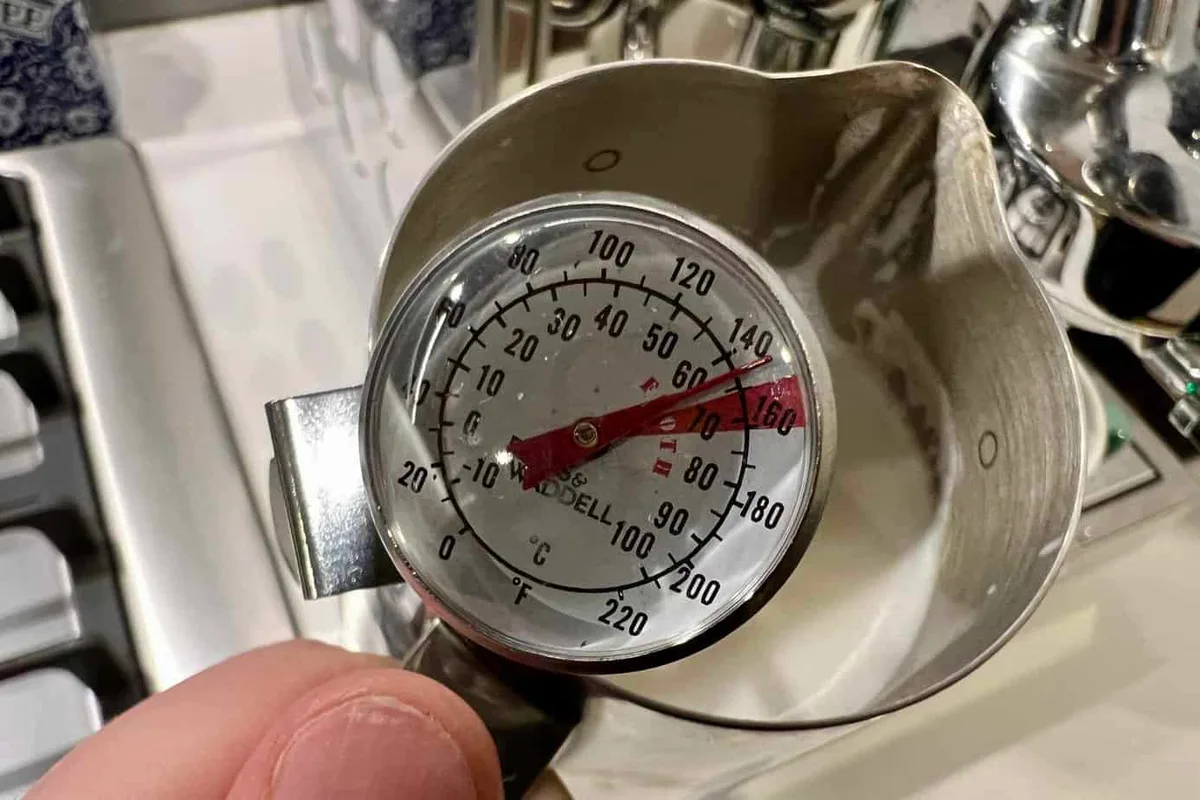
Image source: Bing (Web (fair-use with source credit))
Mistake 1: Using Old or Weak Starter
Your starter is the only source of live bacteria in the batch. If it's old, it won't multiply fast enough to outcompete any stray organisms.
Use starter that's less than two weeks old. Check the label for "live active cultures" and avoid yogurt with gelatin, pectin, or starch. Those thickeners stall the fermentation.
If your previous batch came out thin, don't reuse it as a starter. Grab a fresh container from the store.
Mistake 2: Adding Starter to Milk That's Too Hot
This is the most common single error. Pour starter into milk above 120°F (49°C) and you kill the culture before it starts. The milk never ferments, you wait 12 hours for nothing, and you dump it.
Always temper the starter with warm milk before adding it to the pot. Cool the milk below 115°F. Use an instant-read thermometer at the center of the pot.
The edges cool faster than the middle, so stir first and then check.
Mistake 3: Peeking During Fermentation
Every time you lift the lid, warm air escapes. The internal temperature drops. The fermentation slows.
You extend the timer by 30 minutes or more each time.
Set a timer and walk away. Trust the machine. The Instant Pot holds temperature better when the lid stays sealed.
If you need to check, look through the clear lid window if your model has one. Don't lift.
Mistake 4: Skipping the Scalding Step
Ultra-pasteurized milk users can skip the boil. Everyone else cannot.
Regular pasteurized milk needs the 180°F heat treatment to denature proteins. Skip that phase and the proteins never form a stable curd. Your yogurt comes out thin, watery, and disappointing.
You strain it for hours and still get a lackluster result.
If you're in a hurry, use UHT milk and cold-start. Otherwise, take the 10 minutes to scald.
Mistake 5: Ignoring Your Specific Instant Pot Model
Not all Instant Pots run the Yogurt button the same way. The Duo and Duo Plus heat to 180°F during the boil phase. The Ultra lets you adjust both the boil temperature and the incubation time.
Check your manual for the exact sequence. Some models require pressing Yogurt twice to start incubation. Others start boiling on the first press.
A quick read of the official documentation for your specific model saves one failed batch.
Troubleshooting Thin Yogurt
Why Didn't It Set?
Thin yogurt has three common causes. Check these in order.
Your milk might be ultra-pasteurized or UHT. Without scalding or a cold-start approach, those proteins won't coagulate. Switch to regular pasteurized milk or use the cold-start method next time.
Your starter might have been weak. Old starter, frozen starter, or starter with added thickeners all fail to ferment properly. Use fresh plain yogurt with live cultures.
Your incubation temperature might have been wrong. If the Instant Pot wasn't sealed or the room is very cold, the internal temperature may have dipped below 100°F (38°C). That's too low for efficient fermentation.
Fixing It for Next Time
Add non-fat dry milk powder to your next batch. Two tablespoons per quart boosts protein content and stabilizes the curd. It's the single best fix for thin yogurt that doesn't involve straining.
Extend your incubation time by two hours. More fermentation time forces more whey out of the proteins.
If you're still getting thin yogurt after those adjustments, switch to a different milk brand. Milk processing varies between dairies. Some brands respond better to home fermentation than others.
Frequently Asked Questions
Can I use almond milk or oat milk?
Yes, but with different results. Plant milks have lower protein content than dairy milk. Your yogurt will be thinner and may need a thickener like agar powder or cornstarch.
Choose unsweetened, unflavored varieties for best results.
How long does homemade yogurt keep?
Stored in a sealed container in the refrigerator, homemade yogurt stays fresh for about two weeks. The flavor becomes more tangy over time. Discard any batch with pink mold, orange spots, or a yeasty smell.
Can I reuse my own yogurt as a starter?
Yes, for a few generations. Each time you reuse a batch, the culture may weaken slightly. After three or four batches, the yogurt gets thinner and less consistent.
Replace the starter with a fresh store-bought container every month.
Why does my yogurt have a pinkish tint or weird smell?
Pink or orange discoloration means contamination. Mold or unwanted bacteria have taken hold. Do not taste it.
Throw the entire batch away, sanitize your Instant Pot with hot water and vinegar, and start fresh with a new starter.
The same goes for sharp chemical or alcoholic odors. Safe yogurt smells pleasantly sour, like tangy cream. Any off smell is a sign to discard.

Similar Posts