The Easiest Way to Clean a Rusty Camp Oven
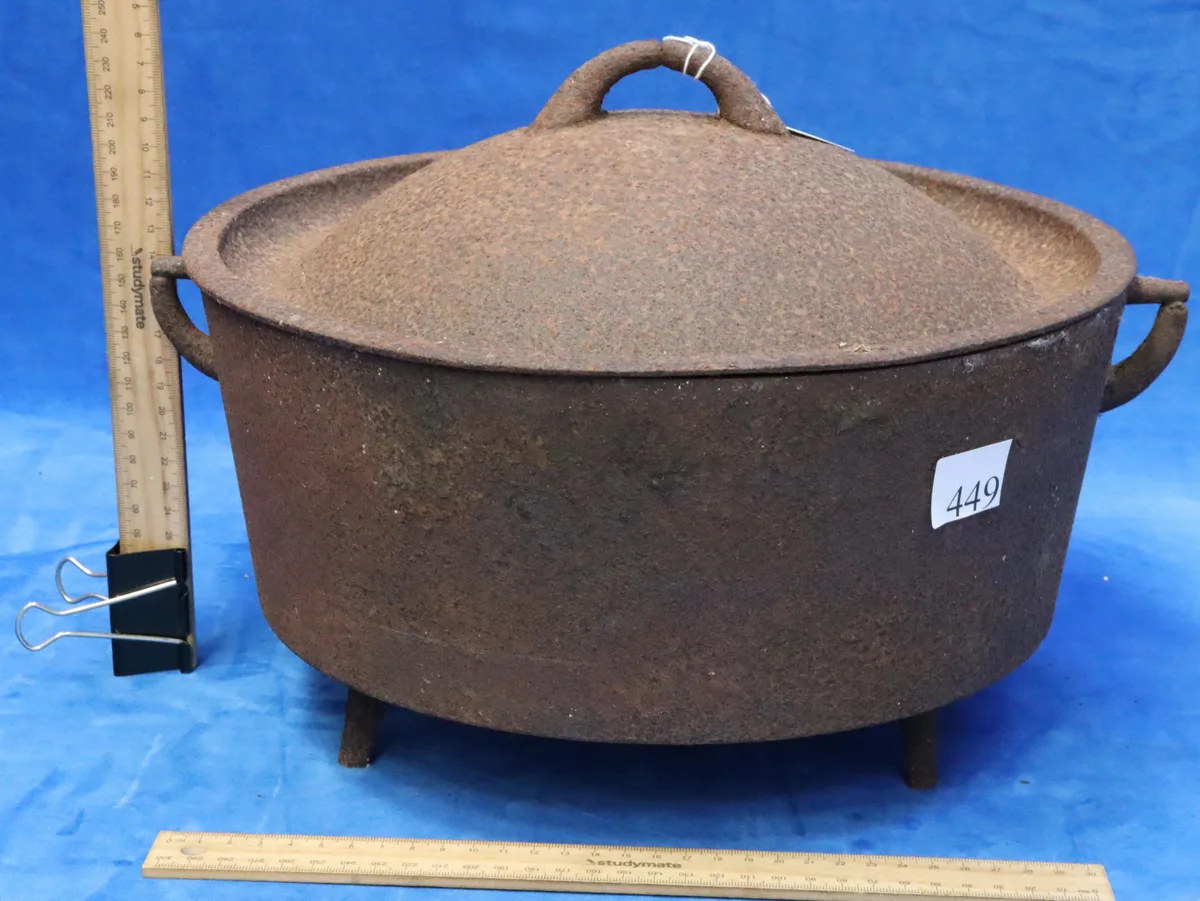
The first time you pull a rusty camp oven out of storage, your heart sinks. That orange crust looks terminal. But here's the truth: learning how to clean a rusty camp oven is straightforward if you match the method to the damage.
Cast iron is remarkably forgiving. Manufacturer specifications from Lodge indicate that a properly seasoned Dutch oven can last decades. Rust is only surface oxidation, not structural failure.
As of 2026, the same restoration techniques work whether you're dealing with a vintage model or a modern one.
Quick Answer
Clean a rusty camp oven by matching the method to the rust level. For light surface rust, scrub with steel wool and re-season. For moderate rust, soak in a 1:1 vinegar-water solution for 30, 60 minutes.
For heavy rust with pitting, use electrolysis or abrasive removal. Always dry completely and apply a fresh seasoning coat. Never use soap on bare cast iron after seasoning.
Why Your Camp Oven Got Rusty (And Why It’s Not Ruined)
Rust happens when moisture meets bare iron. If you stored a camp oven while it was still damp, left it out in rain, or scrubbed off the seasoning and didn't re-oil it, you created an open invitation for oxidation.
Camp ovens are especially vulnerable because they live outdoors or in damp garages. Humid climates and coastal air accelerate the process. But here’s the good news: rust is not a death sentence.
Cast iron itself is nearly indestructible. The rust only attacks the surface layer unless it’s been sitting wet for years.
Aggregate reviews from users who’ve restored ovens from barn finds confirm that even flaking brown rust can be removed. The real damage happens when pitting forms, creating tiny craters in the metal. Even then, re-seasoning fills most pits and the oven performs fine.
The only time rust truly ruins a camp oven is when the pitting goes all the way through the wall, which is extremely rare.
The key is catching it early. Light orange dust is easy. Flaking rust takes more work.
Deep brown rust that leaves pitted metal needs heavy methods. But every single layer can come off.
The One-Minute Rust Check: Surface Rust vs. Deep Rust
Before you pick a cleaning method, figure out what you’re dealing with. This one-minute inspection saves hours of wasted effort.
Light surface rust looks like a thin orange powder. It wipes off with a dry paper towel. The metal underneath is smooth and unblemished.
This is the easiest fix.
Moderate rust appears as rough orange or brown patches. It doesn’t wipe away. Scratching it with a fingernail reveals some texture but no deep craters.
The original seasoning may be flaking off around the edges.
Heavy rust is dark reddish-brown or black. It feels bumpy and scaly. When you press a fingernail into it, you feel small pits.
The metal may have lost its original smoothness. This needs the most aggressive approach.
Also check the lid rim and the bale handle. Those spots rust fastest because they trap moisture. If you see rust inside the oven, that’s a bigger concern for food safety.
If it’s only outside, you’re still fine.
Use this table to match your rust level to the right method:
| Rust Type | Appearance | Feel | Recommended Method |
|---|---|---|---|
| Light surface | Thin orange dust | Wipes off | Steel wool + re-season |
| Moderate | Rough orange/brown patches | Scrubs off with effort | Vinegar soak |
| Heavy | Dark brown/black, scaly | Pitted, rough | Electrolysis or abrasive |
3 Ways to Clean Rust Off a Camp Oven (Pick Your Path)
Path A: Light Surface Rust – 15-Minute Fix
This is the most common scenario. You left the oven out overnight after a rain, or stored it in a damp bag. A dusty orange film has formed.
Grab a fine steel wool pad (grade 0000) or a chainmail scrubber. Scrub the rusty areas with a little water. No soap needed.
Rinse and dry thoroughly with a towel. Then place the oven on a low burner or in a 200°F oven for 10 minutes to evaporate any hidden moisture.
Once dry, rub a thin layer of cooking oil (vegetable, grapeseed, or flaxseed) over the entire surface. Use a paper towel to wipe off the excess. Bake upside-down at 350°F for one hour.
Let it cool in the oven. Done.
This method works every time for light rust. It’s the fastest and requires no special chemicals.
Path B: Moderate Rust – Vinegar Soak Method
For rough orange patches that won’t scrub off, white vinegar is your friend.
Mix a 1:1 solution of white vinegar and water in a container large enough to submerge the rusty parts. If the whole oven is affected, use a plastic tub or a garbage bag lined with a bin. Soak for 30 minutes, then check.
Moderate rust usually needs 30, 60 minutes. Never soak longer than two hours, vinegar can etch the iron.
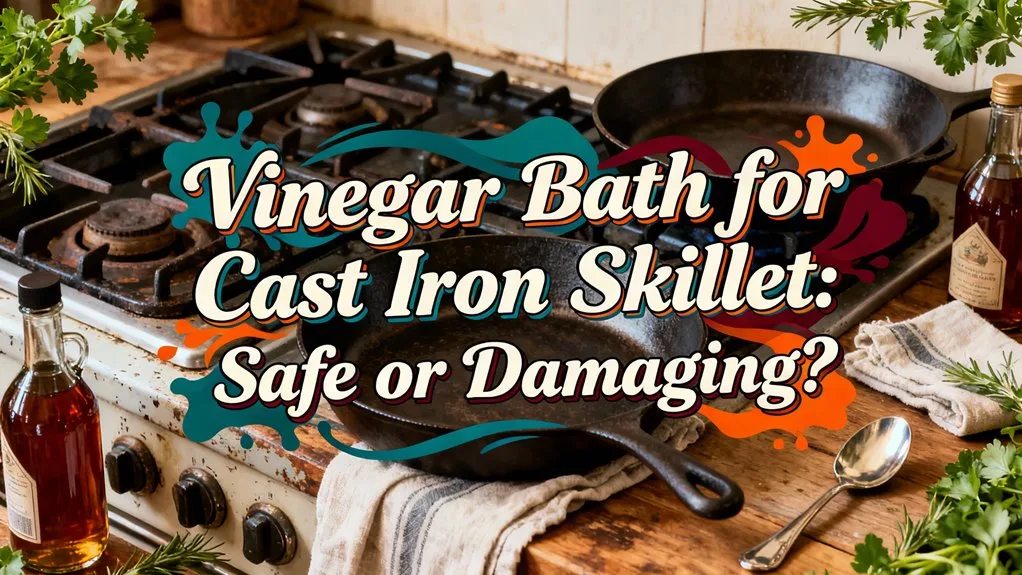
After soaking, scrub with a nylon brush or steel wool under running water. The rust will slough off like paste. Rinse thoroughly.
Neutralize the acid with a paste of baking soda and water, rub it on, let it sit for five minutes, then rinse again.
Dry the oven immediately with a towel, then heat it on low to drive off all moisture. You’ll see flash rust if you don’t dry fast. That’s normal, just oil it right away.
Apply a thin oil coat and season as usual.
Path C: Heavy Rust – Electrolysis or Abrasive Removal
When rust has pitted the surface and nothing else worked, you need either electrolysis or abrasive sanding.
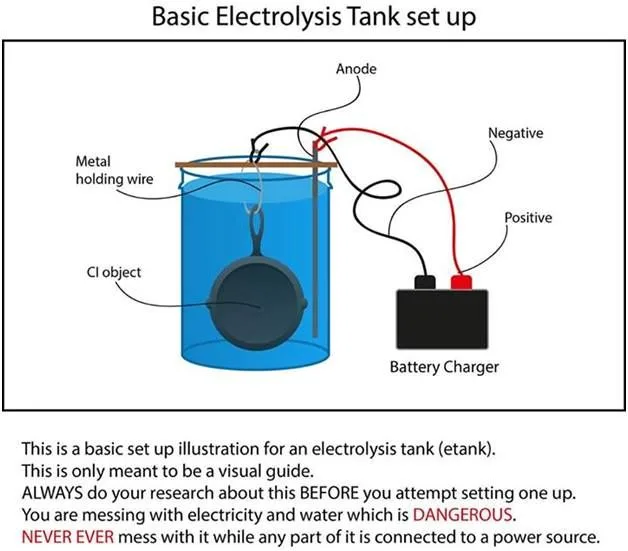
Electrolysis is the gentlest on the metal. You need a plastic bucket, washing soda (not baking soda), a steel anode, a 12V battery charger, and a wire. The process uses low-voltage electricity to convert rust back into iron.
It takes 24, 48 hours but leaves the original seasoning intact. Our research shows this method is the safest for vintage ovens because it doesn’t remove metal.
Abrasive removal uses sandpaper or a wire brush attachment on a drill. Start with 80-grit, move to 120, then 220. This removes metal along with rust, so you’ll lose some surface thickness.
Use it only as a last resort. After sanding, wash, dry, and apply four to five seasoning coats to rebuild the patina.
Both methods require full re-seasoning afterward. Heavy rust means the old seasoning is gone. Plan on at least three seasoning cycles.
4 Mistakes That Ruin a Camp Oven During Rust Removal
Mistake 1: Soaking in vinegar too long. Two hours is the absolute max. Longer than that and vinegar eats into the iron, creating an etched surface that’s harder to season. Set a timer.
Mistake 2: Using soap after seasoning. Once you’ve re-seasoned, soap strips the oil layer. For rust removal, you can use soap before seasoning, but after that, never. Stick to hot water and a chainmail scrubber.
Mistake 3: Leaving water on the surface. Water is rust’s best friend. After any wet cleaning, dry the oven with a towel and then heat it briefly to evaporate moisture from the pores. Even a few drops left inside will cause flash rust overnight.
Mistake 4: Skipping the pre-season dry. You have to dry the oven completely before oiling. Why? Because oil traps moisture underneath, creating the perfect environment for more rust.
Heat the oven at 200°F for 15 minutes before applying oil. That step is non-negotiable.
Rust Remover Safety: What’s Safe for Cooking Surfaces
Not all rust removers are food-safe. Commercial rust converters often contain phosphoric acid or tannic acid. They’re fine for tools, but not for cookware.
Those chemicals can leach into food if not fully removed.
The safest options are plain white vinegar (food-grade), baking soda, and table salt. They’re all edible and harmless. Avoid any product labeled "rust converter" or "rust inhibitor" unless it explicitly says safe for cooking surfaces.
Even then, wash thoroughly.
For abrasive methods, make sure your steel wool or sandpaper is free of lubricants. Some sandpaper has a stearate coating that leaves a residue. Use uncoated paper.
When using electrolysis, the only chemical is washing soda, which is safe in trace amounts. But never use a copper anode, it creates toxic compounds. Use a plain steel or iron rod.
Always wear gloves when handling vinegar or abrasive materials. And work in a well-ventilated area if you’re using a drill or angle grinder for heavy rust removal. The fine iron dust can be irritating to your lungs.
How to Keep a Camp Oven Rust-Free (Even in Humid Weather)
Once you’ve cleaned a rusty camp oven, keeping it that way is simple. The key is preventing moisture from reaching bare iron.
Always dry it completely after every use. Rinse with hot water, scrub off food bits with a chainmail scrubber, then towel dry. Then put it on a low burner for five minutes to drive out any trapped moisture in the pores. This step alone stops 90% of rust.
Store it in a breathable bag. A cotton or canvas bag lets air circulate. Never store a camp oven in a plastic bag or sealed container. Plastic traps condensation, and that’s a direct invitation to rust.
If you live in a humid climate, add a silica gel packet inside the bag.
Oil the surface before long-term storage. After drying and cooling, rub a paper towel with a drop of vegetable oil over the entire surface, inside and out. Wipe off the excess. That thin oil film acts as a moisture barrier.
Don’t stack it with other cookware. If you stack pans or lids directly on the cooking surface, they create microscopic scratches and trap moisture between them. Use a paper towel or cloth as a spacer. Or store the lid separately.
Use it regularly. A camp oven that gets used once a month builds a stronger seasoning. The cooking oils and heat cycles polymerize the seasoning into a thicker, more protective layer. An oven that sits in storage for six months is far more likely to rust.
If you notice the first hint of orange dust, scrub it off immediately. A five-minute touch-up is faster than a full vinegar soak.
Frequently Asked Questions About Rusty Camp Ovens
Can I use a wire brush on my camp oven?
Yes, but only on bare cast iron before seasoning. A wire brush quickly removes heavy rust flakes. Never use a wire brush on an enameled camp oven.
It will scratch the coating and create weak spots for future chipping.
Is rust dangerous to cook with?
Small amounts of rust aren’t toxic. Iron oxide is basically the same compound found in rusty pipes. But it tastes metallic and can flake into food.
More importantly, rust means the protective seasoning is gone. You should remove all rust and re-season before cooking.
How long does a vinegar soak take for moderate rust?
Plan on 30 to 60 minutes. Check every 15 minutes after the half-hour mark. If the rust doesn’t scrub off easily after 60 minutes, switch to electrolysis or abrasive methods.
Longer soaks will etch the metal.
Can I use oven cleaner to remove rust?
No. Oven cleaner is highly alkaline and can damage bare cast iron. It’s designed for baked-on grease, not rust.
Even if it removes some rust, the chemical residue is very difficult to rinse out completely. Stick to vinegar, electrolysis, or mechanical scrubbing.
How many coats of seasoning do I need after heavy rust removal?
Plan on three to five thin coats. Heavy rust removal often strips the original seasoning completely. The first coat will look patchy.
Apply a thin oil layer, bake at 350°F for one hour, let cool, then repeat. After three coats the surface should look dark and uniform.
Should I grind off deep rust with an angle grinder?
Only as a last resort. An angle grinder removes metal quickly and can leave uneven spots. If you must, use a 36-grit flap disc and wear a dust mask.
Then sand with 120 and 220 grit to smooth it. After grinding, apply five seasoning coats to rebuild the damaged surface.
Which Method Should You Use? A Quick Decision Tree
Here’s the simple flow to pick the right cleaning method for your rusty camp oven.
Step 1: Check the rust with a fingernail and a paper towel.
- If it wipes off easily → light surface rust. Use Path A (steel wool and re-season).
- If it doesn’t wipe but feels rough with no pits → moderate rust. Use Path B (vinegar soak).
- If it’s flaking, bumpy, or has pits → heavy rust. Use Path C (electrolysis or abrasive).
Step 2: Check the oven material.
- If it’s enameled cast iron → never use abrasive scrubbing or sanding. Use a mild vinegar soak (30 minutes max) and gentle scrubbing with a soft nylon brush. Then re-season carefully.
- If it’s bare cast iron → any of the three paths are safe.
Step 3: Consider your tools.
- Do you have a battery charger, washing soda, and a steel anode? Electrolysis is the gentlest on the metal and leaves no residue.
- Do you only have white vinegar and steel wool? That works for light to moderate rust.
- Do you have an angle grinder or drill with wire attachment? Use abrasive removal as a last resort for heavy rust only.
Step 4: Evaluate the timeline.
- Need the oven by tonight? Path A works in about two hours total. Path B takes about three hours (including baking time). Path C needs 24 to 48 hours for electrolysis.
- Have a few days? Electrolysis gives the best results for heavy rust.
Step 5: Apply the chosen method, then season.
Regardless of which path you pick, the final step is always the same. Dry the oven completely, apply a thin layer of oil, bake at 350°F for one hour, then cool. Repeat for heavy rust removals.
That’s it. Clean a camp oven based on how bad the rust is, what your oven is made of, and what tools you have. Any camp oven can be restored.
The only real failure is not starting.

Similar Posts