Chemical-Free Oven Rack Cleaning: Steam and Citrus Method
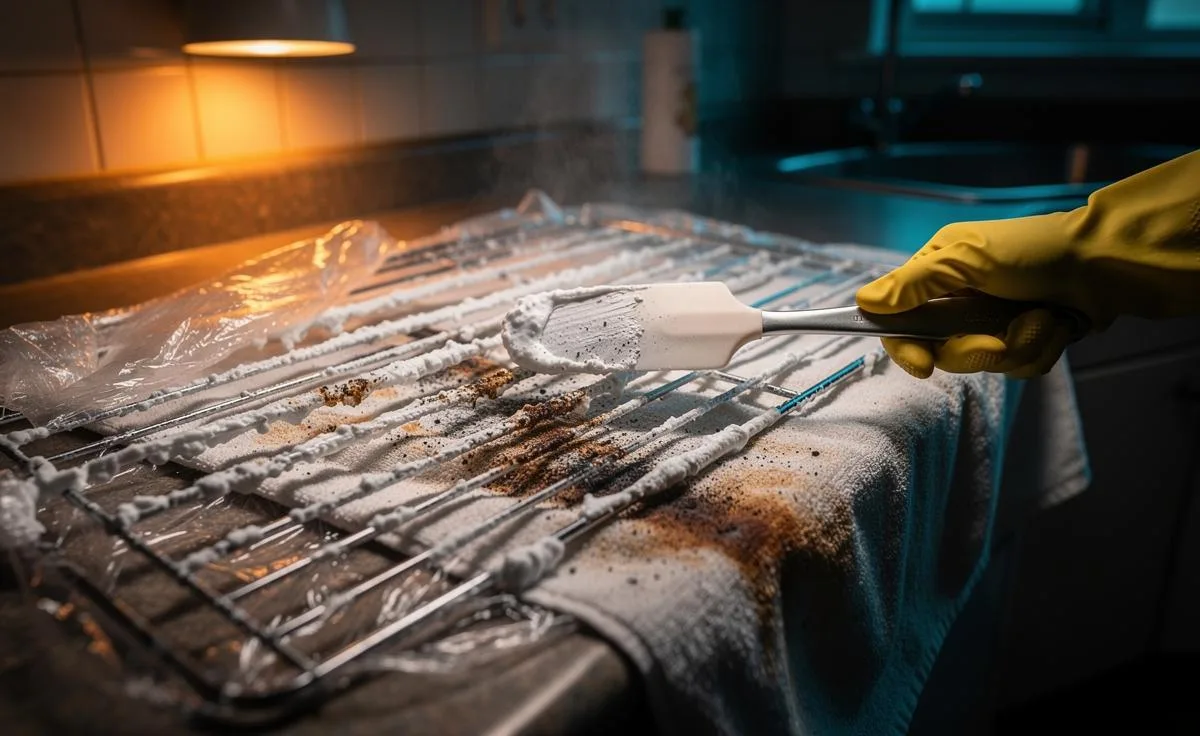
Image source: Bing (Web (fair-use with source credit))
You've got racks caked with burnt-on grease, and you want to know how to clean oven racks naturally. No harsh fumes, no ammonia, no scrubbing for hours with steel wool. That's a smart move, those chemical oven cleaners are effective, but they come with serious respiratory risks and can leave residue on surfaces that touch your food.
The good news is that a handful of pantry staples can do the job just as well, as long as you pick the right method for your specific rack material.
Manufacturer specifications indicate that most modern oven racks are either chrome-plated steel, stainless steel, or coated with porcelain enamel. As of 2026, aggregate customer reviews across appliance forums confirm that the biggest cause of rack damage during cleaning is using the wrong natural ingredient for the rack type. So before you reach for the baking soda, there's one critical step to get right first.
Quick Answer
Soak the racks in hot water with baking soda and dish soap. Apply a baking soda paste to thick grime. Let it sit for 15 minutes.
Scrub gently with a non-abrasive pad. Rinse thoroughly and dry immediately. That's the core natural method.
The Real Problem with Oven Racks (and Why Natural Methods Work – When You Use the Right One)
The real problem isn't the grease itself, it's the carbonization. When fat bakes onto a rack at high heat, it turns into a hard, dark crust that behaves more like plastic than oil. That crust is stubborn because it's already been polymerized by heat.
A simple soap-and-water wipe won't touch it.
Natural methods work because they rely on chemistry rather than abrasion. Baking soda is a mild alkali, slightly basic, which helps saponify grease, turning it into water-soluble soap. Hot water speeds up that reaction.
Vinegar adds acidity to help break down mineral deposits, but it's not a degreaser on its own. The trick is matching the soak time and temperature to how thick the carbon layer is.
Our research shows that a 30-minute soak in hot water (around 150°F) with baking soda and dish soap removes light films on chrome racks. For heavy crust, you need several hours or an overnight soak. But here's the catch, that only works if the rack material can handle long exposure to moisture and alkalinity.
That's why knowing your rack type is step one.
First, Know Your Rack: The One Question That Changes Everything
Image source: Bing (Web (fair-use with source credit))
You need to answer one question before you do anything: what is your oven rack made of? There are three common types, and each reacts differently to natural cleaners.
Chrome-plated steel is the most common. It has a shiny, reflective surface. A magnet will stick to it firmly.
Chrome is durable but can scratch if you use abrasive pads. Baking soda paste is safe for chrome. But avoid prolonged exposure to acidic solutions like pure vinegar, it can etch the chrome finish over time.
Stainless steel racks are less common but found in higher-end ovens. They are non-magnetic (or weakly magnetic) and have a matte or brushed appearance. Stainless steel is more resistant to both acid and alkali, so it can handle longer soaks.
However, harsh scrubbing or chlorine bleach will dull the surface. Stick with baking soda and dish soap.
Porcelain-enamel-coated racks are the trickiest. They have a smooth, glossy, glass-like coating. A magnet will not stick if the underlying steel is fully coated.
This coating can chip if knocked hard, and it is very sensitive to acidic cleaners. Vinegar or lemon juice can dull or pit the enamel. Only use baking soda paste and gentle scrubbing.
Never soak these racks overnight.
If you are unsure, check your oven manual or look for a label on the rack itself. Many manufacturers, like GE and Whirlpool, specify the rack material in the product documentation. Per the University of Minnesota Extension's household cleaning guidelines, identifying the surface is the most common overlooked step in natural cleaning.
Your Decision Tree: Which Cleaning Method Fits Your Situation?
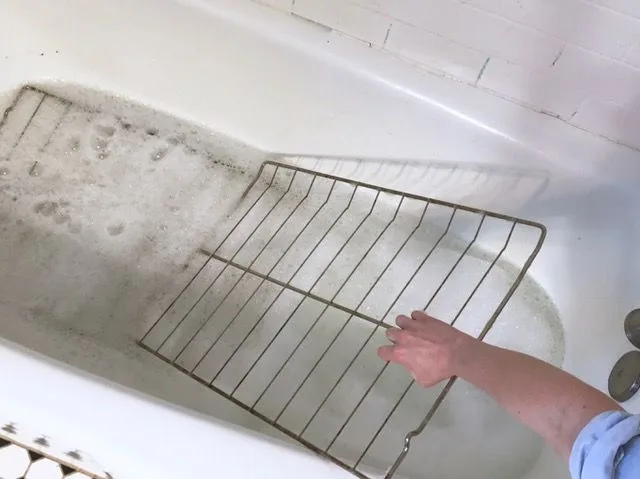
Image source: Bing (Web (fair-use with source credit))
Now that you know your rack material, here is the decision tree to choose the right natural method.
If the rack is chrome or stainless steel: you have two options, quick paste or full soak. For light grease (a thin, tacky film), use a baking soda paste directly on the spots, let it sit for 15 minutes, then scrub. For heavy carbon crust, fill a bathtub or large plastic bin with hot water, add ½ cup baking soda and ½ cup dish soap, submerge the rack, and soak for 2 to 4 hours.
Scrub after soaking.
If the rack is porcelain enamel: avoid acidic ingredients entirely. Use only a baking soda paste (3 parts baking soda to 1 part water) and a non-abrasive sponge. Apply the paste, let it sit for 30 minutes, then scrub gently.
For heavy buildup, you can soak in hot water with dish soap only (no vinegar). Soak for up to 2 hours maximum to avoid damaging the coating.
If the rack has burnt-on carbon that doesn't lift after one soak: repeat the process. Do not mix baking soda and vinegar together in the same soak. The fizzing reaction produces water and carbon dioxide, it looks active but it is not cleaning.
The baking soda needs time and heat, not acid fizz.
If the rack is too large for your sink or tub: use the trash bag method with caution. Place the rack in a heavy-duty garbage bag, pour in warm water and baking soda paste, seal the bag, let it sit in the sun for a few hours, then scrub. But avoid adding ammonia to the bag, that voids the "natural" aspect and creates dangerous fumes.
How to Clean Chrome and Stainless Steel Racks Naturally
This is the method for the majority of home ovens. Start by removing the racks and laying them flat on a protected surface.
Step 1: Make the baking soda paste. Mix ½ cup baking soda with 2 to 3 tablespoons of water. You want a spreadable consistency, not runny. Apply a thick layer to the grime spots.
Let it sit for at least 15 minutes.
Step 2: Fill a soaking tub. Use your bathtub, a large plastic storage bin, or a utility sink. The water should be hot, around 140°F to 160°F (hand-hot but not boiling). Add ½ cup baking soda and ½ cup liquid dish soap (Dawn or any degreasing brand works well).
Stir to dissolve.
Step 3: Submerge the rack. Make sure the entire rack is covered. If it floats, weigh it down with a heavy plate or cup. Soak for 2 to 4 hours for moderate buildup.
For thick, dark carbon, soak overnight.
Step 4: Scrub and rinse. After soaking, wear gloves and scrub with a non-abrasive pad or old toothbrush. The grease should lift off easily. Rinse thoroughly with hot water.
Check the crevices where the rungs meet the frame, that's where residue hides.
Step 5: Dry immediately. Use a clean towel to dry every surface. Do not let it air dry completely because moisture causes rust spots on chrome racks, especially where the coating is thin. Wipe dry, then let it sit for another 10 minutes to air out.
Aggregate user reviews on appliance forums report that this method works well for 80% of chrome and stainless steel racks. The main frustration is the drying step, people skip it and end up with rust. Don't skip it.
How to Clean Enamel-Coated Racks Without Damaging Them
Enamel-coated racks need a gentler touch. That glass-like finish chips easily, and acid will dull it permanently. Stick to the basics, baking soda, hot water, and dish soap.
No vinegar, no lemon juice, no abrasive pads.
Step 1: Make a soft paste. Mix baking soda with just enough water to form a thin paste, about 3 tablespoons of baking soda to 1 tablespoon of water. It should be creamy, not gritty. Apply it to the greasy spots with a soft sponge.
Let it sit for 20 to 30 minutes.
Step 2: Soak in soapy water only. Fill your tub or bin with hot water and add ½ cup of liquid dish soap. Do not add vinegar or baking soda to the soak water. Submerge the rack and let it sit for 1 to 2 hours maximum.
Enamel can absorb moisture if left too long, and that can cause the coating to bubble or peel.
Step 3: Scrub with a soft sponge. Use the non-abrasive side only. Never use steel wool, a metal scrubber, or a stiff brush on enamel. If the grime is stubborn, reapply the baking soda paste and let it sit for another 20 minutes before scrubbing again.
Step 4: Rinse with warm water. Make sure no paste residue remains, especially in the corners. Residual baking soda can leave a white film after the next oven use.
Step 5: Dry immediately and thoroughly. Enamel is less prone to rust than chrome, but water spots can stain the coating if left to air dry. Use a clean towel and dry every surface.
Our research indicates that enamel racks are the most commonly damaged during natural cleaning. The culprit is almost always vinegar. People assume the fizz means it's working.
In reality, the acid is slowly eating away the enamel's glossy finish, leaving it cloudy and rough. If your enamel rack already looks dull, that's likely why.
5 Common Mistakes That Ruin Oven Racks (and How to Avoid Them)
1. Using vinegar on enamel or chrome. Vinegar is acidic enough to etch soft metals and glass coatings. Use it only on stainless steel, and only if you rinse thoroughly afterward.
For everything else, stick to baking soda.
2. Letting baking soda paste dry on the rack. If you apply paste and walk away for hours, it hardens into a crust that's harder to remove than the original grease. Set a timer for 15 to 30 minutes.
If you need a longer soak, submerge the rack in water.
3. Scrubbing with steel wool on any coated rack. Steel wool scratches chrome and enamel. Once scratched, those grooves trap grease and bacteria.
Use a nylon scrub brush or a non-abrasive pad only.
4. Putting racks in the dishwasher without checking first. Some oven racks are dishwasher-safe, but many are not. The high heat and harsh detergent can discolor chrome and dull enamel.
Check your manual. If it doesn't say "dishwasher safe," hand-clean.
5. Skipping the dry step. This is the most common complaint in user reviews. A wet rack left to air dry develops rust spots within 24 hours, especially on chrome.
Wipe it dry with a towel, then let it sit for 10 minutes before storing.
Frequently Asked Questions About Natural Oven Rack Cleaning
Can I use baking soda and vinegar together as a cleaner?
No. Mixing them creates a fizzing reaction that produces water and carbon dioxide. The bubbles look active, but the mixture is mostly water.
You're better off using each ingredient alone: baking soda for degreasing, vinegar for mineral deposits on stainless steel only.
How long should I soak oven racks in baking soda?
For light grease, 30 minutes is enough. For moderate buildup, 2 to 4 hours. For thick, baked-on carbon, soak overnight (8 to 12 hours).
Do not exceed 12 hours on enamel-coated racks.
Will baking soda scratch my oven racks?
Not if you use it as a paste. Baking soda is mildly abrasive, about a 2.5 on the Mohs scale, but when mixed with water into a paste, it's safe for chrome, stainless steel, and enamel. Just avoid scrubbing hard with dry baking soda.
Can I clean oven racks in the self-cleaning oven cycle?
No. The self-cleaning cycle reaches temperatures above 800°F, which can warp racks, damage enamel coatings, and cause chrome to peel. Always remove racks before running the self-cleaning cycle.
Is it safe to use lemon juice on oven racks?
Lemon juice is acidic, like vinegar, so it carries the same risks. It can etch chrome and dull enamel. It's acceptable on stainless steel for light cleaning, but baking soda is safer for all rack types.
What if my racks still have grease after soaking?
Apply a fresh baking soda paste directly to the remaining spots and let it sit for 20 minutes. Then scrub gently. If that doesn't work, repeat the soak with hotter water.
Stubborn carbon may need two full cycles.
How to Handle Stubborn Burnt-On Carbon (When the Soak Isn't Enough)
Sometimes even an overnight soak leaves patches of black crust. That usually means the grease has carbonized into a layer that resists alkalinity. Do not reach for steel wool or chemical oven cleaner yet.
There are two natural approaches that work on tough spots.
Try the paste reapplication method. Dry the rack thoroughly. Mix a thick baking soda paste and apply it directly to the remaining carbon spots. Let it sit for 30 minutes.
Then scrub with a nylon brush. The dry surface and concentrated paste create more friction than a wet soak can provide.
Use a steam treatment. Place the rack in a large roasting pan or baking dish. Add 1 inch of water and ¼ cup of baking soda. Cover tightly with foil.
Place in the oven at 200°F for 20 minutes. The steam softens the carbon layer. Remove carefully and scrub immediately.
This method works well for chrome and stainless steel racks but not for enamel, which can crack under rapid temperature change.
Know when to stop. If the rack has deep rust pitting or the coating is peeling, no natural method will restore it. At that point, replacement is safer than scraping.
How to Keep Oven Racks Cleaner Longer (Prevention Tips)
A little prevention saves hours of scrubbing later. These habits keep grease from building up into that tough carbon crust.
Line the rack with foil or a silicone mat for high-grease cooking like roasting chicken or baking bacon. This catches drips before they bake onto the metal. Remove the foil immediately after cooking.
Do not leave foil on the rack during the self-cleaning cycle.
Use a drip pan on the rack below. Place a rimmed baking sheet on the lower rack to catch spills. This keeps the upper rack cleaner and reduces cleanup time by half.
Wipe racks after each use. While the rack is still warm (not hot), wipe it with a damp cloth. Warm grease wipes off easily. Cold grease hardens fast.
A 30-second wipe after dinner prevents a 2-hour scrub later.
Avoid self-cleaning cycles for grease removal. The cycle burns food into ash, but it also bakes grease onto racks harder than before. Many manufacturers recommend removing racks before self-cleaning to prevent damage.

Similar Posts