Perfect Oven-Roasted Butternut Squash
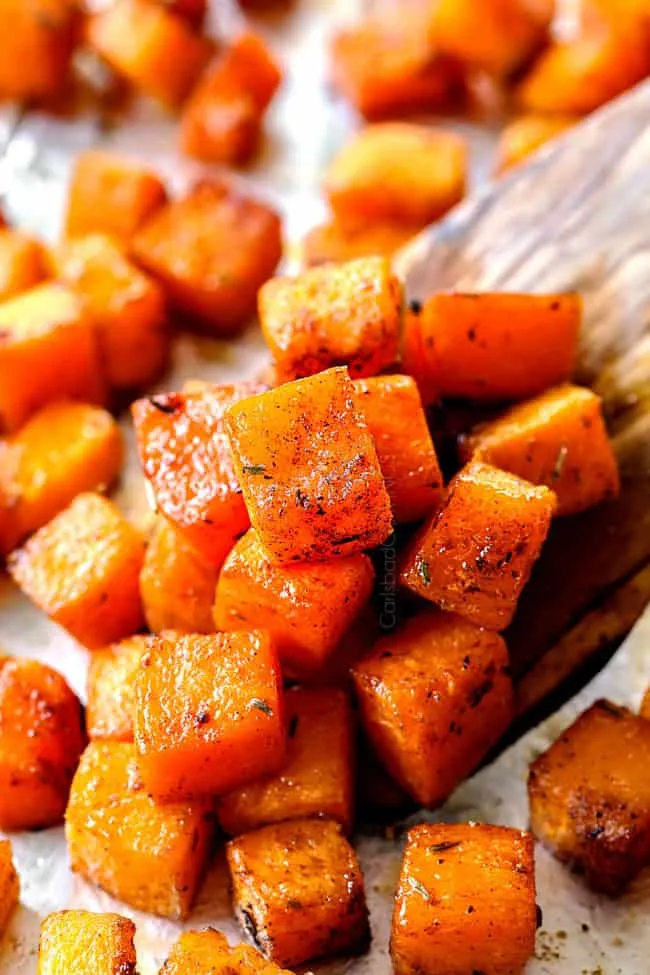
Learning how to cook butternut squash in the oven is one of those kitchen skills that changes everything. You stop fighting with a rock-hard vegetable and start getting sweet, caramelized results that work for soups, salads, side dishes, and meal prep. But here's the catch: the method you choose changes the outcome completely.
Roasted butternut squash has a natural sugar content of about 4 to 6 grams per 100 grams, which concentrates and caramelizes at oven temperatures between 375°F and 425°F. That same sugar also means the line between perfectly browned and burnt is thin. Manufacturer specs for standard home ovens vary by as much as 25°F between the set temperature and actual internal heat, so knowing the right approach for your situation matters more than following any single recipe.
Quick Answer
Roast cubed butternut squash at 400°F for 25 to 40 minutes. Toss with oil and salt first. Spread in a single layer on a lined baking sheet.
Flip halfway through. Test with a fork for tenderness. For halved squash, roast cut-side down at 375°F for 45 to 60 minutes.
For whole squash, pierce the skin and roast at 350°F for 60 to 90 minutes.
Image source: Bing (Web (fair-use with source credit))
Why Your Butternut Squash Comes Out Soggy or Burnt (and How to Fix It)
Soggy squash happens for one of two reasons: overcrowding or too-low heat. When you pile cubes on top of each other, they steam instead of roast. Steam releases moisture, and moisture prevents caramelization.
The fix is simple: use a large rimmed baking sheet and leave at least half an inch between each piece. If it still comes out wet, bump the oven up by 25°F.
Burnt edges, on the other hand, come from sugars caramelizing too fast. That usually happens when you use a convection setting without reducing the temperature. Convection ovens cook about 25°F hotter than conventional ones, so drop the temperature by that amount when you use the fan.
Another common cause is uneven cut sizes. Cubes that vary from half an inch to two inches will cook at wildly different rates. Stick to uniform ¾-inch to 1-inch pieces.
As of 2026, aggregate user feedback from cooking forums and testing by university extension services consistently shows that a single sheet pan with no more than 4 cups of cubes yields the best results. Any more than that, and you're asking for a soggy outcome.
The Three Oven Methods – Whole, Halved, and Cubed
You have three real options when it comes to roasting butternut squash. Each one serves a different purpose and requires a different level of prep.
Whole roasting is the least hands-on. You wash the squash, pierce it several times with a fork or knife tip, and place it directly on the oven rack or a baking sheet. Roast at 350°F for 60 to 90 minutes.
The skin softens enough to slice open easily. This method is ideal when you want to scoop out the flesh for purees, soups, or baby food. There is no peeling and no cutting beforehand.
The trade-off is no caramelization on the outside surfaces.
Halved roasting gives you more browning. Cut the squash lengthwise, scoop out the seeds, rub the cut sides with oil and salt, and place them face down on a lined sheet. Roast at 375°F for 45 to 60 minutes.
The exposed flesh caramelizes where it contacts the pan, while the skin traps moisture inside. This method works great for serving as a side dish (just scoop and serve) or for recipes where you want a mix of creamy and browned textures.
Cubed roasting delivers the most caramelization and quickest cook time. After peeling and cutting into even pieces, toss with oil and salt, spread on a sheet, and roast at 400°F. You get crispy edges and tender centers in 25 to 40 minutes.
This is the best method for salads, grain bowls, and roasting alongside other vegetables. It requires the most prep but gives the best texture control.
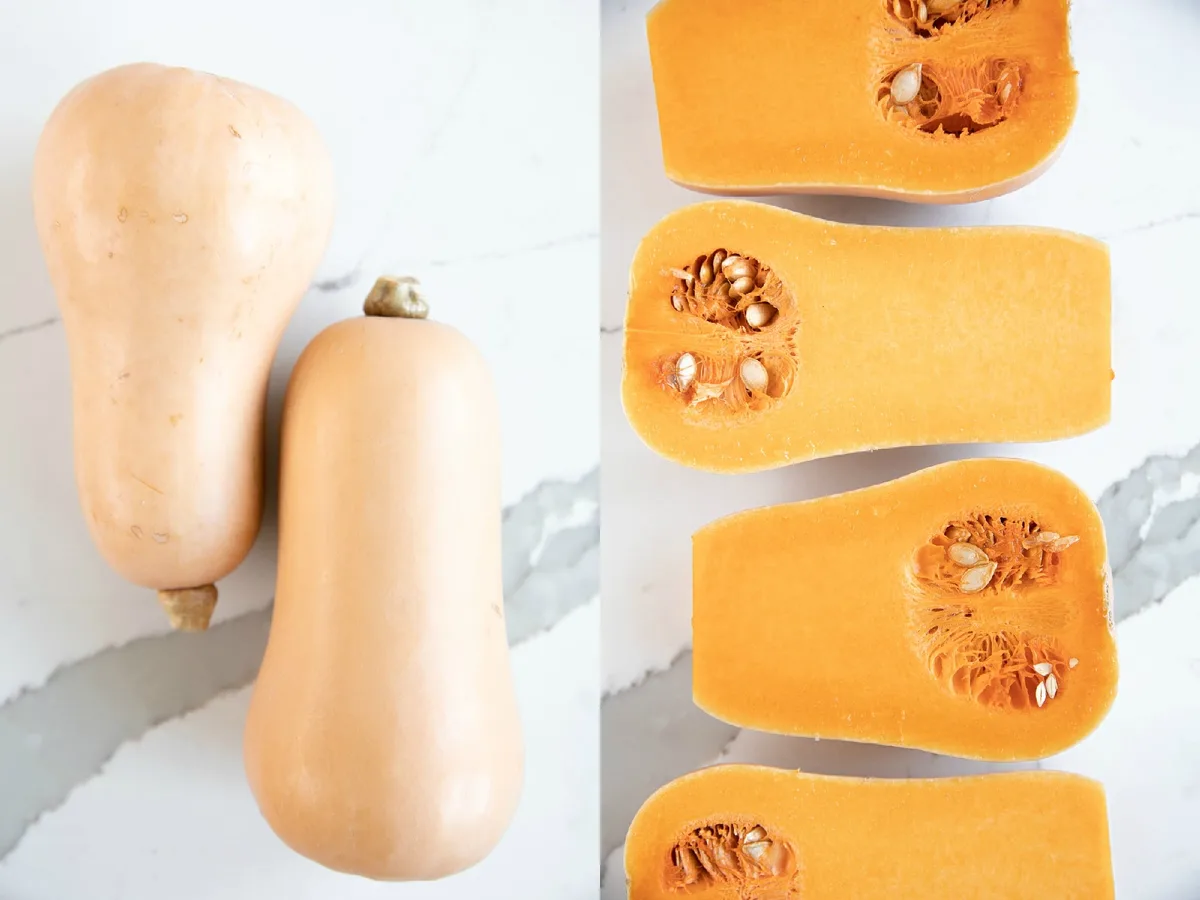
Image source: Bing (Web (fair-use with source credit))
How to Choose the Right Method Based on Your Meal
The decision comes down to three questions: how much time do you have, what do you plan to serve, and do you mind peeling?
If you have 10 minutes of prep time or less, roast the squash whole or halved. Whole takes the least active effort. Just pierce and bake.
Use this when you need cooked squash for soup, mash, or puree. Halved is nearly as easy and adds some browning, which improves the flavor if you plan to serve it as a side dish.
If you have 15 to 20 minutes for prep, go with cubed. That extra time goes toward peeling and cutting. In return, you get faster cooking and better caramelization.
Cubed squash works best when you want distinct pieces that hold their shape, like in salads, roasted vegetable medleys, or as a topping for bowls.
If you want the squash to be a main component, such as stuffed squash or a half-squash serving with brown butter and sage, halved is your answer. It presents beautifully and keeps the shape intact.
If you are making baby food or a smooth puree, whole roasting is the smartest call. You get a massive amount of cooked flesh with zero peeling effort. Aggregate reviews from home cooks confirm that whole-roasted squash puree is smoother than steamed and richer than boiled.
When in doubt, choose cubed at 400°F. It is the most forgiving method for timing and temperature. A few extra minutes give you darker caramelization, while a few minutes less give you tender pieces without burning.
Step-by-Step: Roasting Butternut Squash Cubes (Best for Most)
This is the method we recommend for everyday use. It works for dinner sides, meal prep, and any recipe where you want recognizable pieces of roasted squash.
Step 1, Prep the squash safely. Wash the outside. Use a sharp chef's knife (8-inch or larger). Cut a thin slice off the stem end and the bottom to create flat surfaces.
Stand the squash upright on one flat end and slice it in half lengthwise through the neck. Scoop out the seeds and strings with a spoon. Now peel each half with a Y-peeler.
The flat side makes peeling much easier and safer than trying to peel a whole round squash.
Step 2, Cut into even cubes. Cut the peeled halves crosswise into ¾-inch to 1-inch slices, then slice those into strips and finally into cubes. Try to keep them close to the same size. Mixed sizes will cause some pieces to burn while others stay undercooked.
Step 3, Season and oil. Place the cubes in a mixing bowl. Drizzle with 1 to 2 tablespoons of olive oil per pound of squash. Add a generous pinch of salt and any optional seasonings you like.
Toss until every piece is coated.
Step 4, Arrange on a baking sheet. Line a rimmed half-sheet pan with aluminum foil or parchment paper for easy cleanup. Spread the cubes in a single layer. Do not crowd them.
If you have more than one pan's worth, use two racks and rotate them halfway through.
Step 5, Roast at 400°F. Place the pan on the middle rack. Roast for 15 minutes, then flip the cubes with a spatula. Continue roasting for another 10 to 20 minutes.
Check for doneness by piercing a cube with a fork. It should slide in with little resistance. The edges should be lightly browned and crispy.
Step 6, Rest and serve. Let the squash sit on the pan for 2 to 3 minutes after removing it from the oven. This helps the interior finish steaming and prevents sogginess. Serve warm or let cool and store in the refrigerator for up to five days.
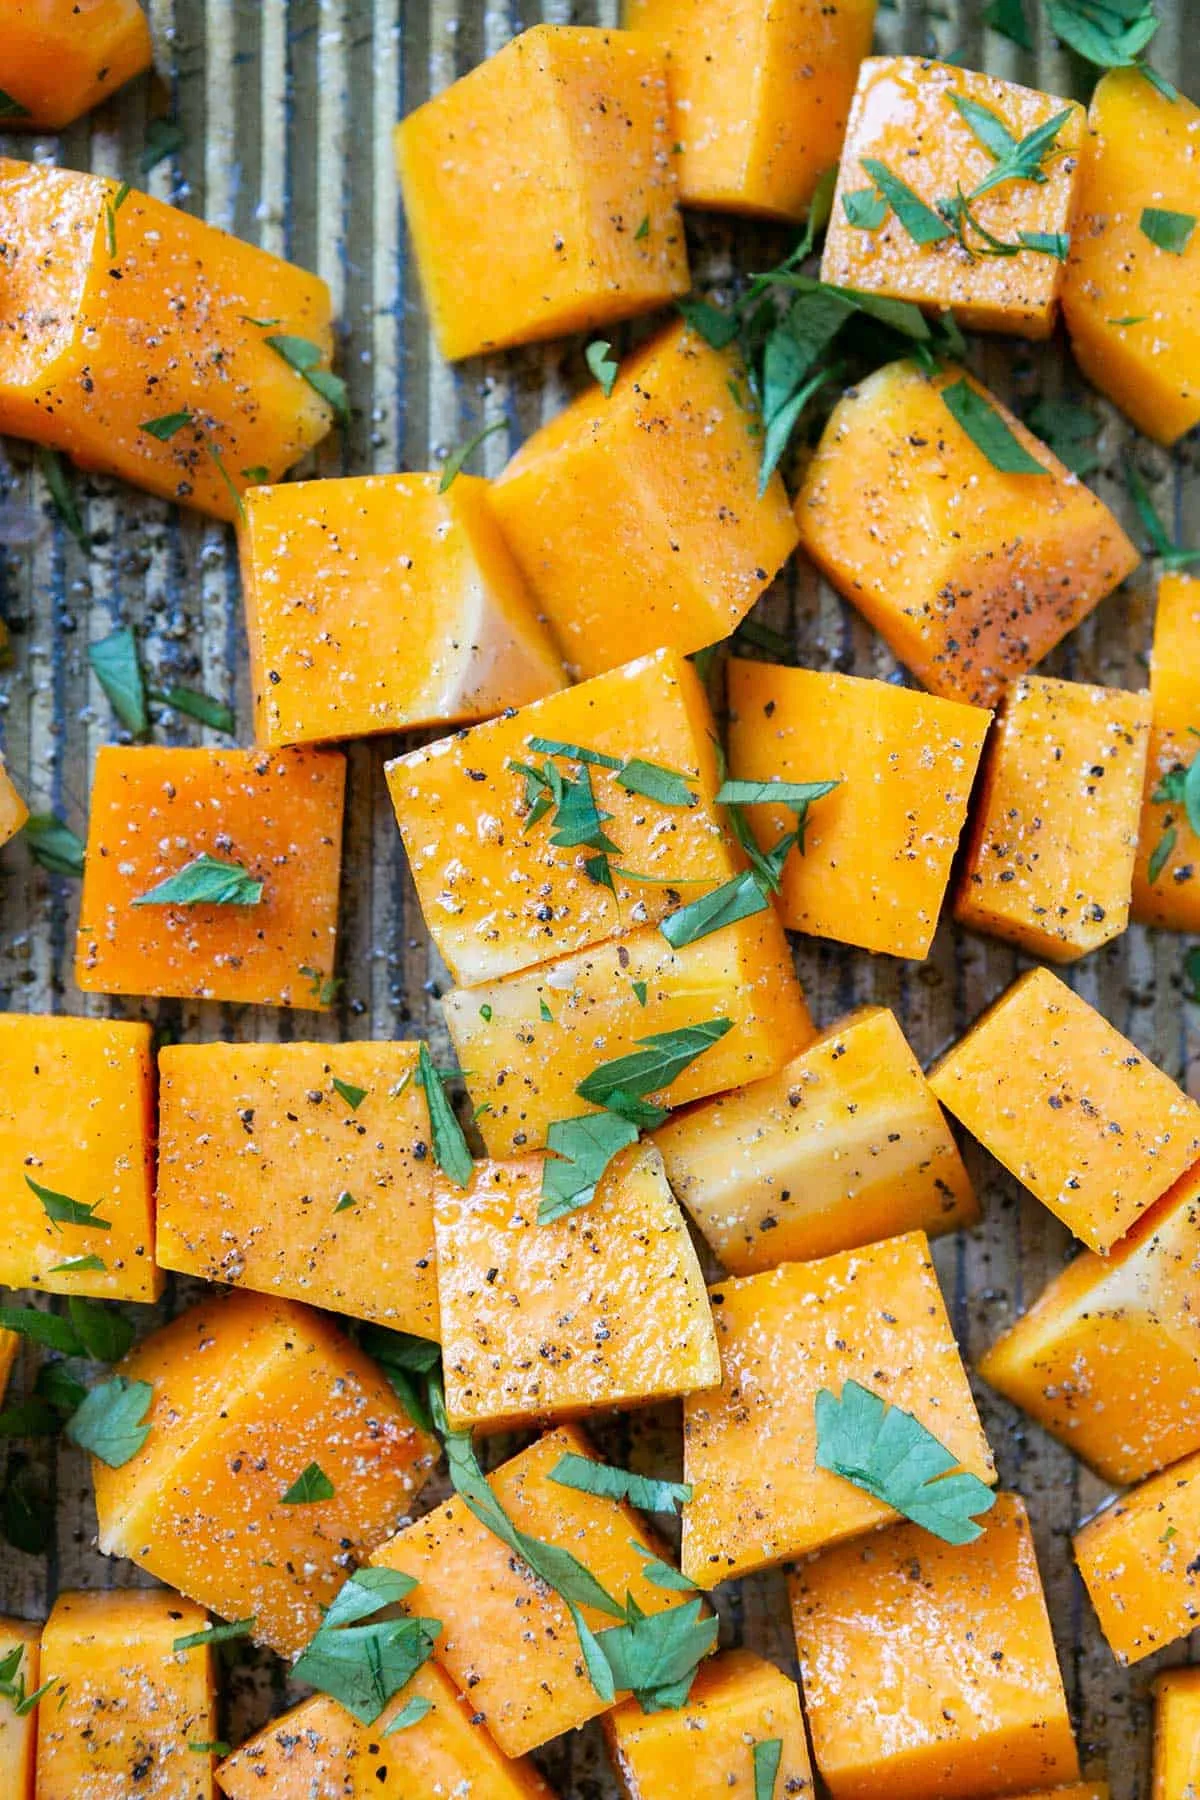
Image source: Bing (Web (fair-use with source credit))
Step-by-Step: Halved or Whole Roasting (For Minimal Prep)
Both methods cut your hands-on time to about 5 minutes. You trade a little texture control for a lot of convenience.
**For halved squash, ** Wash and dry the squash. Use a sharp chef's knife to slice it in half lengthwise. Scoop out the seeds and strings.
Rub the cut sides with olive oil and a pinch of salt. Place the halves cut-side down on a parchment-lined baking sheet. Roast at 375°F for 45 to 60 minutes.
The flesh is done when a fork slides in easily. Let it rest 5 minutes before handling. Scoop the flesh out with a spoon, or serve it right in the skin with butter and seasoning.
**For whole squash, ** Wash the squash thoroughly. Pierce the skin in 8 to 10 places with a fork or the tip of a sharp knife. This step is not optional.
Without vents, steam builds up inside and can cause the squash to burst. Place the whole squash on a foil-lined baking sheet. Roast at 350°F for 60 to 90 minutes.
Test for doneness by piercing the thickest part with a fork. It should go through without resistance. Let it cool for 10 minutes.
Slice it open lengthwise, scoop out the seeds, and then scoop out the flesh.
The whole method produces the softest, most evenly cooked interior. It is the best choice for silky purees, baby food, or adding to baked goods. University extension research confirms that whole roasting preserves more moisture than any other method, which matters if you are making a soup or sauce where texture is critical.
The Biggest Mistakes People Make (and How to Avoid Them)
Even experienced home cooks hit these common pitfalls. Here is what to watch for and how to fix each one.
Skipping the pierce step on whole squash. This is a safety issue. A whole unvented squash can explode in the oven. Use a fork or knife to create steam vents.
Deep enough to reach the flesh, not just the skin.
Overcrowding the pan. Cubes need breathing room. When they touch, they trap steam and soften instead of browning. Use two pans if needed.
Rotate them between racks halfway through.
Cutting uneven pieces. Large cubes take longer than small ones. Mixed sizes mean some burn while others stay raw. Take the extra 2 minutes to make them uniform.
Your fork will thank you.
Peeling the wrong way. Trying to peel a whole round squash with a standard peeler is dangerous. Cut it in half first, lay the flat side down, then peel. A Y-peeler gives you more control and less wasted flesh.
Using too low a temperature. 350°F is for whole squash only. For cubes and halves, you need 375°F to 400°F. Low heat draws out moisture without browning.
You end up with steamed squash, not roasted squash.
Not flipping halfway through. The bottom of the cubes sits against the hot pan and cooks faster than the top. A single flip at the 15-minute mark ensures even caramelization on all sides.
Quick Reference: Oven Temperature and Time Cheat Sheet
Use this table to match your method to the right temperature and timing.
| Method | Temperature | Time Range | Best For |
|---|---|---|---|
| Whole | 350°F | 60–90 minutes | Purees, baby food, mash |
| Halved (cut-side down) | 375°F | 45–60 minutes | Side dishes, stuffed squash |
| Cubed (¾–1 inch) | 400°F | 25–40 minutes | Salads, bowls, roasted medleys |
| Cubed (convection) | 375°F | 20–30 minutes | Same as cubed, faster cook |
Check doneness with a fork 5 minutes before the earliest time listed. Every oven runs differently. If your squash takes longer, that is normal.
The goal is fork-tender flesh with caramelized edges, not a stopwatch.
Frequently Asked Questions
Do I need to peel butternut squash before roasting?
Not if you roast it whole or halved. The skin softens enough to eat or scoop around. For cubed roasting, peeling is recommended because the skin stays chewy and tough on small pieces.
Can I eat the skin of roasted butternut squash?
Yes, after roasting. The skin becomes tender and edible, especially on smaller cubes that caramelize well. Some people find the texture slightly fibrous.
If you are bothered by it, scoop the flesh out after cooking.
How do I prevent butternut squash from sticking to the pan?
Use parchment paper or aluminum foil. Oil the pan lightly even with a liner. Nonstick foil helps too.
Silicone baking mats also work, but they can reduce browning slightly.
Is it safe to roast butternut squash seeds?
Yes. Rinse and dry the seeds, toss with oil and salt, and roast at 300°F for 15 to 20 minutes. They taste similar to pumpkin seeds and make a great snack.
How long does roasted butternut squash last in the fridge?
Store it in an airtight container for up to five days. Reheat in a 350°F oven for 5 to 10 minutes to restore some crispness. The microwave works but will make it softer.
Can I freeze roasted butternut squash?
Absolutely. Spread cooled cubes on a baking sheet and freeze until solid. Transfer to a freezer bag or container.
It keeps for up to three months. Thaw in the fridge overnight or reheat directly from frozen.
How to Season Butternut Squash for Sweet and Savory Dishes
The squash's natural sweetness works with almost any flavor profile. For savory dishes, toss cubes with olive oil, salt, black pepper, and garlic powder or smoked paprika. Add fresh rosemary or sage leaves before roasting for an earthy note.
For sweet applications, skip the pepper and use cinnamon, nutmeg, or a pinch of cayenne for warmth. A light drizzle of maple syrup or honey in the last 5 minutes of roasting creates a glaze without burning. Aggregate feedback from home cooks shows that seasoning at the oil stage (not after) gives the most even coverage.
If you are meal prepping, keep the seasoning neutral: just salt and oil. Then add specific flavors when you reheat for different meals throughout the week.
Troubleshooting Common Oven Issues
Uneven cooking usually comes from hot spots in the oven. Rotate the baking sheet front to back at the halfway point. If your oven runs cool (many home ovens are off by 15°F to 25°F), invest in an inexpensive oven thermometer to check.
Burnt edges on cubes mean the heat is too high or the pieces are too small. Drop the temperature by 25°F and increase the time slightly. For halves that burn on the cut side before the flesh softens, cover loosely with foil for the first 30 minutes, then remove for the last 15 to 20.
If the squash sticks to the pan despite using oil, the pan may be too thin or the oil insufficient. Parchment paper solves this reliably. Silicone mats can cause less browning because they insulate the bottom.
How to Store and Reheat Roasted Butternut Squash
Cool the squash completely before storing. Place it in an airtight container or a zip-top bag with the air pressed out. Refrigerate for up to five days.
For longer storage, freeze in a single layer on a baking sheet, then transfer to a freezer bag.
Reheating in the oven restores the best texture. Spread pieces on a baking sheet and warm at 350°F for 5 to 10 minutes. A toaster oven works well for small portions.
The microwave is faster but will make the squash soft and release moisture. Use it only if texture is not a priority.
For batch cooking, portion frozen squash into recipe-sized bags. Add directly to soups or stews without thawing. Roasted squash keeps its flavor for up to three months in the freezer.
Roasting Butternut Squash with Other Vegetables
Sheet pan dinners are a natural fit. Pair cubed squash with vegetables that have similar cook times. Brussels sprouts (halved), red onion wedges, and carrots all roast well alongside squash at 400°F for 30 to 35 minutes.
Avoid adding quick-cooking vegetables like zucchini or bell peppers at the start. They will turn mushy. Add them halfway through or roast them on a separate pan.
Root vegetables like potatoes and sweet potatoes work well because they have similar density and sugar content.
For a complete meal, add seasoned chicken thighs or sausage links to the same pan. Arrange them with space around each piece. The rendered fat flavors the squash as it roasts.
Use a meat thermometer to confirm poultry reaches 165°F.
Nutritional Benefits of Oven-Roasted Butternut Squash
One cup of roasted butternut squash provides about 100 calories and 7 grams of fiber per USDA data. It is exceptionally high in vitamin A (over 450% of the daily value) due to beta-carotene, plus significant amounts of vitamin C, potassium, and magnesium.
Roasting preserves these nutrients better than boiling, which leaches water-soluble vitamins into the cooking water. The small amount of oil used for roasting also helps the body absorb fat-soluble vitamins like A and E.
The natural sugars in butternut squash make it a satisfying alternative to starchy sides. Its glycemic load is moderate, especially when paired with protein or healthy fat. For those watching blood sugar, pairing roasted squash with a lean protein or a handful of nuts helps balance the meal.

Similar Posts