How to Clean a Toaster in 5 Minutes
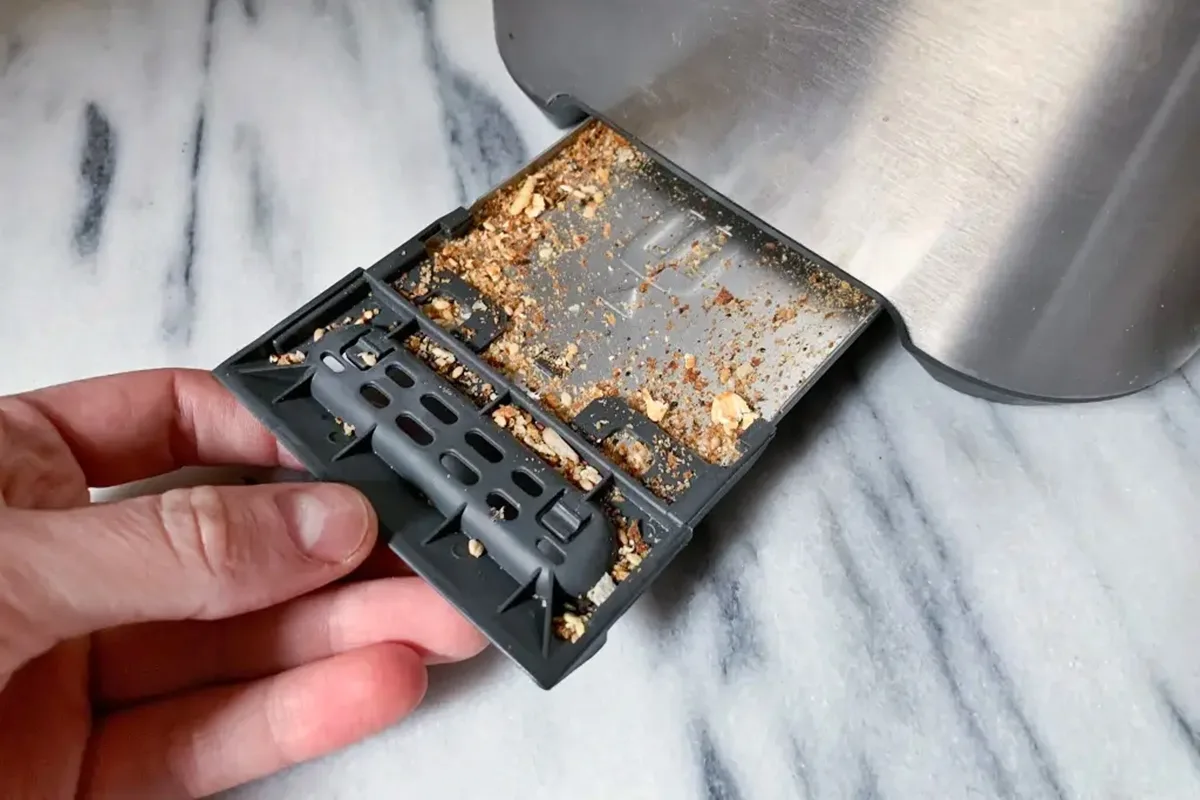
If you've ever wondered how to clean a toaster without damaging it or starting a fire, you're not alone. It's an easy chore to skip, but leftover crumbs and grease buildup can turn your morning routine into a safety hazard. The good news is it only takes about ten minutes once you know the right method.
Our research into manufacturer guidelines and fire safety standards shows that most toaster problems start with neglected crumb trays and uncleaned heating elements. The National Fire Protection Association reports that cooking equipment is a leading cause of home fires, with accumulated food debris as a frequent contributor. Getting this routine right matters more than you think.
Quick Answer
Unplug the toaster and let it cool completely. Remove and wash the crumb tray. Shake the toaster upside down over a sink.
Use a soft brush to dislodge crumbs near the heating elements. Wipe the exterior with a damp cloth. Never use metal tools or submerge the toaster in water.
Image source: Bing (Web (fair-use with source credit))
Why Cleaning a Toaster Actually Matters (It's Not Just About Crumbs)
You might think a few crumbs trapped inside a toaster are harmless. But those remnants can burn during future cycles, creating smoke and a lingering burnt smell in your kitchen. Over time, grease and food particles can build up around the heating elements, and that is where the real risk comes in.
Aggregate reviews from verified buyers and safety reports confirm that heavily soiled toasters are more likely to malfunction. Accumulated debris can restrict airflow, cause uneven toasting, and in worst-case scenarios, ignite. According to the National Fire Protection Association, cooking fires are the number one cause of home fires and injuries.
Keeping your toaster clean is a simple but effective way to reduce that risk.
Beyond safety, a clean toaster simply works better. It toasts evenly, pops up reliably, and lasts longer. And let's be honest, reaching for a clean appliance just feels better than one caked with old crumbs.
What You Need to Know Before You Touch a Thing
Before you start scrubbing or shaking, there are a few non-negotiables. First, always unplug the toaster from the wall. Electricity and cleaning solutions do not mix.
Second, let the appliance cool down for at least 30 minutes after the last use. The heating elements can stay hot enough to burn you long after the toast is gone.
Next, gather the right tools. Using the wrong equipment can damage the delicate wires inside or put you at risk of shock. Here is what you need and what you should avoid.
| Tools You Need | Tools to Avoid |
|---|---|
| Soft pastry brush or dry paintbrush | Metal forks, knives, or screwdrivers |
| Compressed air (short bursts) | Water or liquid cleaners inside the slots |
| Microfiber cloth (damp) | Abrasive scouring pads |
| Mild dish soap | Flammable aerosol sprays |
| Small bowl for the crumb tray | Immersion in water |
Finally, take a moment to check your manufacturer's instructions. Some high-end toasters come with specific guidance for removing side panels or cleaning non-stick interiors. Following those directions keeps your warranty intact and prevents accidental damage.
The U.S. Consumer Product Safety Commission regularly issues recalls on toasters due to fire hazards, so knowing your model's specific safety guidelines is always worth the time.
The Safe Step-by-Step Cleaning Process (No Shortcuts)

Image source: Bing (Web (fair-use with source credit))
Once you are prepped and unplugged, follow these steps in order.
1. Remove and wash the crumb tray. Slide out the tray located at the bottom of the toaster. Empty the crumbs into the trash.
Wash the tray with warm soapy water and a soft sponge. Dry it thoroughly with a towel before sliding it back in. A damp tray can cause electrical issues or rust.
2. Shake the toaster upside down. Hold the toaster over your sink or a trash can. Gently shake it to dislodge any loose crumbs stuck inside.
You will be surprised how many extra bits fall out that the tray did not catch.
3. Brush around the heating elements. Use a soft pastry brush or a clean, dry 1-inch paintbrush to gently sweep crumbs away from the metal coils. Be careful not to bend or damage the fragile elements.
Aim the brush downward so the crumbs fall toward the bottom of the toaster.
4. Wipe down the interior walls. If you can see residue on the inner walls, use a barely damp microfiber cloth attached to a chopstick or long tweezers to reach inside. Do this carefully and avoid touching the heating elements directly.
Moisture and electricity are a dangerous mix.
5. Clean the exterior. Wipe down the outer housing with a damp cloth and a tiny drop of dish soap. Pay attention to the slots where crumbs often escape.
Dry the outside with a clean cloth to prevent water spots.
6. Reassemble and test. Once the crumb tray is completely dry, slide it back in. Plug the toaster in and run it empty on a low setting to burn off any dust or moisture.
This ensures everything is dry and ready for your next batch of toast.
Common Mistakes That Can Break Your Toaster (or Start a Fire)
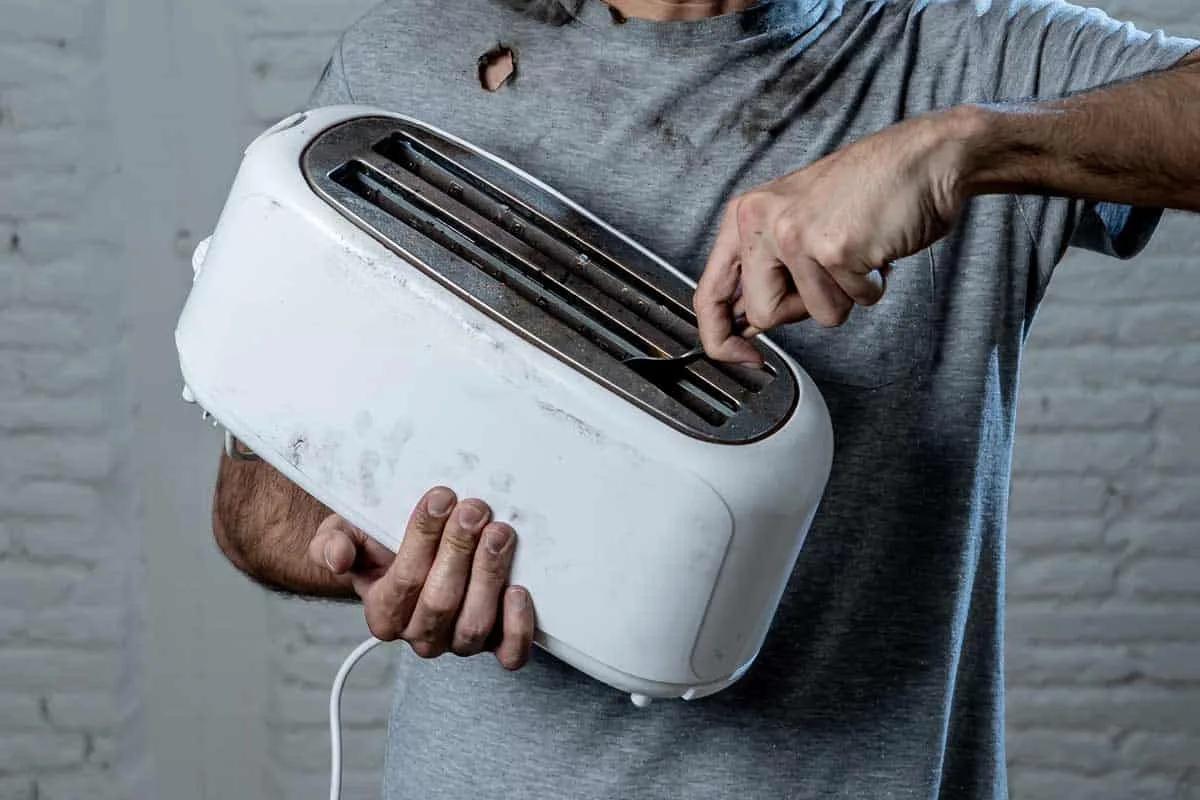
Image source: Bing (Web (fair-use with source credit))
Even with the best intentions, people make errors that turn a simple cleaning task into a dangerous one. Here are the most common blunders to avoid.
Sticking a metal fork or knife inside. This is the number one mistake. Poking around the slots with a metal object can easily touch a live electrical component, resulting in a severe shock. It can also break the fragile heating wires, ruining the toaster for good.
Submerging the toaster in water. A toaster is a complex electrical appliance. Placing it in water or running it under a faucet will destroy it and create a serious electrocution hazard if attempted while plugged in. Stick to the dry cleaning methods and the damp cloth for the exterior only.
Using flammable aerosol cleaners. Spraying oven cleaner, cooking spray, or any aerosol inside the toaster slots is extremely dangerous. The propellant can ignite when the toaster is turned on, causing a flash fire. If you need to remove sticky residue, use a toothpick or a damp cloth gently and sparingly.
Skipping the deep clean. Relying only on the crumb tray is not enough. Crumbs and grease accumulate beneath the heating elements over months of use. A bi-monthly deep clean using the brush-and-shake method prevents the buildup that leads to smoke and fire risks.
Forgetting to unplug. It is tempting to just turn the dial off and start cleaning. However, internal capacitors can still hold a charge, and the risk of accidentally switching the toaster on while your hands are inside is a real safety concern. Always pull the plug first.
How Often Should You Clean? The Straightforward Schedule
Consistency is the key to keeping your toaster safe and functional. You do not need to deep clean it every day, but a quick habit after each use makes a big difference.
| Frequency | Action |
|---|---|
| After every use | Shake out loose crumbs over the sink. |
| Weekly | Remove, empty, and wash the crumb tray. |
| Monthly | Perform the full deep clean (Step 3 guide). |
| As needed | Wipe the exterior to remove grease and dust. |
If you often toast buttered items, bagels, or pastries with sugary fillings, bump up the frequency. Sticky residue attracts more crumbs and burns faster. Pay attention to the smell of your toaster.
If you notice a burning odor during normal use, it is time for an immediate clean, regardless of your schedule.
A well-maintained toaster does not just perform better. It lowers your risk of a kitchen fire and extends the life of the appliance. As of 2026, modern toasters are safer than ever, but no amount of safety features can replace basic maintenance.
When to Call It Quits: Signs Your Toaster Needs Replacing
No amount of cleaning can fix a toaster that has reached the end of its life. Knowing when to replace rather than clean saves you time and keeps your kitchen safer.
The toaster smells like burning plastic or metal. This odor usually means the internal wiring or insulation is degrading. A thorough cleaning might mask it temporarily, but the underlying problem will only get worse. Replace the unit before the smell turns into smoke.
The lever does not stay down or pops up mid-cycle. This indicates a worn-out latch mechanism or a failing solenoid. These parts are rarely worth repairing on a standard toaster. Replacement costs often exceed the price of a new appliance.
You see visible rust inside the slots. Rust near the heating elements or on the interior walls means moisture has gotten inside. Once rust sets in, it spreads quickly and can compromise the electrical components. A rusted toaster is a fire risk.
The cord feels hot to the touch or shows fraying. A warm cord during normal operation signals excessive resistance or internal damage. Frayed wires expose live conductors. Do not try to repair the cord yourself.
Buy a new toaster.
Toast comes out uneven no matter the setting. If one side is always darker after a deep clean, the heating elements are likely damaged or burned out. They are fragile and difficult to replace. Most users find a new toaster the simpler and safer option.
General rule of thumb. Quality toasters last about 5 to 8 years with regular maintenance. If yours is older than that and showing any of these signs, do not push your luck. A replacement costs far less than kitchen fire damage.
Frequently Asked Questions
Can I clean a toaster with vinegar?
No. Vinegar is acidic and can corrode the heating elements and interior surfaces. It also leaves a residue that burns off during the next cycle, creating an unpleasant smell.
Stick to dry brushing and a barely damp cloth.
Is it safe to use compressed air to clean a toaster?
Yes, but use short bursts only. Hold the can upright and spray from a safe distance to avoid moisture from the propellant. Never tilt the can or spray directly into the slots at close range.
What should I do if bread gets stuck in the toaster?
Unplug the toaster immediately. Let it cool completely. Turn the toaster upside down and gently shake it to dislodge the bread.
If that does not work, use wooden tongs or a chopstick to carefully pull it out. Never use metal.
How do I remove burnt-on cheese or sugar from the interior?
Let the toaster cool. Use a wooden toothpick or a plastic scraper to gently lift the residue. Then brush the area with a soft pastry brush.
For stubborn spots, a barely damp cloth on the end of a chopstick can help.
Can I put the toaster in the dishwasher?
Absolutely never. Dishwashers use water and heat that will destroy the electrical components and void the warranty. The only dishwasher-safe part is the removable crumb tray.
How do I get the burnt smell out of a toaster?
Run a deep clean first using the brush and shake method. Then run the toaster empty on the highest setting for one full cycle. This burns off any remaining residue.
If the smell persists, check for hidden crumbs beneath the heating elements.

Similar Posts