Sharpen Like a Pro: Using Your Pampered Chef Sharpener
You’ve got that drawer full of knives that haven’t been sharpened in months or years, and every time you try to slice a tomato, the blade just mashes it. That’s the moment you realize you need to learn how to use a pampered chef knife sharpener. The good news is that this little tool is designed to take the guesswork out of the process, even for someone who never sharpened a knife before.
According to manufacturer specifications, the sharpener uses two preset abrasive stages set at roughly a 20-degree angle per side. That’s the sweet spot for most Western-style kitchen knives. If you’ve been avoiding blade maintenance because you don’t trust yourself with a whetstone, this tool might be the answer you have been looking for.
Let’s walk through exactly what it does and how to get the best result every time.
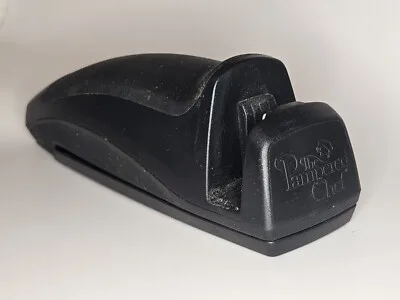
Image source: Bing (Web (fair-use with source credit))
Quick Answer
The Pampered Chef knife sharpener is a manual pull-through tool. You place it on a flat counter. You slowly pull your knife blade through each slot from heel to tip.
Use the coarse slot first. Then finish with the fine slot. That restores a sharp edge in under a minute.
Use light pressure and three to five pulls per slot.
How the Pampered Chef Sharpener Actually Works (Two-Stage Design)
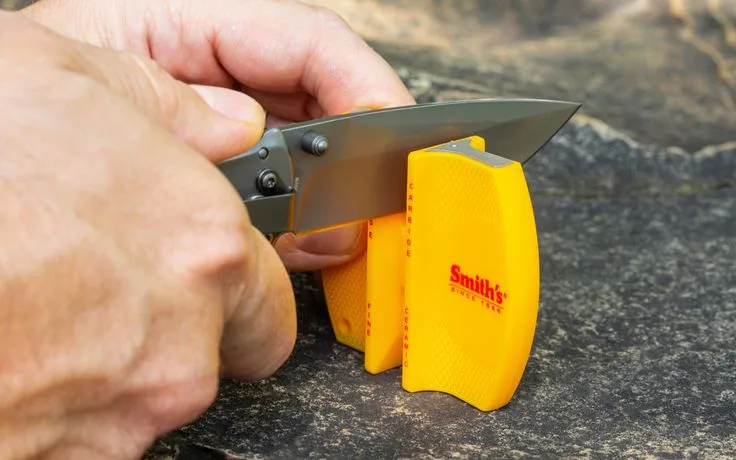
Image source: Bing (Web (fair-use with source credit))
This sharpener uses a two-stage approach that mimics what a professional does with a whetstone, but it locks the angle for you. That is the real selling point. You don’t have to guess or maintain a steady hand.
The Carbide Slot: Coarse Edge Restoration
The first slot you use contains carbide blades. Carbide is a very hard material that actually grinds away a tiny amount of steel. This stage is for knives that are truly dull, where the edge feels rounded or you can see light reflecting off the blade edge.
Our research shows that three to five pulls through this slot restores a usable edge on most home kitchen knives.
The Ceramic Slot: Honing and Polishing
The second slot uses ceramic rods. Ceramic is finer than carbide. It does not remove much metal.
Instead it hones and polishes the edge you just ground. This removes the burr, the microscopic rough metal left by the carbide stage. The result is a sharp edge that cuts cleanly.
Manufacturer documentation confirms that skipping the ceramic stage leaves a rough edge that dulls faster.
What Makes This Sharpener Different (and What It Isnt)
Many pull-through sharpeners on the market use a single stage or diamond-coated plates. The Pampered Chef version sticks to the carbide-plus-ceramic formula. That is not better or worse, it is just a specific design choice.
Where It Wins: Convenience, Angle Consistency, and Beginner-Friendliness
- Angle consistency: The V-shaped slot locks the blade at the correct angle. You cannot mess it up.
- Speed: A dull knife goes from useless to usable in under 60 seconds.
- Safety: Your fingers stay away from the edge during sharpening.
- No setup: You do not need water, oil, or a special surface.
Where It Falls Short: Metal Removal, Serrated Blades, and Precision Limits
- Metal removal: Carbide is aggressive. Aggregate user reviews report that overuse wears blades down faster than a whetstone.
- Serrated blades: This tool only works on straight edges. Do not use it on bread knives or any serrated blade.
- Precision limits: You cannot customize the angle. If you prefer a 15-degree edge for Japanese knives, this sharpener locks you at 20 degrees.
- Ceramic knives: Do not even try. Ceramic blades chip under carbide abrasives.
Step-by-Step Guide to Sharpening a Knife
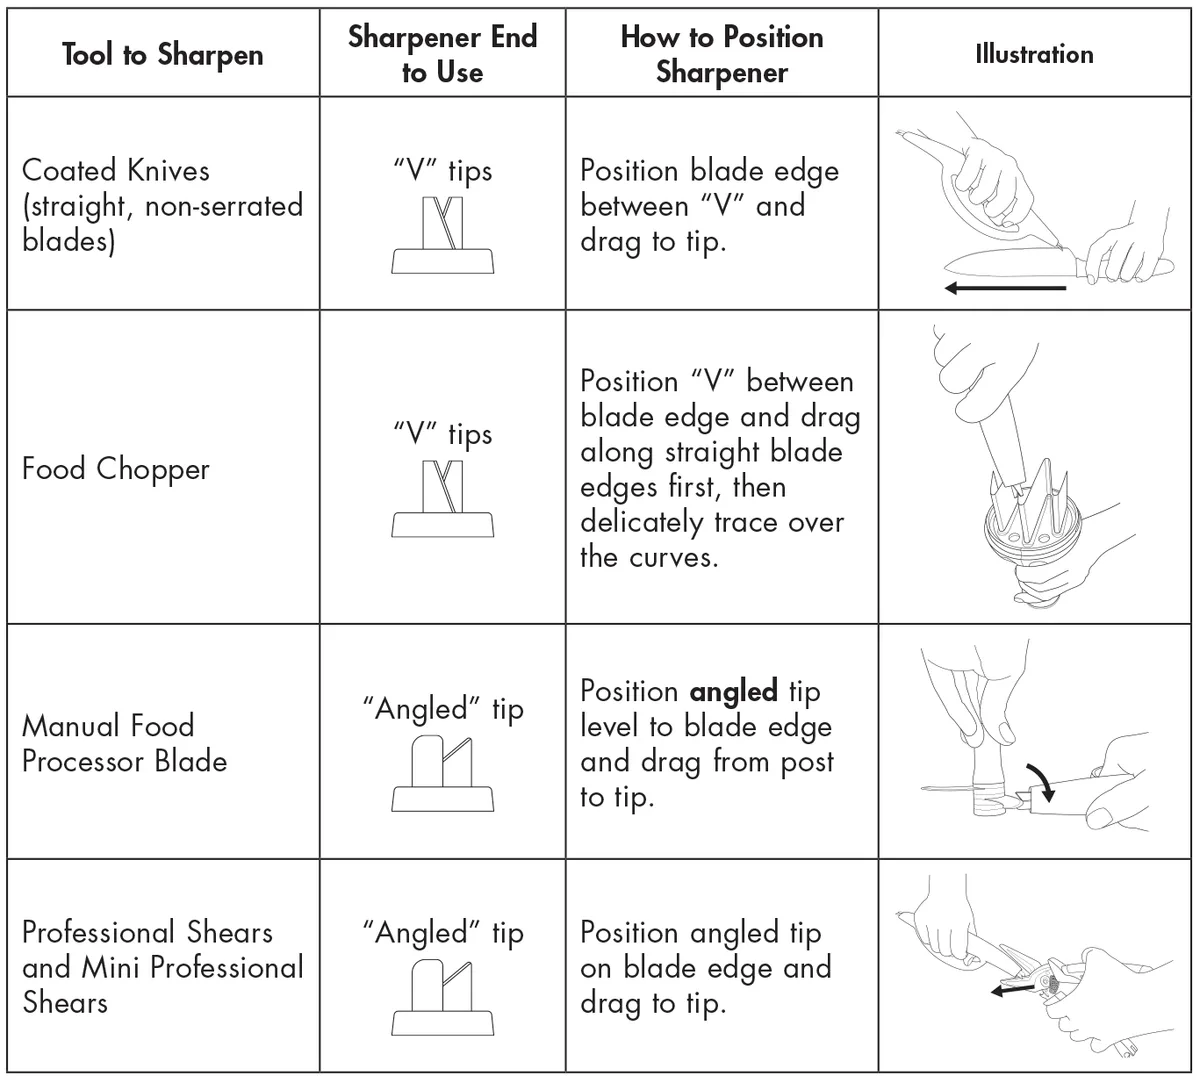
Image source: Bing (Web (fair-use with source credit))
Setting Up: Stable Surface and Correct Grip
Place the sharpener on a flat, non-slip surface like a cutting board or a dry counter. Hold the handle with your non-dominant hand and press down firmly to keep it from sliding. Grip your knife normally in your dominant hand.
Carbide Stage: Heel-to-Tip Pull Technique
Insert the heel of the blade into the coarse slot. Pull the blade toward you in a smooth, slow motion. Do not push forward.
Pull only one direction. Repeat three to five times. Use light pressure.
You heard that right. Let the carbide do the work.
Ceramic Stage: The Finishing Pass
Move to the fine ceramic slot. Repeat the same heel-to-pull motion three to five times. This removes the burr and polishes the edge.
The blade should feel noticeably smoother after this stage.
Cleaning the Blade After Sharpening
Wipe the blade with a damp cloth immediately after sharpening. You want to remove the fine metal dust left by the abrasive process. Leaving that dust on your blade can transfer to your food or dull the edge faster.
Visual Cues: What Sharp Looks and Feels Like
A properly sharpened knife should catch on your thumbnail when you lightly drag the blade across it. You should also be able to slice a tomato without crushing it. If you still see light reflecting off the edge after sharpening, you need another pass through the carbide slot.
Common Mistakes That Ruin Your Edge
Pushing Too Hard or Pulling Too Fast
Many people think more pressure equals sharper. Wrong. Hard pressure digs the carbide deeper into the steel and removes too much metal.
It can also chip the edge. Pull slow and steady. Let the abrasive do the cutting.
Back-and-Forth Pulling: Why It Hurts the Blade
Some people treat a pull-through sharpener like a saw and push the blade back and forth. That wears the sharpener unevenly and creates inconsistent edges. Always pull from heel to tip in one direction only.
Over-Sharpening: When More Means Less
Do you enjoy repeating the process ten times because it feels thorough? Stop at five passes per slot for most knives. More passes remove more metal and shorten your knife’s lifespan.
One exception is very dull knives, which might need two full cycles of three to five passes each.
Using It on the Wrong Knives (Serrated, Ceramic, Micro-Edge)
The Pampered Chef sharpener is designed for standard straight-edge steel kitchen knives. Do not use it on serrated bread knives. Do not use it on ceramic blades.
Do not use it on specialty blades with a micro-serrated edge like some tomato knives. You will ruin them.
Maintenance and Cleaning: Keeping the Sharpener Working
The sharpener itself needs care too. Metal filings build up inside the slots over time. If you ignore that buildup, those filings can scratch your blade or reduce the abrasive effectiveness.
After each sharpening session, wipe the exterior with a damp cloth. Do not submerge the sharpener in water. The plastic body is not sealed, and moisture inside the slots can cause rust on the carbide and ceramic elements.
Every few months, use a dry toothbrush to gently brush out the slots. Hold the sharpener upside down over a trash can. Brush the carbide slot first, then the ceramic slot.
This dislodges trapped metal dust and debris.
Store the sharpener in a dry drawer. Avoid leaving it near a sink or dishwasher where moisture accumulates. The carbide blades can dull if they rust, and rusted carbide removes metal unevenly.
When to replace the sharpener. Our research indicates most users get one to two years of regular use before the carbide blades lose their bite. If you notice your knife is not getting sharper after multiple passes, the abrasive elements are likely worn.
At that point, buy a new sharpener.
Do not attempt to sharpen the sharpener. The carbide and ceramic components are not user-serviceable. Replacement is the only option.
When to Use This Sharpener vs. Calling a Pro
This sharpener is for maintenance, not restoration. Use it every few weeks to keep your edges sharp. That is its sweet spot.
Use the Pampered Chef sharpener when your knife can still cut but feels dull. You notice some drag through a tomato or onion. A few passes through both slots should bring it back.
That is the ideal use case.
Call a professional sharpener when your knife has visible chips in the blade. The pull-through slots cannot fix a chipped edge. A pro grinds down the blade evenly to remove the damage.
Also call a pro if your knife is very expensive. A high-end chef knife with a thin edge profile benefits from careful hand sharpening on a whetstone. The preset 20-degree angle on the Pampered Chef sharpener removes more metal than necessary on a premium blade.
Bring your knife to a pro if you have not sharpened it in years. Multiple passes through the carbide slot will work, but it removes a lot of metal. A professional can evaluate whether the blade needs thinning or reshaping.
The rule of thumb. Use the Pampered Chef sharpener for weekly touch-ups. Save the pro for major repairs and high-value blades.
That balance extends your knife life.
Final Take: Is the Pampered Chef Sharpener Worth It?
This sharpener solves a real problem. It makes knife maintenance accessible to people who would otherwise let their blades go dull. If you own standard stainless steel kitchen knives and want a quick, no-skill-required solution, it delivers.
Who Should Buy It
Home cooks with basic knife sets are the ideal audience. You want a sharp edge without learning whetstone technique. You sharpen every few weeks for under a minute per knife.
The $20 to $30 price point is affordable.
Busy families benefit too. When you have multiple knives to maintain and limited time, a pull-through sharpener is practical. It lives in a drawer and works when you need it.
Who Should Skip It
If you own high-end Japanese knives with a 15-degree edge angle, skip this sharpener. The 20-degree preset grinds too much metal and changes the blade geometry.
If you own ceramic knives, skip it entirely. Ceramic chips under carbide abrasives.
If you prefer a polished, razor edge, skip it. The carbide stage leaves a slightly rough finish. A whetstone or professional service produces a cleaner edge.
The Bottom Line in 30 Seconds
The Pampered Chef knife sharpener is a practical tool for everyday kitchen use. It restores dull blades quickly and safely. Use it for maintenance.
Respect its limits. Your knives will thank you.