Bring Your Rusted Cast Iron Griddle Back to Life
That rusted griddle sitting in your garage or hanging on a hook isn't dead. It's just waiting for someone who knows how to restore rusted cast iron griddle. With a few basic supplies and a couple of hours of hands-on work, you can bring it back to a non-stick, cook-ready surface.
Even pitted, neglected pieces usually recover completely.
The process isn't complicated, but it does follow a specific order. Aggregate reviews and manufacturer guides agree on the essentials. For example, a standard vinegar soak uses a 1:1 ratio of water to distilled white vinegar, and you should never let it run past two hours.
Get that part right, and the rest falls into place. Let's walk through the whole process, starting with whether your griddle is even worth the effort.
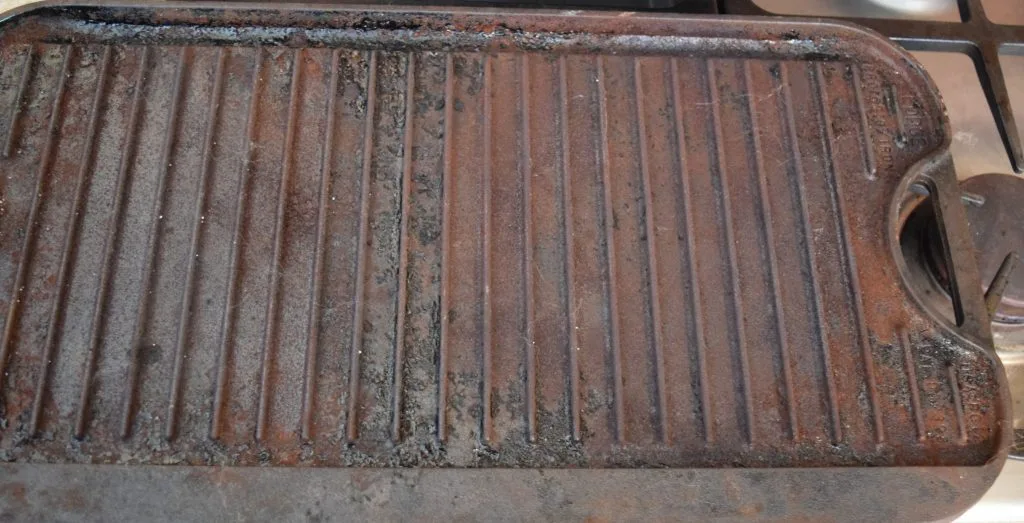
Image source: Bing (Web (fair-use with source credit))
Quick Answer
Soak the griddle in a 1:1 vinegar and water solution for 30 minutes to two hours. Scrub it with steel wool until rust is gone. Dry it completely on a hot stove.
Apply a thin layer of oil. Bake it upside down at 450°F for one hour. Repeat the oil and bake step 3 to 5 times.
The Short Version: Yes, That Rusted Griddle Is Worth Saving
First, let's talk about whether you should bother at all. For most people, the answer is a clear yes. A new cast iron griddle runs anywhere from $40 to $150 depending on brand and size.
Restoration supplies cost under $20 total. Vinegar, steel wool, oil, and a few paper towels are the whole shopping list.
There's also the quality angle. Older cast iron pieces, especially vintage ones from the early to mid 1900s, were milled smooth in the factory. Modern mass-produced griddles often have a rough, pebbly texture that food sticks to.
If you've inherited a vintage griddle or found one at a flea market, restoring it gives you a cooking surface that simply isn't made anymore.
But not every griddle deserves your time. Watch for these deal-breakers:
- Cracks or fractures in the metal
- Warping that makes the griddle rock on a flat stovetop
- Deep rust holes that go all the way through
- Unknown history, especially for vintage pieces that might have been used to melt lead
The first three issues are structural. A cracked griddle will eventually break, and a warped one won't heat evenly. The lead issue is a safety concern.
Old cast iron from thrift stores or estate sales could have been used for crafts or ammunition. If you can't verify the piece's history, pick up a lead test kit before you invest any effort. They're cheap, and they give you peace of mind.
Step One: Assess the Damage Before Touching Anything
Before you grab any tools, take a good look at what you're dealing with. Place the griddle under bright light and run your fingers across the surface. The feel tells you more than the color ever will.
Rust comes in different stages, and each one needs a different response.
Light surface rust feels like rough sandpaper under your fingertip. It's a thin, uniform layer of orange or brown across the surface. Most people see this after storing a griddle in a damp garage for a few months or forgetting to dry it fully after washing.
This stage is easy to fix. A thorough scrub with steel wool and a fresh seasoning usually does the trick in one afternoon.
Moderate rust means you can see actual scale and flaking. The rust layers are visible to the eye, often darker brown or reddish, and they can come off in your hand when you rub the surface. At this stage, you need a vinegar soak to soften the rust, then a more aggressive scrub.
The piece still has its structural integrity, but the surface will have some texture loss.
Heavy rust and pitting look like the griddle's been buried in the yard for a decade. The surface has visible pits, deep discoloration, and possibly patterns that look like a topographic map. Pitting means the rust has eaten into the metal.
That's okay. The pits are cosmetic, not structural. The griddle will still cook fine after restoration, though the surface won't be perfectly smooth.
There's one more critical check before anything else. Is your griddle actual cast iron or enameled cast iron? Look for any signs of a glossy, glass-like coating, especially on the bottom or edges.
Enameled pieces were never meant to be seasoned and should never go through the vinegar soak or lye bath process. If you're not sure, inspect the sides. Enamel is usually a different color from the raw iron interior.
The Decision Tree: Which Rust Removal Method Should You Use?
Your path forward depends entirely on what your assessment revealed. This isn't a one-size-fits-all situation. Here's the if/then logic that determines your method.
Branch 1: Light surface rust, no old seasoning. Skip the chemicals. Dampen the griddle, sprinkle coarse salt on the surface, and scrub with a chainmail scrubber or steel wool. Rinse, dry, and season.
Total time is under an hour.
Branch 2: Moderate rust with flaking. Set up a vinegar soak. Mix distilled white vinegar and water in a 1:1 ratio in a large container or plastic tub. Submerge the griddle completely.
Check it every 30 minutes, and never let it soak past two hours. Longer exposure causes the vinegar to eat into the base metal, creating unnecessary pitting. After the soak, scrub with steel wool until the surface is bare gray iron.
Branch 3: Heavy rust plus old seasoning or grease buildup. This needs a two-stage approach. First, strip the old seasoning using an oven cleaner or a lye bath. Seasoning is polymerized oil, and ordinary rust removers won't touch it.
Once that's off, shift to the vinegar soak to handle the rust layer underneath. This route takes a few days of waiting.
Branch 4: Vintage or collectible pieces. Exercise extra caution. These pieces have a smooth, milled surface that modern production methods don't replicate. Power tools like angle grinders or drill-mounted wire brushes can gouge the surface and destroy the griddle's value.
Stick to manual scrubbing, gentle vinegar soaks, or electrolysis. Electrolysis is slower but far gentler, and it leaves original surface markings intact.
What about sandblasting, power tools, and the aggressive route? Just don't. Heat guns and sanders are too aggressive for cookware.
They can cause heat warping or remove too much metal. The only situation where a power tool makes sense is a cheap modern griddle that needs heavy rust removal and you accept the surface damage trade-off. For everything else, the slow route works better.
The Restoration Workflow: Step-by-Step from Rust to Ready
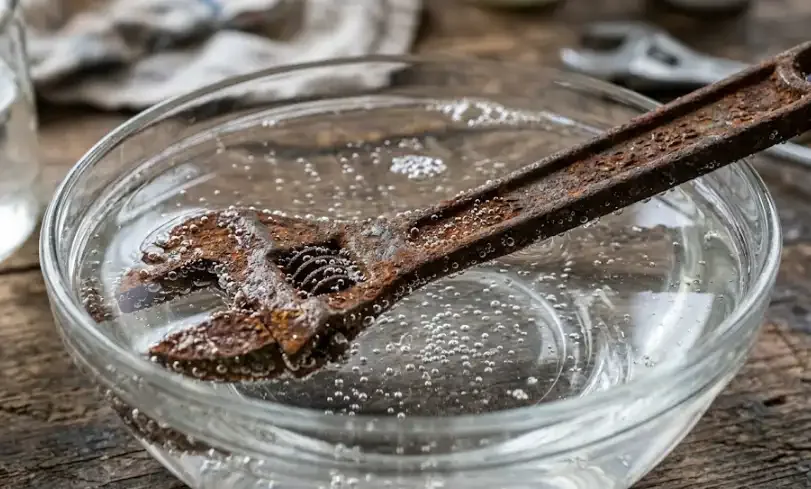
Image source: Bing (Web (fair-use with source credit))
Once you've picked your branch, the workflow follows the same sequence. Here's the full path from rusty mess to ready-to-cook.
Step 1: Strip the old seasoning. If the griddle has any existing oil-based coating, remove it first. Spray oven cleaner over the entire surface, place the griddle in a sealed plastic garbage bag, and leave it for 24 to 72 hours. This is a lye-based chemical reaction that dissolves old seasoning without harming the iron.
When the time is up, rinse and scrub the sludge off with steel wool.
Step 2: Soak to remove rust. For anything beyond light rust, this is your vinegar step. Mix one part distilled white vinegar with one part water in a tub large enough for the griddle. Submerge the piece completely.
Check it every 30 minutes. When the rust looks soft and gray, pull it out. Two hours is the absolute maximum before acid damage starts.
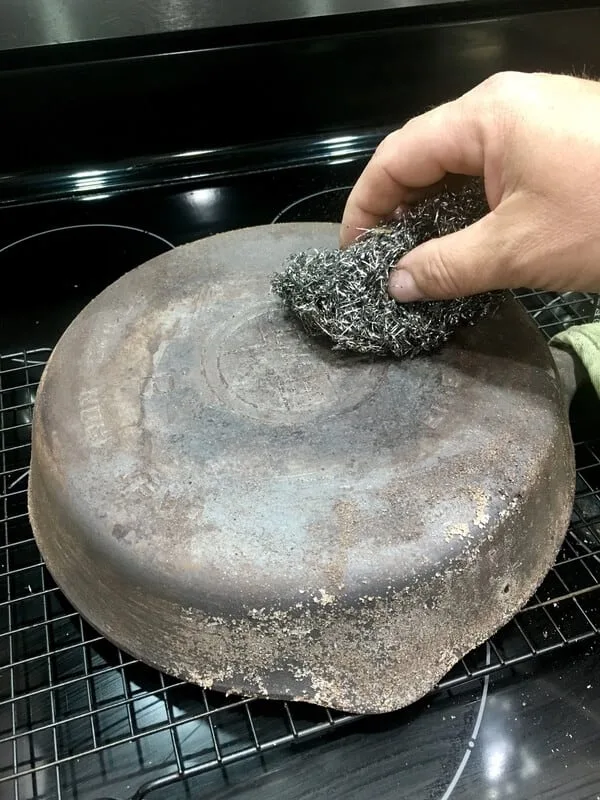
Step 3: Scrub and neutralize. Rinse the griddle under running water, then scrub with steel wool or a stainless steel scrubber until the entire surface is bare gray metal. You're looking for an even, uniform color with no orange left. Rinse again thoroughly to neutralize any remaining vinegar residue.
Step 4: Dry completely and beat flash rust. This step is crucial. Rinse the griddle with hot water, then place it on a stove burner or in a 200°F oven until every drop of moisture evaporates. The moment bare iron meets air, it starts to oxidize.
You'll often see a light orange haze forming within minutes. That's flash rust. Wipe it down with a paper towel and oil immediately to stop the process.
Step 5: Season with a thin oil layer. Choose a neutral oil with a high smoke point. Grapeseed and canola are solid choices. Vegetable shortening works well too.
Use a lint-free cloth and apply a very thin coat across every surface. Then wipe it off like you didn't mean to apply it. Excess oil causes sticky, gummy seasoning.
The layer should be nearly invisible.
Step 6: Bake at high heat. Preheat an oven to 450°F. Place the griddle upside down on the middle rack, with a sheet of aluminum foil or a baking sheet on the rack below to catch drips. Bake for one hour.
Then turn the oven off and let the griddle cool inside naturally. That gradual cooling prevents thermal shock and helps the seasoning bond.
Step 7: Repeat the seasoning coats. One coat isn't enough. Plan on 3 to 5 cycles of oil, wipe, and bake. Each layer polymerizes and builds on the previous one.
The color shifts from gray to bronze to a deep, dark black. Don't rush. A griddle seasoned properly at this stage will hold up for years before it ever needs attention again.
Mistakes That Will Ruin Your Griddle (and How to Avoid Them)
Most restoration failures aren't caused by rust or bad iron. They're caused by well-intentioned mistakes in the process. Here are the ones we see most often in aggregate user reports and forum discussions.
Leaving vinegar on too long. This is the single most common error. Vinegar is an acid, and it doesn't just eat rust. It eats iron too.
Leave a griddle in a vinegar soak overnight and you'll pull it out with a pitted, rough surface, a pale gray instead of a shiny silver, and a serious headache. Set a timer. Check every 30 minutes.
Two hours max.
Using too much oil when seasoning. Oil polymerizes best in thin layers. Slather it on thick, and the outer surface cures into a hard skin while the interior stays gummy and soft. That's the sticky mess people complain about.
The remedy is counterintuitive. Apply oil, then wipe it off with a dry paper towel until it looks like there's nothing left. That invisible film is what you want.
Trusting flaxseed oil as a subscription-quality seasoning. Flaxseed has a passionate following because it produces a beautiful, hard, glossy finish. The problem is durability. Many users report massive flaking within six months to a year, especially on cookware that sees heavy use.
Grapeseed oil performs nearly as well visually and holds up far better in practice.
Quenching hot iron in cold water. The shock of sudden temperature change can warp or crack cast iron. It's a solid piece of metal, but it does expand and contract with heat. Await it to cool naturally after cooking or baking.
If you absolutely must rush, use warm water, never cold.
Skipping the immediate dry step. Bare iron wants to rust. The moment you rinse the griddle after your final scrub, the clock starts. If you leave it sitting on the counter to air dry, you'll see a fresh rust haze within 20 minutes.
Heat-dry it right away and apply oil immediately. This habit alone saves more griddles than any other single practice.
Aftercare: Keeping Your Restored Griddle Rust-Free for Good
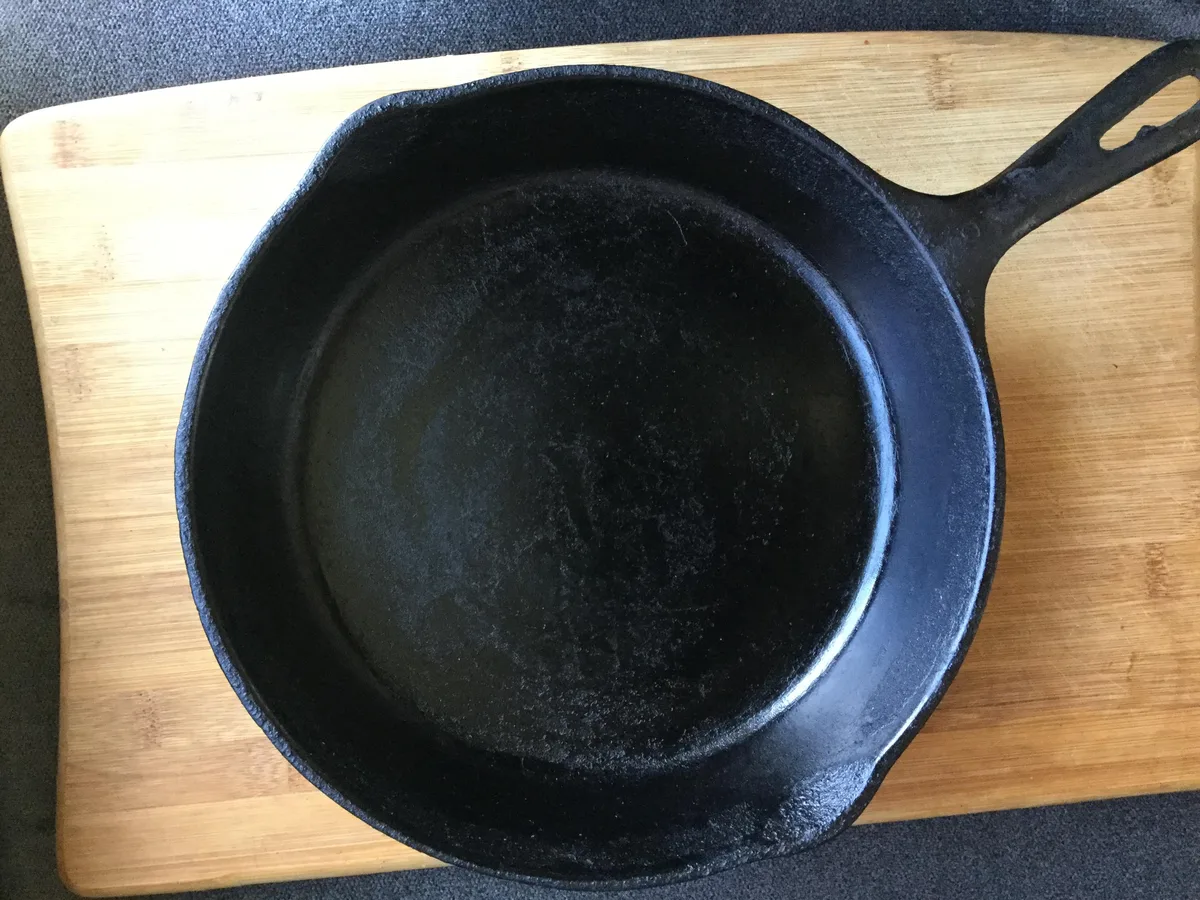
Image source: Bing (Web (fair-use with source credit))
Your griddle is seasoned, black, and ready. Now comes the easy part. A few habits keep it that way for years.
Dry it fully every single time. After washing, place the griddle on a warm burner for a minute or two until every bead of water evaporates. Residual moisture is the number one cause of surface rust on restored pieces. This habit costs you almost no time and eliminates most problems.
Apply a thin maintenance coat. While the griddle is still warm, rub a drop of oil across the cooking surface with a paper towel. Then wipe it off until it looks dry again. This replaces the microscopic layer of seasoning lost during cooking and storage.
Store it in a dry environment. Avoid humid basements, garages, or drawers near a dishwasher. If you live in a coastal or high-humidity area, wrap the griddle in a cotton cloth or paper towel before storing. The cloth absorbs moisture that would otherwise hit the iron.
Know when to re-season. If food starts sticking more than usual or you see a dull, gray patch, that's a warning. A single maintenance coat on the stovetop usually fixes it. If the surface looks rusty or feels rough, strip and reseason.
Most restored griddles need a full rebuild every 1 to 3 years depending on use frequency.
Frequently Asked Questions
How many coats of seasoning do I need?
Three to five thin coats is the standard recommendation. Each coat takes about an hour in the oven. Five coats give a deeper, more durable layer than three.
But even three properly applied coats will perform well for daily cooking.
Is a rusted griddle safe to cook on after restoration?
Yes, as long as the rust is completely removed and the griddle is properly seasoned. Rust itself is iron oxide, which is not toxic. The real concern is pitting that could trap food residue.
A thorough scrub and good seasoning eliminates that risk.
Can I use soap on my restored griddle?
Yes, you can. The old rule about never using soap dates back to when soaps contained harsh lye that stripped seasoning. Modern dish soaps are mild enough for seasoned cast iron.
Just avoid soaking and dry the griddle immediately after washing.
What's the best oil for seasoning?
Grapeseed oil is a solid all-around choice. It has a high smoke point, creates a hard finish, and holds up well to regular use. Canola oil and vegetable shortening are also reliable.
Avoid flaxseed oil despite its glossy results. It tends to flake off within months.
Should I restore my griddle or just buy a new one?
Restore it if the griddle has sentimental value, is a vintage piece with a smooth surface, or if you want to save money. Buy new if the griddle is cracked, heavily warped, or if you simply want a larger size or a specific modern feature like an integrated grease tray.
How do I fix patchy seasoning after restoration?
Patchy seasoning usually means the oil layer was uneven or too thick. Apply a fresh thin coat and bake at 450°F for an hour. Cook something fatty like bacon or onions on the stovetop to help fill in thin spots.
Two or three focused rounds usually even it out.