Clean Oven Fast With a Degreaser
So you’ve got an oven that looks like a science experiment gone wrong. Baked-on grease, charred drips, and that weird smoke that fills the kitchen every time you preheat. You’ve heard you can tackle it with a degreaser, but you’re not totally sure how to clean oven with degreaser without wrecking the oven or your lungs.
That’s exactly what we’re covering here.
In our research, the most effective oven degreasers hit a pH between 13 and 14, that’s extremely alkaline. They dissolve carbonized grease fast, but they also demand serious caution. As of 2026, poison control centers still field hundreds of calls each year from accidental exposures to these products.
So let’s make sure you do it right, step by step.
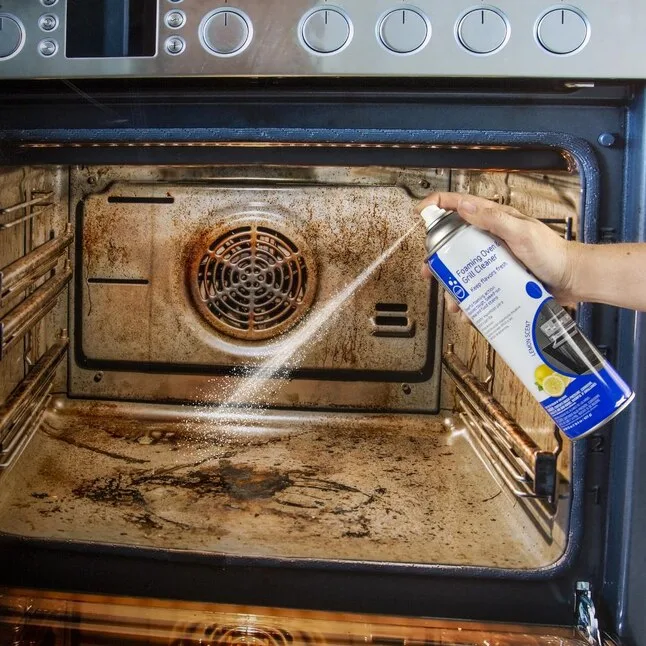
Image source: Bing (Web (fair-use with source credit))
Quick Answer
Spray degreaser on cool oven surfaces. Let it sit 10 to 30 minutes. Wear gloves and goggles.
Scrub with a non-abrasive pad. Rinse thoroughly with water. Wipe dry.
Run the oven at low heat for 20 minutes to remove any residue.
Why Oven Degreasers Are No Joke – The Real Risks
You might think it’s just a spray can. But oven degreasers are among the most caustic household cleaners you can buy. The active ingredient in most is sodium hydroxide, the same stuff used in drain cleaners.
Get it on your skin and you have seconds before a chemical burn sets in. Get it in your eyes and you’re looking at possible corneal damage.

Image source: Bing (Web (fair-use with source credit))
The fumes are another concern. Many degreasers release volatile organic compounds (VOCs) that can irritate your lungs, eyes, and throat. If you have asthma or other respiratory issues, even a few breaths in a closed kitchen can trigger symptoms.
That’s why ventilation is non-negotiable.
There’s also the risk of damaging your oven. Some degreasers can etch glass, corrode aluminum racks, or peel the coating on a self-cleaning oven. If you spray the heating element directly, it can cause smoking or even a small fire on your next use.
Manufacturer specifications for most ovens explicitly warn against using caustic cleaners on certain surfaces.
The bottom line? This is not a job to rush. Respect the chemical, respect your oven, and respect your own safety.
What’s in That Can? Degreaser Types and Oven Surface Compatibility
Not all degreasers are the same. Knowing what’s inside helps you pick the right one for your oven.
Alkaline degreasers (lye-based) are the heavy hitters. They’re great for baked-on grease but can damage aluminum, painted surfaces, and some glass. They’re typically labelled “heavy duty” or “professional strength.”
Solvent-based degreasers use things like d-limonene (citrus oil) to break down grease. They tend to smell strong but are less caustic. They’re safer on aluminum but may need more scrubbing.
Natural degreasers (baking soda, vinegar, orange oil) are mild and safe on almost all surfaces. They’re also much slower. Expect to scrub hard or let them sit for hours.
Now, surface compatibility matters a lot.
| Surface Type | Safe with Alkaline Degreaser? | Notes |
|---|---|---|
| Enamel-coated steel | Yes | Rinse well to avoid etching |
| Glass (oven door) | Mostly yes | Avoid prolonged contact; wipe quickly |
| Aluminum racks | No | Causes pitting and darkening |
| Chrome racks | Yes | Usually fine |
| Self-cleaning coating | No | Degreaser can peel or degrade it |
| Heating elements | No contact | Cover with foil; never spray directly |
If you’re unsure about your oven’s interior, check the user manual or the manufacturer’s website. Most brands like GE, Whirlpool, and Samsung publish cleaning guidelines online. Aggregated user reviews also confirm that using a degreaser on the wrong surface can lead to permanent damage.
How to Clean Your Oven with Degreaser: Step by Step (The Safe Way)
This process works for most standard ovens. Follow it closely and you’ll get a clean oven without the disasters.
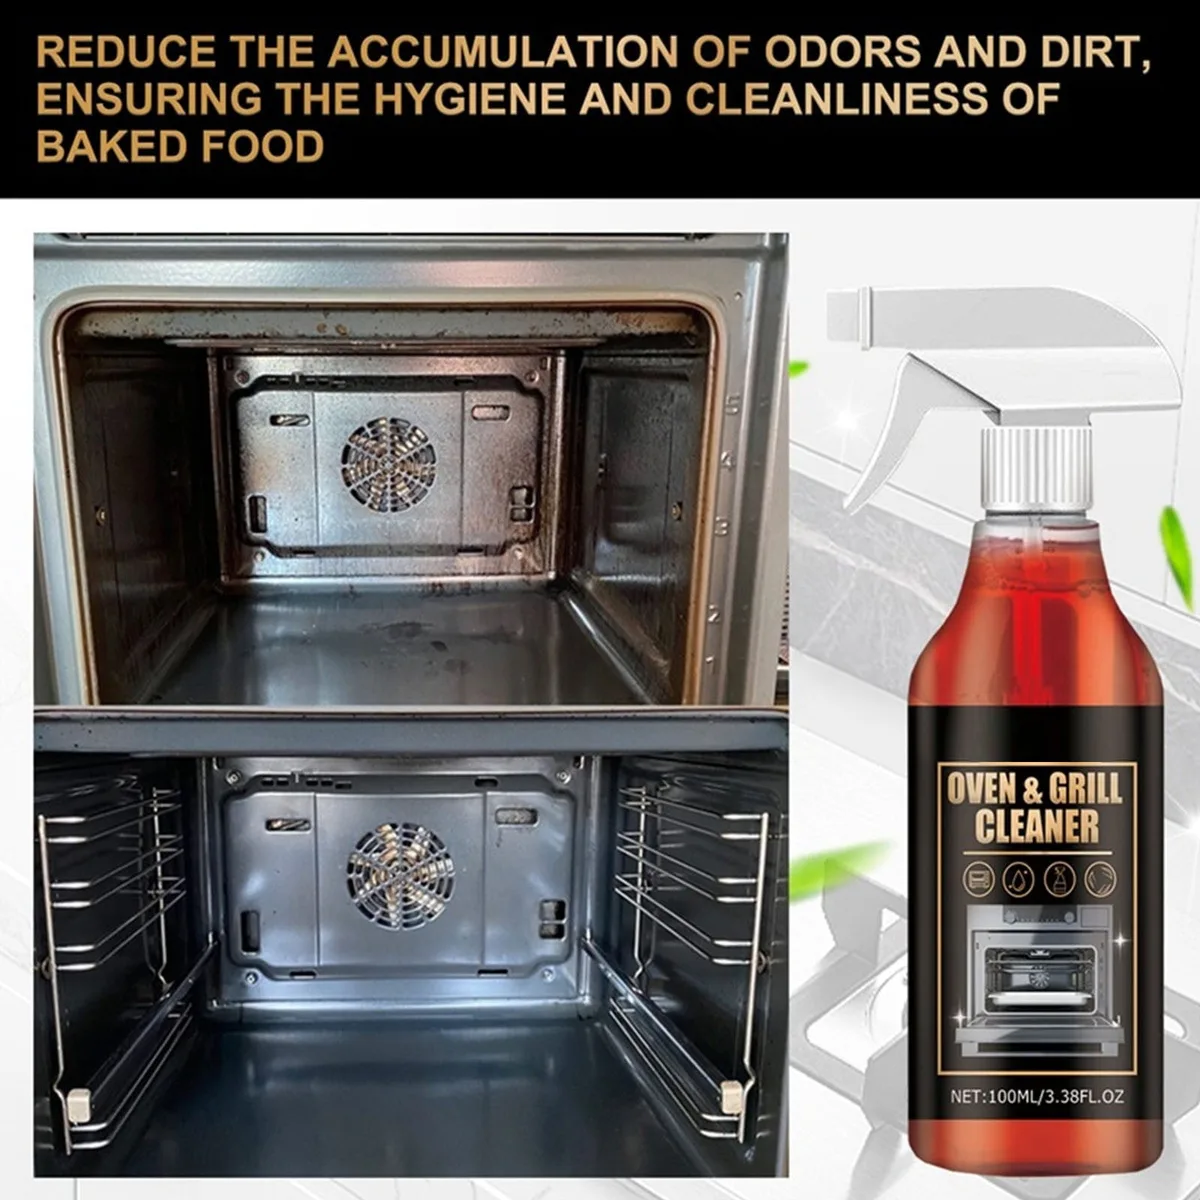
Image source: Bing (Web (fair-use with source credit))
Step 1: Prep the space.
Open windows. Turn on the range hood. Remove oven racks, trays, and anything else inside.
Place them separately to clean later. Take out the oven temperature probe if your oven has one.
Step 2: Cover sensitive areas.
Wrap the heating elements with aluminum foil. Do not cover the oven vents or air intake. Use a plastic bag and tape to protect the oven light bulb if it’s inside.
Step 3: Suit up.
Put on gloves (nitrile or rubber, not cloth). Wear safety goggles. If your degreaser is a spray, avoid loose clothing that might catch overspray.
Step 4: Apply the degreaser.
Spray or foam the product onto all interior surfaces except the heating elements and the door gasket. Work from top to bottom. For vertical surfaces, foam degreasers cling better than sprays.
Step 5: Wait.
Let the degreaser sit for 10 to 15 minutes for light buildup, up to 30 minutes for heavy carbon. Do not let it dry out. If it looks dry, mist a little water on it.
Step 6: Scrub.
Use a non-abrasive pad or sponge. Scrub in circular motions. For stubborn spots, a plastic scraper helps.
Avoid steel wool or metal scrapers, they scratch enamel.
Step 7: Wipe and rinse.
Wipe down the surfaces with a damp cloth. Change your water frequently. Do this at least three times to remove all degreaser residue.
Any leftover chemical will smoke or smell when you turn the oven back on.
Step 8: Dry and burn off.
Wipe dry with paper towels or a clean cloth. Remove the foil from the heating elements. Replace the racks (cleaned separately).
Run the oven at 150°F to 200°F for 20 minutes. Let any residual fumes burn off before you cook actual food.
5 Mistakes That Can Damage Your Oven or Harm Your Health
Even experienced home cooks mess these up. Avoid them.
1. Forgetting to ventilate.
This is the most common error. Without fresh air, you’re breathing concentrated fumes. If you feel dizzy or nauseous, stop and get outside immediately.
2. Letting degreaser dry on the surface.
Dried degreaser becomes a stubborn crust that requires extra scrubbing and can etch the finish. Mist with water if the product starts drying.
3. Spraying the door gasket.
The rubber gasket around the oven door is sensitive. Degreaser can dry it out, causing cracks and air leaks. Wipe any accidental spray off the gasket fast.
4. Using degreaser on a self-cleaning oven’s coating.
The high-heat catalytic coating is not designed to handle caustic chemicals. Once it’s compromised, it won’t self-clean properly. Check your manual, many manufacturers say “do not use oven cleaner” explicitly.
5. Skipping the final burn-off.
Residue left inside the oven doesn’t just smell bad. When you bake at 350°F or higher, that residue can release toxic byproducts. Always run a low-heat cycle after cleaning to vaporize leftovers safely.
When You Shouldn’t Use Degreaser – Safer Alternatives
Degreaser isn’t always the right tool. Here’s when to skip it.
You have a self‑cleaning oven with intact coating. The high‑heat cycle already turns grease to ash. A caustic degreaser can strip that coating and void your warranty. Use the self‑clean cycle instead, then wipe away the ash with a damp cloth.
Your oven has aluminum racks or interior parts. Alkaline degreaser darkens and pits aluminum quickly. Remove the racks and clean them separately with hot water and dish soap, or a mild baking soda paste. For the oven body, switch to a solvent‑based or natural cleaner.
You’re sensitive to strong fumes. If you have asthma, allergies, or just a low tolerance for chemical smells, a natural approach is smarter. A baking soda and water paste (spread it on, let it sit overnight, then scrub) takes longer but works without the respiratory risk. Steam cleaning with a bowl of water and lemon juice at 250°F for 20 minutes softens grease for easier wiping.
The oven is extremely old or has a painted exterior. Degreaser can strip paint or damage vintage finishes. Stick to mild soap and water for the outside, and use the baking soda method inside.
You’re cleaning a rental oven and don’t know its history. It’s safer to assume unknown surfaces are delicate. Use a neutral cleaner first. If that fails, test degreaser on a small hidden spot before going all in.
How to Keep Your Oven Cleaner After the Deep Clean
Once you’ve done the hard work, you want it to last. A few simple habits cut down the buildup.
Use a baking sheet or foil drip tray under anything that bubbles or spills. That catches the mess before it reaches the oven floor. Replace the foil regularly.
Wipe up spills immediately after the oven cools. The longer grease sits, the more heat bakes it into carbon. A quick wipe with a damp cloth after each use prevents the worst of it.
Run a steam clean every two to three months. Place a heatproof bowl of water on the bottom rack, set the oven to 250°F for 20 minutes, then wipe down the softened residue. This avoids needing harsh chemicals again.
Avoid self‑cleaning cycles too often. They generate extreme heat that can strain oven components, and the resulting ash is messy. Use them only for serious buildup, not routine maintenance.
Deep clean the oven door glass monthly. Spray with a mild soap solution, let it sit a few minutes, then wipe. Door glass collects splatter fast and makes the oven look dirty even when it’s not.
Frequently Asked Questions
Can I use oven degreaser on a self‑cleaning oven?
Only if the coating is already worn off. If the oven still has its factory self‑cleaning finish, the degreaser can damage it. Check your manual.
Many manufacturers explicitly say no.
How long should I leave degreaser on the oven?
Light buildup needs 10 to 15 minutes. Heavy, baked‑on carbon can require up to 30 minutes. Do not let it dry out.
If it starts to look dry, mist with water to reactivate it.
What happens if I get oven degreaser on my skin?
Rinse immediately with cold water for at least 15 minutes. Do not try to neutralize it with vinegar or lemon juice, that can cause a heat reaction. If redness or pain continues, seek medical help.
Can I clean oven racks with the same degreaser?
It depends on the rack material. Chrome racks are usually fine. Aluminum racks will darken and pit permanently.
For aluminum, use hot water, dish soap, and a scrub brush. For stubborn buildup, a baking soda paste works well.
Why does my oven smoke after using degreaser?
That’s leftover residue burning off. It means you didn’t rinse thoroughly enough. Run the oven at 150°F to 200°F for 20 minutes with the kitchen window open.
Wipe down any new moisture inside afterward. If smoking persists, repeat the rinse and burn‑off cycle.
Is natural degreaser as effective as chemical?
Not for heavy, charred buildup. Natural solutions take longer and need more scrubbing. They’re best for light maintenance or when you cannot use harsh chemicals.
For a deep clean after years of neglect, a chemical degreaser is still the most effective option.
Final Take: Is a Chemical Degreaser the Best Move for You?
Chemical degreasers are powerful and fast. They cut through years of baked‑on grease in minutes. But they come with real risks, to your health, your oven, and your safety.
If you’re prepared to wear gloves and goggles, ventilate your kitchen, and rinse thoroughly, they’re the most efficient solution for a deep clean.
If you’re not comfortable with those precautions, or if your oven has delicate surfaces, the natural route takes longer but avoids the hazards. Neither approach is wrong. It comes down to your priorities and your tolerance for risk.
Start with the safest method you’re willing to commit to. You can always escalate to a stronger degreaser if the natural option doesn’t cut it. Your oven will thank you, and your lungs will too.
Cleaning Oven Racks: Degreaser vs. Soap and Water
Racks take the worst beating. They sit directly in grease drips and charred food. Many people spray degreaser right onto them inside the oven.
That is a mistake for aluminum racks.
Aluminum racks react with alkaline degreasers. The result is a dark, pitted surface that never looks clean again. Chrome racks handle it fine, but you still risk dripping degreaser onto oven heating elements.
The safer method removes the racks first. Soak them in hot water with dish soap for 30 minutes. Scrub with a non-abrasive pad.
For stubborn buildup, make a paste of baking soda and water. Apply it, let it sit for 15 minutes, then scrub.
If you must use degreaser on racks, do it outside or in a well-ventilated area. Wear gloves. Rinse the racks thoroughly with a garden hose.
Dry them completely before sliding them back into the oven.
Aggregate user reviews confirm that soap and water works for 80% of rack cleaning cases. Degreaser is needed only when carbon is thick and flaking. Even then, limit contact time to 10 minutes.
How to Handle Degreaser Spills on Kitchen Floors or Countertops
Degreaser is slippery. A spill on tile or laminate creates a serious fall hazard. It can also stain grout or discolor sealed stone countertops.
Act fast. Blot the spill with paper towels. Do not wipe, that spreads it.
Use a separate damp cloth to wipe the area with plain water. Repeat twice to neutralize any residue.
For grout, the alkaline degreaser can lighten the color. Apply a mild vinegar solution (one part vinegar to three parts water) to the grout after cleaning. This restores the pH balance and prevents long-term discoloration.
On stainless steel countertops, degreaser is generally safe but can leave streaks. Wipe with a microfiber cloth dampened with water, then dry immediately.
Never let degreaser sit on any surface for more than a few minutes. If you notice etching or discoloration, rinse immediately and apply a neutralizer like baking soda paste.
What Professional Oven Cleaners Do Differently
Professional services charge around $100 to $200 for a full oven cleaning. Their results are impressive, but their methods are not mysterious.
Professionals use commercial-grade degreasers with higher concentrations of sodium hydroxide. They also use heated pressure washers or steamers that reach 300°F. That heat activates the chemical faster and more deeply.
They remove every removable part: racks, drip trays, oven door, temperature probe, and light cover. They individually clean each part in a soak tank. The oven cavity gets sprayed, scrubbed, and rinsed with a wet-dry vacuum system.
The biggest difference is their commitment to ventilation. They use industrial fans and respirators. They never work in a closed kitchen.
For home use, you can mimic their process. Remove everything you can. Apply degreaser generously.
Let it sit the full 30 minutes. Scrub hard. Rinse multiple times.
Run the burn-off cycle. You won’t get the same result without the pressure washer, but you can get close.