How to Deep Clean an Over-the-Range Microwave
It’s tempting to just spray some all-purpose cleaner inside your microwave and call it a day. But if you’ve never stopped to think about how to clean an over the range microwave, the one mounted above your stove, you could be doing more harm than good. Grease, grime, and trapped moisture don’t just smell bad; they can damage the exhaust fan, ruin the control panel, and even create a fire hazard if the filter gets clogged enough.
Manufacturer specifications indicate that most over-the-range microwaves use a mesh grease filter that should be cleaned every one to three months. As of 2026, the U.S. Consumer Product Safety Commission still lists grease buildup in recirculating vents as a common contributing factor in kitchen fires.
That’s not a risk you want to ignore. Let’s walk through the safe, effective way to clean this appliance, starting with why shortcuts are dangerous.
Why Cleaning Your OTR Microwave the Wrong Way Can Be Dangerous
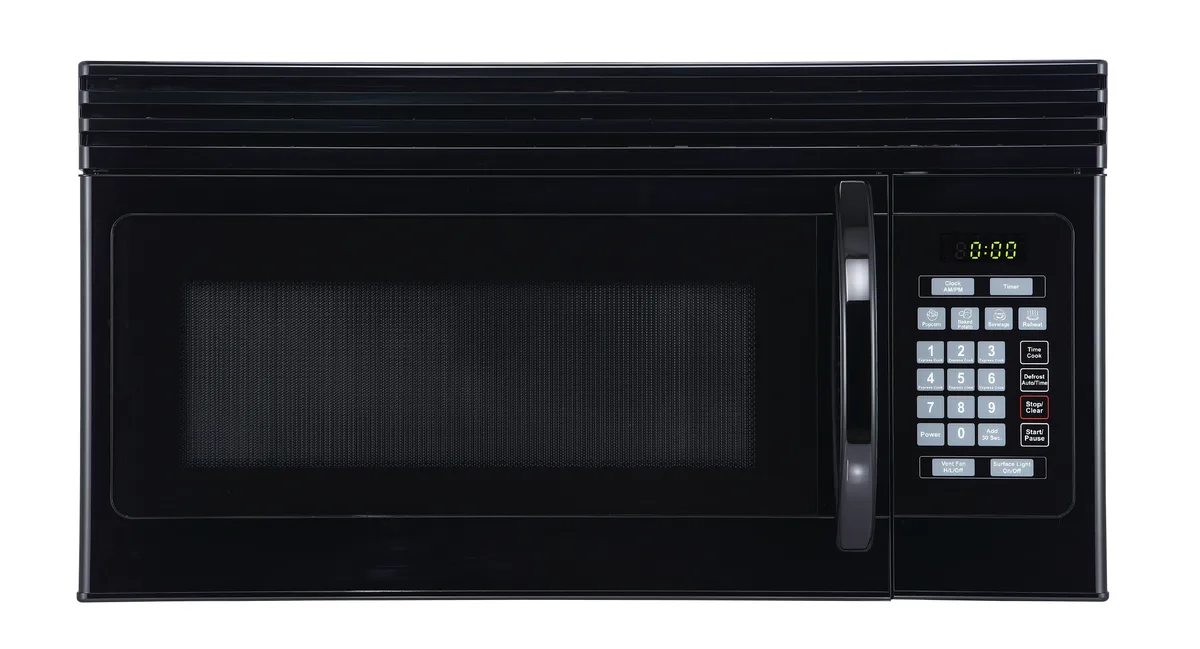
Image source: Bing (Web (fair-use with source credit))
The biggest mistake people make is spraying cleaner directly into the vent openings on top or near the control panel. Those vents lead straight to the fan motor and electrical components. Liquids inside the motor housing can cause short circuits, corrosion, or even a shock hazard when you turn the microwave back on.
Another hidden danger is letting the grease filter go too long without cleaning. As the mesh fills with cooking oil and dust, airflow drops. The fan has to work harder, and the motor can overheat.
In a worst case, accumulated grease near the heating element can ignite. That’s not fear-mongering; it’s a documented risk in fire safety reports from agencies like the CPSC.
Even the exterior matters. Harsh abrasives or bleach-based sprays can strip the protective coating on stainless steel, leading to rust spots and permanent discoloration. A scratched control panel may become unresponsive over time.
So the “quick wipe” mentality can cost you a lot more than a new sponge.
What’s Inside That You Should Know About — Filters, Vents, and Surfaces
Before you start scrubbing, it helps to understand what you’re dealing with. Every over-the-range microwave has three main areas that need different care.
The grease filter is a metal mesh panel located underneath the microwave, behind the vent opening. It captures airborne grease particles from cooking. Most filters are washable and reusable.
Some are dishwasher safe; others require hand washing. Check your manual or the part number stamped on the filter frame.
The charcoal filter (if your model is ductless/recirculating) sits behind the grease filter. It absorbs odors and can’t be washed. It must be replaced every six to twelve months.
You’ll know it’s time when cooking smells linger longer than usual.
The interior cavity and turntable collects food splatters and steam residue. The interior is typically coated with a painted or enamel surface that resists staining but can be etched by acidic cleaners.
The control panel is the most sensitive part. Even a small amount of moisture seeping under the membrane buttons can cause unresponsive keys or ghost presses.
The exterior surfaces can be stainless steel, black stainless, or painted. Each requires a different cleaner to avoid streaks or scratches.
| Area | Material / Type | Cleaning Frequency |
|---|---|---|
| Grease filter | metal mesh | Every 1–3 months |
| Charcoal filter | carbon-filled | Replace every 6–12 months |
| Interior cavity | painted/enamel | Weekly |
| Turntable | glass | Weekly |
| Control panel | membrane | As needed, gentle |
| Exterior | stainless steel or paint | Weekly or as needed |
Your Step-by-Step Cleaning Guide — Safe and Effective
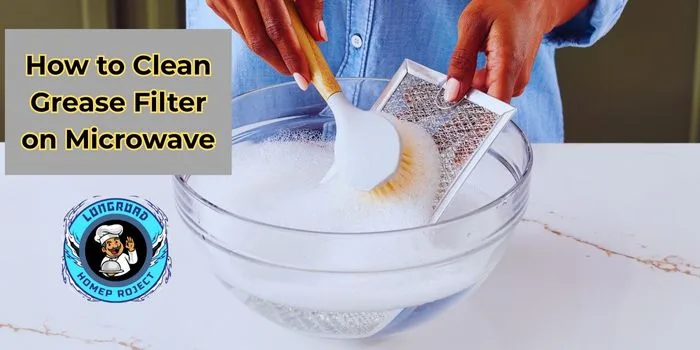
Image source: Bing (Web (fair-use with source credit))
Step 1: Unplug the microwave or turn off the breaker. This is non-negotiable. You eliminate any chance of electric shock while your hands are near vents and water.
Step 2: Remove the grease filter. Slide it out from the bottom. If it’s metal mesh and your model allows, place it in the dishwasher on the top rack.
If hand washing, soak it in hot water mixed with a few drops of dish soap for 10, 15 minutes. Scrub gently with a soft brush, rinse, and let it air dry completely on a towel.
Step 3: Clean the interior cavity. Fill a microwave-safe bowl with 1 cup of water and 2 tablespoons of white vinegar. Microwave on high for 2, 3 minutes until steam builds up.
Let it sit for 5 minutes without opening the door. The steam loosens hardened food. Then wipe the interior with a soft sponge or microfiber cloth.
Avoid abrasive scouring pads.
Step 4: Remove and wash the turntable and glass plate separately. Soap and warm water work fine. Dry them before placing back inside.
Do not put the glass plate in the dishwasher unless the manual says it’s safe.
Step 5: Clean the exterior. For stainless steel, use a mild soap-and-water mix or a dedicated stainless steel cleaner. Wipe with the grain, look closely at the door to see which direction the brushed finish runs.
Buff dry immediately with a clean microfiber cloth to prevent water spots.
Step 6: Wipe the control panel with a slightly damp (not wet) cloth. Spray cleaner onto the cloth, not the panel. Gently pat dry.
Never rub aggressively.
Step 7: Reinstall the grease filter only after it is completely dry. Wet filters can trap moisture inside the vent system and promote mold growth. Plug the microwave back in and test the fan and light to confirm everything works.
The Most Common Cleaning Mistakes (and What to Do Instead)
Even well-intentioned cleaning routines can go wrong. Here are the errors I see most often in aggregate user reviews and repair forums.
- Spraying cleaner directly onto the control panel. Moisture seeps under the membrane buttons. Instead, spray cleaner onto a cloth, then wipe.
- Using oven cleaner or bleach inside the cavity. These chemicals can damage the interior coating and leave harmful residues. Stick to vinegar water or mild dish soap.
- Scrubbing the grease filter with a wire brush. It scratches the mesh and reduces its ability to trap grease. Use a soft-bristle brush or your fingers.
- Ignoring the charcoal filter. Many people don’t realize they have one. If your microwave vents back into the kitchen, there is a charcoal filter that needs replacing. Not cleaning it makes the microwave circulate stale air.
- Putting the grease filter in the dishwasher when the manual says hand wash only. High heat and detergent can warp some filters. Always check the manufacturer guidelines.
- Using paper towels on stainless steel. They often leave lint and streaks. Microfiber cloths work far better.
| Mistake | Consequence | Fix |
|---|---|---|
| Spray on control panel | Unresponsive buttons | Spray cloth first |
| Oven cleaner inside | Coating damage, residue | Use vinegar water |
| Wire brush on filter | Reduced filtration | Soft brush only |
| Forget charcoal filter | Lingering odors | Replace every 6–12 months |
| Paper towels on steel | Streaks and lint | Use microfiber |
When to Replace the Charcoal Filter — and Other Maintenance Must-Knows
The charcoal filter is a small rectangular pad filled with activated carbon. It traps odors as air passes through before being recirculated back into your kitchen. Over time, the carbon becomes saturated and stops working.
You should replace it every six months if you cook frequently. If you only use the microwave occasionally, once a year may be enough. A clear sign it’s time: after heating strong-smelling food like fish or curry, the smell hangs around for hours.
To check if you have a charcoal filter, open the vent cover (usually held by a clip or screw) behind the grease filter. If you see a black felt-like pad, that’s it. Replacement filters are specific to your microwave brand and model.
Buy the correct part from the manufacturer or a certified appliance parts retailer, generic filters often don’t fit snugly and leak odors.
Other maintenance checks to schedule:
- Inspect the vent cover seals for cracks or gaps. If air leaks, grease can bypass the filter.
- Clean the exterior vent grille on the top or back of the microwave (depending on installation) every few months. A vacuum with a brush attachment works well.
- Lubricate hinges? No, most modern microwaves have sealed hinges. Just wipe them clean.
- Run the exhaust fan for a few minutes after each cooking session to help dry out any moisture inside the vent path.
Quick Tips for Streak-Free Stainless Steel (Without Damage)
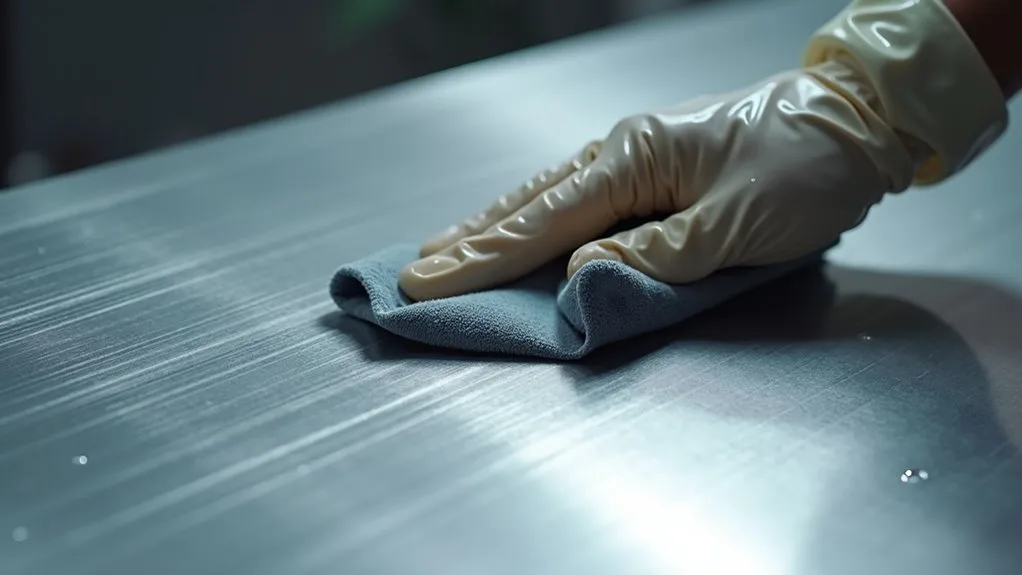
Image source: Bing (Web (fair-use with source credit))
Stainless steel shows every fingerprint, water spot, and swipe mark. The good news is that getting a mirror-like finish doesn’t require expensive polishes. It comes down to three things: the right cloth, the right motion, and the right cleaner.
Use a microfiber cloth. Paper towels leave lint. Cotton rags can trap grit that scratches the surface. Microfiber grabs oils without abrasion.
Always wipe with the grain. Look at the door under bright light. You’ll see fine brush lines running in one direction. Wipe parallel to those lines.
Wiping against them creates visible crosshatch marks.
Skip the all-purpose spray. Many kitchen cleaners contain ammonia or bleach that dull the protective layer over time. Instead, use a tiny drop of dish soap in warm water, or a 50/50 mix of white vinegar and water. Spray it on the cloth, never the surface.
Buff dry immediately. Water left to air dry leaves mineral spots. Dry with a second clean microfiber cloth in the same direction as the grain.
For extra shine, apply a few drops of mineral oil on a cloth and buff gently. It fills micro‑scratches and repels fingerprints for days. Just don’t overdo it, a thin layer is plenty.
Frequently Asked Questions
Can I put my over-the-range microwave grease filter in the dishwasher?
It depends on the filter. Many metal mesh filters are dishwasher‑safe on the top rack. Check your manual or look for a stamp on the filter frame.
If it’s aluminum, hand washing is safer, dish detergent can discolor it over time.
How often should I clean the charcoal filter?
Charcoal filters cannot be washed. Replace them every six to twelve months depending on how much you cook. If your kitchen smells like last night’s fish after running the fan, it’s past time to swap it.
What should I do if my microwave control panel stops working after cleaning?
Unplug the microwave and let it sit for 24 hours. Moisture under the membrane buttons often evaporates on its own. If it still doesn’t respond, the panel may be damaged.
Contact a qualified technician or the manufacturer for repair options.
Is it safe to use steam to clean the inside of the microwave?
Yes, steaming vinegar water for 2‑3 minutes is one of the safest methods. It loosens stuck‑on food without harsh chemicals. Just wipe the interior dry afterward to prevent moisture from collecting under the turntable.