Master Meat Thermometer Calibration in Minutes
You bought a nice instant-read thermometer, and you're ready to cook the perfect steak or a holiday bird. But you just dropped it on the kitchen floor, or it's been sitting in a drawer for a year. Can you trust that number?
Knowing how to calibrate a meat thermometer is the only way to know for sure, because a thermometer that's off by even a few degrees can mean the difference between safe, juicy meat and a food safety gamble.
Per USDA guidelines, poultry needs to hit 165°F internally to kill salmonella, and ground beef needs 160°F. A thermometer reading just five degrees low could leave you serving dangerous food. That's why calibration isn't an optional skill.
It's the single step that makes your thermometer a reliable tool instead of a guessing game. Let's walk through exactly how to do it.
Quick Answer
Calibrate a meat thermometer using the ice water method or the boiling water method. For the ice water method, fill a glass with crushed ice and water. Insert the probe at least two inches deep, not touching the glass.
Wait 30 seconds. It should read 32°F (0°C). If not, adjust the calibration nut or reset button.
For boiling water, use distilled water, and remember altitude changes the boiling point.
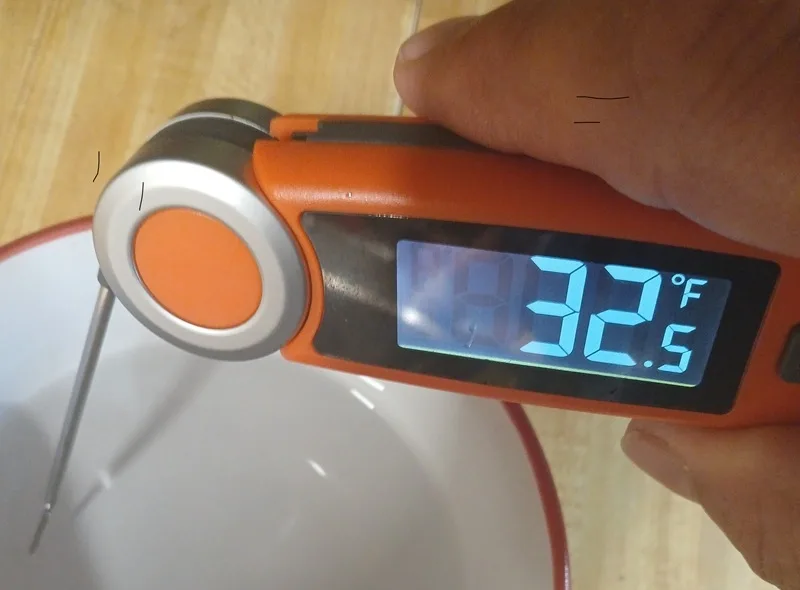
Image source: Bing (Web (fair-use with source credit))
Why Accuracy Matters (The Real Stakes)
A meat thermometer is a safety device before it's a cooking tool. If the reading is off by even a few degrees, you lose that safety net. Undercooked poultry can harbor salmonella.
Ground meats can carry E. coli. The USDA publishes clear safe minimum internal temperatures for a reason: they're backed by food safety science.
For the home cook, the stakes are simpler. You want food that is safe to eat and tastes good. A thermometer that reads 10°F high will have you pulling a roast out when it's still raw inside.
One that reads 10°F low will dry out that chicken breast you worked so hard to get right.
As of 2026, most thermometers on the market claim accuracy within ±2°F. That's acceptable for most cooking, but only if you verify it through calibration. Without that check, you have no idea if your thermometer is within that window or completely unreliable.
What Type of Thermometer Do You Have? (Digital vs. Analog)
Before you calibrate, you need to know what you're working with. The process differs depending on your thermometer design.
Analog Dial Thermometers
These are the classic round-faced thermometers with a metal stem. They use a bimetallic coil that expands and contracts with temperature. Look for a small hex nut or adjustment screw located directly behind the dial face.
That's your calibration point.
You turn that nut with a small wrench or pliers while the probe is in the reference water. Turn clockwise to increase the reading, counterclockwise to decrease it. Some models need you to hold the dial face still while you turn the nut.
Digital Instant-Read Thermometers
Most digital thermometers, including popular pen-style models, are factory-calibrated. Many cannot be adjusted by the user at all. You press a reset button if one exists, or you simply test them and replace them if they're off.
Some high-end professional digital thermometers allow recalibration through a button combination or menu setting. Check your user manual. If your digital model doesn't have a recalibration option, and it reads more than ±2°F off, it's time to buy a new one.
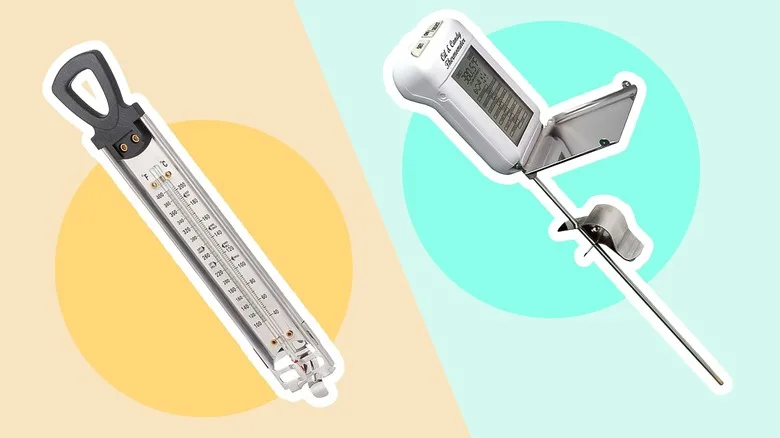
Image source: Bing (Web (fair-use with source credit))
Leave-In Probe Thermometers
These are the ones you insert into a roast or turkey and leave in the oven. Many have a probe connected by a wire to a base unit. Calibration for these varies widely by brand.
Some allow you to recalibrate through the base unit settings. Others are sealed units that require replacement.
The Two Calibration Methods (Which One to Use When)
You have two reliable ways to check your thermometer: the ice water method and the boiling water method. Each has strengths and a best-use scenario.
Ice Water Method (Best for Most Home Cooks)
This is the method we recommend for almost everyone. It uses the freezing point of water, which is always 32°F (0°C) regardless of your altitude. That's a huge advantage.
To set it up, fill a glass or small container with crushed ice. Add clean water until the ice is just submerged. Let it sit for a minute to stabilize.
Then insert your thermometer probe at least two inches deep, making sure it doesn't touch the sides or bottom of the glass.
The reading should stabilize at 32°F. If it's off, that's how much you need to adjust.
Boiling Water Method (Use When You Cannot Make Ice)
This method is useful if you don't have ice handy. Bring a pot of distilled water to a full rolling boil. Insert the probe into the water, again at least two inches deep, not touching the pot.
The problem? The boiling point depends on your altitude. At sea level, it's 212°F.
For every 500 feet above sea level, the boiling point drops by about 1°F. At 5,000 feet, water boils at roughly 202°F. You need to know your elevation and adjust your target accordingly.
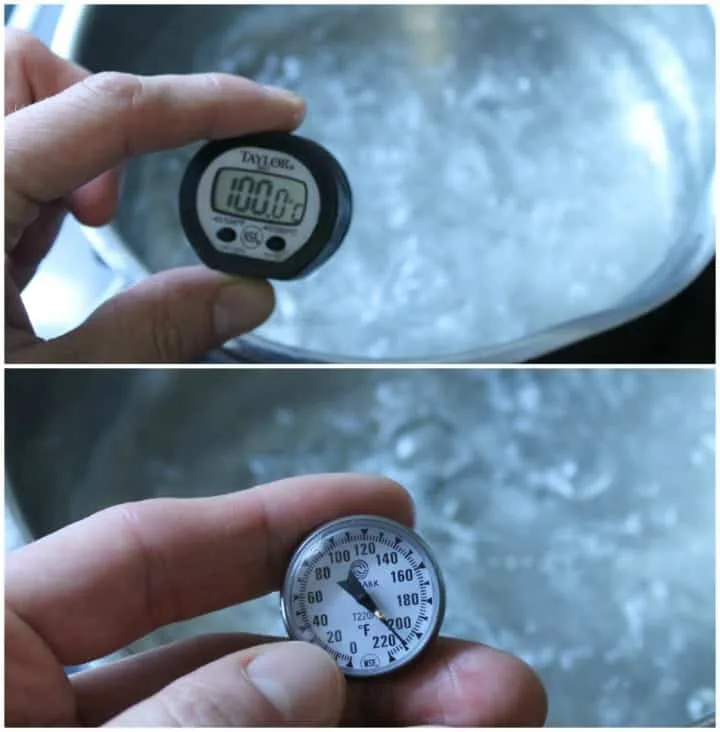
Image source: Bing (Web (fair-use with source credit))
If you don't know your altitude, a quick online search of your city name plus "elevation" will give it to you. Use this method only when you can apply that correction.
| Method | Target Temperature | Need to Know Your Altitude? | Best For |
|---|---|---|---|
| Ice Water | 32°F (0°C) | No | Every home cook |
| Boiling Water | 212°F at sea level | Yes | When no ice is available |
Step-by-Step – Calibrate Your Thermometer
Let's run through the process from start to finish. We'll focus on the ice water method since it works for everyone.
What You'll Need
- Crushed ice (enough to fill a tall glass)
- Clean tap water
- A tall glass or narrow container
- Small pliers or a wrench (for analog dial thermometers)
- Your meat thermometer
The Process
Step 1: Prepare the ice bath. Fill your glass with crushed ice all the way to the top. Pour in cold water until the ice is barely covered. Give it a quick stir and let it sit for one minute.
The mixture should be a thick slush.
Step 2: Insert the probe. Place the thermometer probe into the center of the ice bath. Push it in at least two inches. Make sure the probe tip is not touching the glass on any side.
Hold it steady.
Step 3: Wait and read. Wait at least 30 seconds for the reading to stabilize. Analog dial thermometers may take a full minute. Check the reading.
It should be exactly 32°F or 0°C.
Step 4: Adjust if needed. If the reading is off, make your adjustment now. For analog thermometers, use the small wrench to turn the hex nut behind the dial. Turn clockwise to increase the temperature, counterclockwise to decrease it.
Keep the probe in the ice bath while you adjust. Turn in small increments and recheck.
For digital thermometers with a reset button, press it while the probe is in the ice bath. The display should reset to 32°F.
Step 5: Recheck. After your adjustment, wait another 30 seconds and confirm the reading is now correct. If it's still off, repeat the adjustment until it hits 32°F.
Step 6: Test with boiling water (optional). For extra confidence, you can test in boiling water afterward. Just remember to account for altitude.
Common Calibration Mistakes (That Throw Off Your Readings)
Even with good intentions, people make errors during calibration. Here are the ones we see most often.
Touching the Glass
The glass itself is not at the same temperature as the ice water. If your probe touches the side or bottom of the glass, you'll get a false reading. The probe must be suspended in the water, surrounded by ice.
Not Using Enough Ice
A cup of water with a few ice cubes floating in it is not an ice bath. You need a dense slush of crushed ice. The water temperature must be at freezing point.
Cubes create pockets of warmer water.
Not Waiting Long Enough
Thermometers, especially analog dial models, take time to stabilize. If you read it immediately, the needle or number hasn't settled yet. Wait a full 30 to 60 seconds for an accurate reading.
Forgetting About Altitude with Boiling Water
This is the most common error with the boiling water method. Someone at 4,000 feet sees their thermometer read 208°F in boiling water and thinks it's broken. It isn't.
Water boils at about 208°F at that elevation. Know your altitude before you test.
Adjusting the Wrong Thing
On some analog thermometers, the entire dial face rotates. Don't twist the face thinking it's the calibration nut. The adjustment is a small nut or screw behind the dial, not the dial itself.
If you force the wrong part, you can break the thermometer.
When to Replace vs. Recalibrate (Don't Waste Money or Time)
Not every inaccurate thermometer can be fixed. Knowing when to replace saves you frustration and keeps your cooking accurate.
When Recalibration Works
Recalibration is the right move if you have an adjustable analog thermometer that drifted over time. Most analog models with a hex nut behind the dial can be brought back to spec. You should also recalibrate after dropping a thermometer, after exposing it to extreme heat, or at the start of grilling season.
For digital thermometers with a reset button, recalibration is just as straightforward. Press the button while the probe is in the ice bath. The display resets to 32°F.
When You Should Replace Instead
Some thermometers simply cannot be recalibrated. Many budget-friendly digital instant-read models lack any adjustment feature. If yours is off by more than 2°F and has no reset button, replacement is the only option.
Replace a thermometer if the display is cracked, the probe is bent, or the seal around the stem is broken. Water damage inside a digital unit cannot be fixed. Replace it if the readings jump erratically or fail to stabilize.
The Cost Reality Check
A basic analog thermometer costs less than ten dollars. An entry-level digital instant-read runs fifteen to thirty dollars. Compare that to the cost of a ruined brisket or a case of food poisoning.
Spending twenty dollars every couple of years on a reliable thermometer is cheap insurance.
| Condition | Recalibrate? | Replace? |
|---|---|---|
| Analog dial off by a few degrees | Yes | No |
| Digital with reset button off by a few degrees | Yes | No |
| Digital with no reset button off by more than 2°F | No | Yes |
| Cracked display or broken probe | No | Yes |
| Readings jump around or never stabilize | No | Yes |
Frequently Asked Questions
How often should I calibrate my meat thermometer?
Calibrate your thermometer before its first use, then at least once per month if you cook regularly. Calibrate it immediately after dropping it, exposing it to extreme heat, or submerging the display. Professional kitchens calibrate weekly or even daily.
Can I calibrate a digital thermometer without a reset button?
Most digital thermometers without a reset button cannot be user-calibrated. You can test them using the ice water method to verify accuracy. If they read outside the ±2°F tolerance, you need to replace them.
Some high-end digital models allow calibration through hidden menu settings, so check your manual.
Does altitude really affect the boiling water method?
Yes, significantly. At sea level, water boils at 212°F. At 5,000 feet, it boils at about 202°F.
For every 500 feet of elevation gain, the boiling point drops roughly 1°F. If you live in Denver, your boiling water reference point is around 203°F. The ice water method avoids this problem entirely.
Why does my thermometer show 34°F in ice water?
A reading of 34°F in an ice bath usually means the mixture is not cold enough. You need more crushed ice and less water. The mixture should be a thick slush, not water with floating ice cubes.
Stir it and wait a full minute before testing again. If it still reads 34°F, you likely need to adjust the calibration.
Can I use tap water for calibration?
Yes, tap water works fine for the ice water method. For the boiling water method, use distilled water if possible. Tap water contains dissolved minerals that can raise the boiling point slightly.
The difference is small, usually less than a degree, but distilled water is more accurate.
What temperature should my thermometer read in boiling water at 3,500 feet?
At 3,500 feet above sea level, water boils at approximately 205°F. Deduct about 1°F per 500 feet of elevation from the standard 212°F. So at 3,500 feet, your target is 212 minus 7, or roughly 205°F.
Check your exact elevation online for a precise calculation.
The Bottom Line (One Quick Check Before Every Cook)
A five-second ice bath test before you cook can save you from serving unsafe food or ruining a good meal. You do not need fancy equipment. You need crushed ice, water, and thirty seconds of your time.
Make calibration a habit. Test your thermometer the night before a big cookout. Test it when you pull it out of the drawer after months of storage.
Test it after someone drops it by accident.
Thermometers drift over time. That is normal. What is not normal is assuming yours is accurate without checking.
Your thermometer is a tool, not a talisman. It needs maintenance just like your knives and your grill.
Keep a small wrench or pliers near your thermometer drawer. Write the date of your last calibration on a sticky note. Set a monthly reminder on your phone.
These tiny habits are what separate consistently great cooking from occasional food poisoning scares.
And if your thermometer cannot be calibrated and reads off by more than two degrees, replace it. The cost of a new one is nothing compared to the cost of a ruined dinner or a trip to the emergency room. Cook safe, cook smart, and never trust a thermometer you have not tested.