Sharpen Your Old Pampered Chef Knife Sharpener
If you're wondering how to use old pampered chef knife sharpener, you're not alone. These vintage sharpeners show up in thrift stores, inherited kitchen drawers, and the back of cabinets, usually with no manual and a lot of confusing slots. The good news is that both major designs still work beautifully.
The catch is that they need completely different techniques.
Manufacturer specifications from the era indicate the ceramic-rod model sharpens best at a 20-degree angle, while the two-slot pull-through uses a fixed tungsten-carbide guide. That one detail changes everything about how you move the blade. Before anything else, let's figure out which one you're actually holding.
First Things First: Which Old Pampered Chef Sharpener Do You Actually Have?
Pampered Chef made two very different sharpeners during its early party-kitchen era. They look similar in photos but work nothing alike.
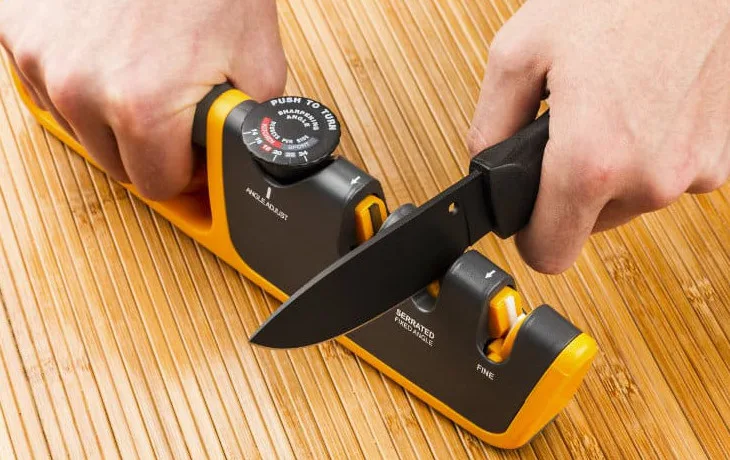
If yours is a flat base with two angled slots and a non-slip bottom, that's the pull-through model. It uses a coarse tungsten-carbide slot for damaged edges and a fine ceramic slot for routine honing. The slots sit at a fixed angle, so you just pull the blade through.
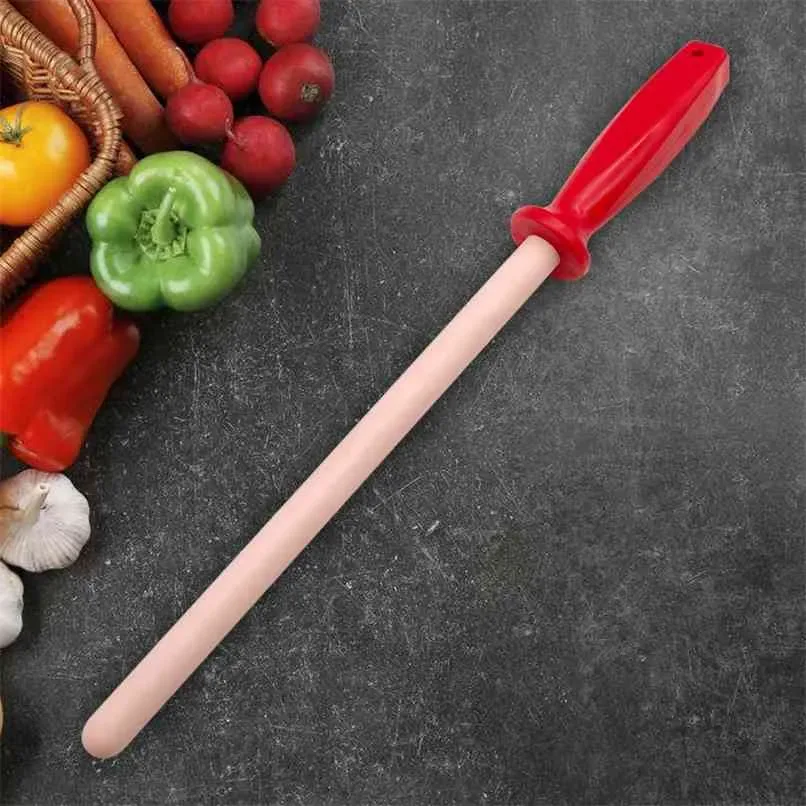
If yours is a short handheld rod with a round handle and a finger guard above the ceramic surface, that's the rod sharpener. It acts like a honing steel, which means you control the angle with your wrist.
| Feature | Pull-Through | Handheld Rod |
|---|---|---|
| Shape | Flat base, two slots | Rod with handle and guard |
| Cutting surface | Carbide + ceramic inserts | Ceramic rod |
| Angle control | Fixed by base | You set it |
| Best for | Fastest edge repair | Gentle daily touch-up |
As of 2026, these old units still show up on resale sites for $10 to $25. The quickest visual test is the edge profile. A pull-through has V-shaped notches cut into the base.
A rod sharpener is smooth and tapered. You can cross-check model details on Pampered Chef's official site. The pull-through is faster, but the rod is gentler on your knife.
The Core Technique: Angle, Pressure, and Direction That Works on Every Model
Sharpening comes down to three variables. Angle, pressure, and direction. Get those right, and either sharpener will make your knives scary sharp.
Angle matters first. Most Western kitchen knives have a 15 to 20 degree edge. Manufacturer specifications indicate that a 20-degree angle works best with these Pampered Chef tools.
The pull-through handles that automatically. The rod requires you to hold the blade against the rod at roughly the same tilt as a cheese slicer.
Pressure should stay light. Pushing the knife into the slot with force removes too much metal and leaves a weak, jagged edge. Use barely enough pressure to feel the blade bite.
Direction is where people get confused. The pull-through only works on a downward, heel-to-tip pull. The rod works on a downward stroke that mimics slicing thin air.
Pushing upward on either one is a recipe for chipped edges.
Listen for a light gritty scrape. That sound means the abrasive is actually cutting steel. No sound usually means the angle is too shallow.
How to Use the Two-Slot Pull-Through Sharpener (Step-by-Step)
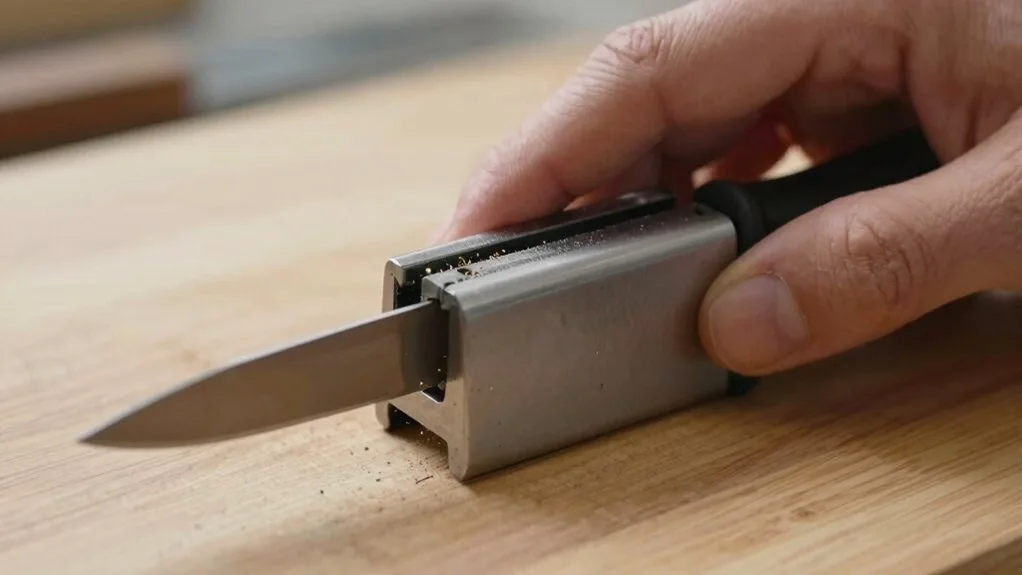
This model has two slots on the base, sometimes labeled coarse and fine. The coarse slot uses a tungsten-carbide blade to grind a fresh edge. The fine slot uses a ceramic disc to hone it.
Set the sharpener on a damp paper towel or rubber mat. It must not move while you pull.
Follow these steps:
- If the knife is quite dull, start with the coarse slot. Use 3 to 5 pulls per side.
- Insert the blade at the heel, with the edge facing down and slightly toward you.
- Pull the knife toward you in one smooth motion. Don't rock the blade.
- Switch to the fine slot and do 2 pulls per side.
- Wipe away metal dust with a damp cloth.
For a knife that's only slightly dull, skip the coarse slot entirely. Two to three fine passes per side usually restores a working edge. If you hear a rough grinding, let up on the pressure.
How to Use the Handheld Ceramic Rod Sharpener (Step-by-Step)
This one works like a honing rod, not a grinder. It realigns the edge instead of carving away steel. The finger guard keeps your knuckles safe if the blade slips.
Place the rod tip on a folded towel or cutting board. Angle the handle slightly toward you. Keep your thumb behind the finger guard.
- Rest the knife blade against the rod near the handle.
- Tilt the blade to about 20 degrees. Think of a slice of cheese.
- Pull the knife down and toward you, sliding from heel to tip.
- Alternate sides. Use 5 to 7 strokes per side for a moderately dull blade.
- Use feather-light pressure. Let the ceramic rod do the work.
Never push the knife upward into the rod. That motion chips the edge and dulls the tip. Also avoid twisting your wrist mid-stroke, which makes the angle uneven.
When you are done, the blade should catch on a fingernail. If it just glides over, repeat with a lighter touch.
What "Working" Looks Like: Visual and Tactile Cues That You're Doing It Right
Sharpening creates a tiny wire edge called a burr. It is hard to see but easy to feel.
Run your thumb across the edge, from the back of the blade to the front, moving sideways. If you feel a slight catch, like a microscopic hook, the edge is formed. That is the signal to flip the blade.
Check the edge in good light. You should see a thin, bright line running along the blade. Scratches, dark spots, or a wavy reflection mean your angle drifted.
A little gray dust is normal. Heavy metal shavings mean too much pressure. Stop and lighten up.
After sharpening, run a few quick tests:
| Test | What you want |
|---|---|
| Thumb drag | Slight catch, not pain |
| Receipt paper | Clean cut, no tear |
| Tomato skin | Pierces with light touch |
If the knife fails any test, do two more fine passes on either tool. Then test again.
Common Mistakes That Chip Blades or Wreck the Sharpener
The biggest mistake is rocking the blade mid-stroke. When you change the angle while pulling, you carve a curved edge instead of a straight one. That curve creates weak spots that chip under normal use.
Overusing the coarse slot is almost as bad. Pull-through sharpeners with tungsten carbide inserts remove noticeable amounts of steel. Use the coarse slot only when the blade is truly dull.
For routine touch-ups, stick to the fine ceramic slot.
| Mistake | What happens | Fix |
|---|---|---|
| Rocking the blade | Uneven edge, chipping | Keep wrist locked, pull straight |
| Too many coarse passes | Thin blade, shorter life | Use 3-5 passes max, then switch to fine |
| Pushing backward on rod | Chipped edge, dull tip | Always pull down and toward you |
| Heavy pressure | Jagged burr, poor edge retention | Use light grip, let abrasive bite |
Pulling the blade backward on the ceramic rod is a fast way to ruin the edge. The ceramic cuts in only one direction. Reverse motion creates micro-fractures along the bevel.
Too much pressure creates a ragged burr that folds over instead of shearing cleanly. You might feel a sharp edge at first, but it collapses after a few cuts. Light hands produce edges that last.
Cleaning and Care: Keeping a Vintage Sharpener Functional
Metal filings collect inside the slots and on the ceramic rod over time. Those filings reduce cutting efficiency and can scratch your blade. Clean the sharpener after every use.
For the pull-through model, tap the base gently over the trash to dislodge loose dust. Wipe the slots with a dry paper towel. For stuck filings, use a soft toothbrush or a compressed air duster.
Never rinse the sharpener with water. Moisture can rust the internal metal components.
For the ceramic rod model, rinse the rod under warm water and wipe it dry immediately. Dish soap is fine, but avoid abrasive scrubbers. A clean ceramic surface cuts better and lasts longer than a clogged one.
Check the condition of both sharpeners regularly. Inspect the tungsten carbide inserts for chips or dull spots. Test the ceramic rod for smoothness.
If the rod feels glassy instead of slightly rough, the abrasive layer has worn away. Replace the unit at that point.
Store the sharpener in a dry drawer or cabinet. Aeration is fine, but direct contact with other metal tools can transfer rust. Keep it away from steam and heat sources.
Frequently Asked Questions
Can I sharpen serrated knives with these old Pampered Chef sharpeners?
No. Serrated knives need a tapered round file that fits each scallop. Pulling a serrated blade through the slot or across the rod will flatten the teeth and ruin the knife.
Use a dedicated serrated knife sharpener instead.
How often should I sharpen my knives with an old Pampered Chef sharpener?
For most home cooks, one light touch-up every two to four weeks keeps blades working well. If you cut on wood or bamboo boards, you may need weekly passes. If you use glass or stone boards, expect to sharpen more often.
How do I know when the sharpener is worn out and needs replacing?
When the pull-through slots feel smooth instead of grippy, the abrasive has worn down. When the ceramic rod feels polished and refuses to raise a burr, it is spent. Most units last two to three years with regular use before replacement.
Can I use these old sharpeners on ceramic or Japanese knives?
Ceramic knives will shatter. Do not try. Japanese knives with harder steel (60+ Rockwell) can chip under the tungsten carbide slot.
Use the ceramic rod only, with very light pressure, for those knives.
Is it worth keeping an old Pampered Chef sharpener or should I upgrade?
If your pull-through slots still bite and the ceramic rod still feels slightly rough, keep it. They are well-built tools. If the inserts are smooth or the rod is polished, replace it.
Modern options with adjustable angles offer more versatility at a low cost.