The Easiest Way to Sharpen Zyliss Knives
Dull Zyliss knife? Here's how to sharpen Zyliss knives without ruining the edge. The right method hinges on a single visual check: whether the blade is serrated or straight.
Mix those up, and you can permanently damage a knife that was only a few passes away from being sharp.
Manufacturer specifications, confirmed by Zyliss's official product pages, indicate that most Zyliss kitchen knives use a serrated edge with roughly 40 to 50 scallops on a typical paring model. As of 2026, Zyliss still markets many blades as "stay sharp" with little sharpening guidance. The good news is that both edge types respond well to home sharpening.
You just need the right rod, stone, and technique.
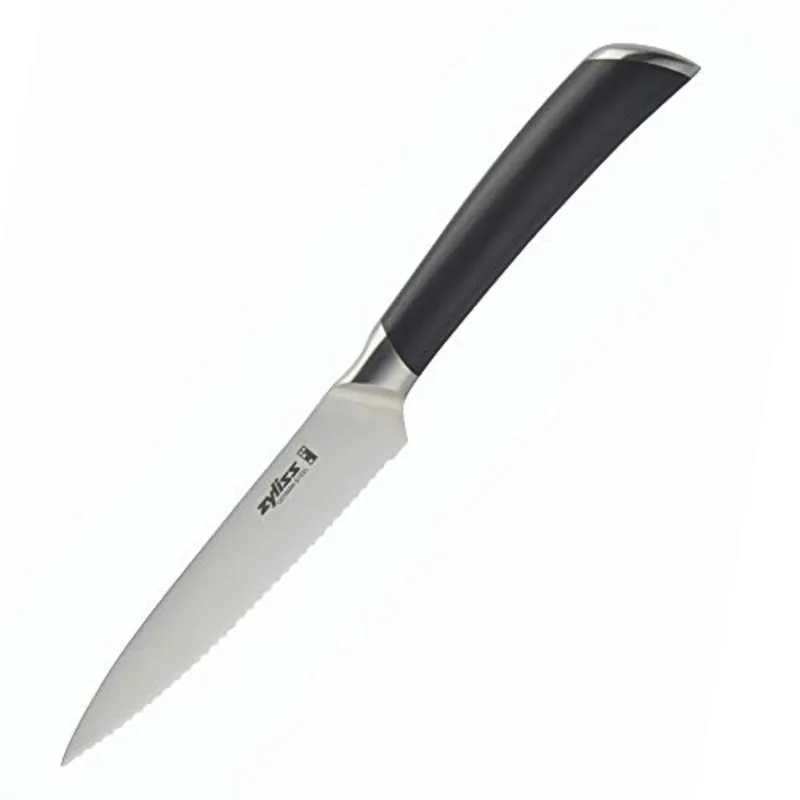
Image source: Bing (Web (fair-use with source credit))
Quick Answer
To sharpen Zyliss knives, first check if the blade is serrated or straight. Serrated edges need a tapered ceramic rod. Use it one scallop at a time.
Straight edges need a whetstone. Raise a burr, then polish it away. Test the edge gently.
First, Know Your Blade: Serrated or Straight-Edge Zyliss
Before anything else, check the blade. The quickest test uses your fingertip. Place your finger at a right angle to the edge and pull it lightly across.
If you feel a series of bumps, the blade is serrated. If it feels smooth and continuous, it's straight-edged. Never slide your finger along the blade's length.
You'll end up with a cut.
The visual test is just as reliable. Look closely at the cutting edge. Serrated Zyliss knives, like the classic paring model, have distinct curved scallops.
Straight-edge versions show one flat, continuous bevel. Many Zyliss sets combine both types, so inspect each knife individually.
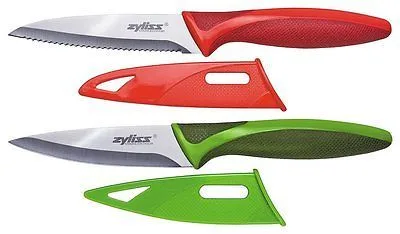
Image source: Bing (Web (fair-use with source credit))
If you're still unsure, use a phone macro mode or a magnifying glass. The scallops become obvious once you see them up close. This step matters because the sharpening tool you choose depends entirely on what you find.
The Right Sharpening Tool for Each Zyliss Edge
Once you know your edge type, the tool choice gets simple. For serrated blades, use a tapered ceramic rod. The taper matches the varying width of each scallop.
A fine grit around 1000 works well for regular maintenance. A diamond rod removes metal faster, but it's easier to overdo it. For straight-edge Zyliss knives, a dual-grit whetstone is your best pick.
Use the 1000-grit side to raise a burr, then the 3000-grit side to polish it.
Skip two tools entirely: pull-through sharpeners and honing steels. Pull-throughs scrape away unevenly and chew up serrations. Steels don't fix a dull edge.
They just roll the cutting edge back. On a serrated Zyliss, a steel can flatten the scallop tips and ruin slicing performance.
Here's the quick reference you'll want to remember:
| Edge type | Recommended tool | Grit range |
|---|---|---|
| Serrated | Tapered ceramic rod | ~1000 |
| Straight | Dual-grit whetstone | 1000 / 3000 |
How to Sharpen a Serrated Zyliss Knife: Step-by-Step
Image source: Bing (Web (fair-use with source credit))
Start with the knife tip-down on a cutting board. Hold the handle with your non-dominant hand. Grip the ceramic rod like a pencil in the other.
Insert the rod into the first scallop near the handle. Angle it to match the bevel you see in the scallop. For most Zyliss knives, that's roughly 15 degrees from the blade's flat side.
Push forward in one smooth stroke, following the scallop's curve. Don't rock the rod. Don't saw back and forth.
Repeat five to ten times on the same scallop. Then move to the next one. Work all the way along the blade, keeping the same stroke count on each scallop.
After a few scallops, check the blade's flat side. You should see a faint wire burr building up. That's tiny, curled metal pushed out by the rod.
It tells you the edge is being sharpened. When the whole edge has a uniform burr, stop. Flip the knife over and make two or three light passes with the rod flat on the blade's back.
That removes the burr without rounding the scallops.
How to Sharpen a Straight-Edge Zyliss Knife: Step-by-Step
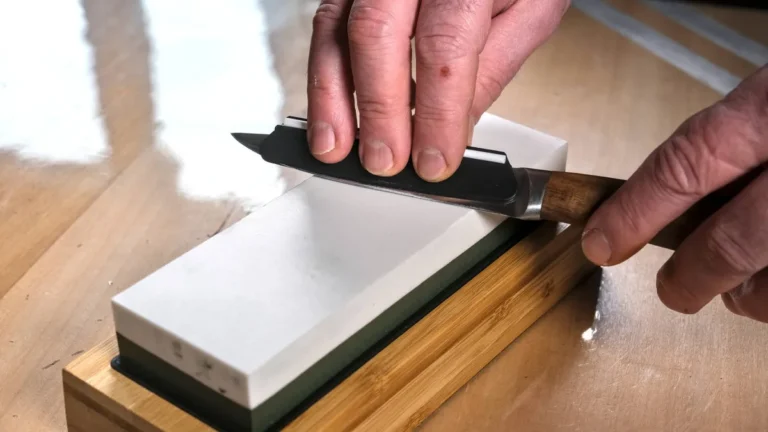
Soak your whetstone in water for 10 to 15 minutes. Place it on a damp towel so it doesn't slide. For this blade, you want to work at an angle between 18 and 20 degrees per side.
Hold the knife with one hand on the handle and the fingertips of the other on the blade's flat.
Slide the edge forward across the 1000-grit stone, edge leading, as if you're slicing a thin layer off the stone. Keep the angle constant. After 10 to 15 strokes, switch to the other side.
Repeat. Then check for a burr by running a thumb across the back edge. A rough, gritty feel means the burr has formed.
Switch to the 3000-grit side. Use lighter pressure and fewer strokes, maybe five per side. This polishes the edge and removes the coarse burr.
Finish with a single, feather-light pass per side on the same stone. Wipe the blade clean and test. If the knife catches on a paper edge and slices cleanly, you're done.
Visual Cues: How to Tell Your Zyliss Edge Is Actually Sharp
A sharp edge gives you clear visual cues. Hold the blade up to a bright window and look along its edge. A dull edge reflects a thin, bright line.
A sharp edge shows no reflection at all. The steel simply disappears to the eye.
Next, try the paper test. Hold a piece of paper with one hand and draw the blade through it from heel to tip. A sharp edge cuts with almost no resistance.
A dull one tears or slips off. For a serrated Zyliss, slide the knife at a shallow angle along the paper. It should leave a clean cut, not a ragged rip.
If you have a ripe tomato, that's the truest test. A sharp Zyliss slices through skin without squashing the flesh. A dull blade collapses the fruit.
And here's the tactile cue: when the edge is sharp, the final deburr pass leaves a smooth, sticky feel on your thumb. Not rough, not glassy. Just a slight drag.
Mistakes That Destroy a Zyliss Blade (And How to Spot Them Early)
One wrong move can ruin a Zyliss knife faster than any dull edge. The most common mistake is using a honing steel on a serrated blade. The steel rolls the scallop tips sideways.
Over time, those tips flatten and stop biting into food. Aggregate user reviews report that this single error kills more Zyliss knives than any other.
The second killer is the pull-through sharpener. Its carbide blades strip away metal unevenly. Serrations end up gouged and wavy, and straight edges lose their original angle.
As of 2026, few pull-through models can match the geometry of a Zyliss bevel. Think of it as a one-way ticket to replacement.
A third mistake is over-sharpening. Ten strokes per scallop is plenty on soft stainless steel. Thirty strokes removes excess metal and leaves weak, irregular serrations.
You can spot the damage by examining the edge under bright light. Uneven scallop depth and a bright reflection along the tips are early warning signs.
Sharpen vs. Replace: When a Zyliss Knife Isn't Worth the Effort
Sometimes, tossing the knife is the smarter move. A quality tapered ceramic rod costs $10 to $20. A replacement Zyliss paring knife runs similar money, often around $12 to $15.
If your blade has deep chips, heavy corrosion, or cracked handle plastic, a new knife beats hours of grinding.
| Condition | Sharpening cost | Replacement cost | Verdict |
|---|---|---|---|
| Dull but intact edge | $10–$20 (rod) | $12–$15 | Sharpen |
| Bent or chipped serrations | $20+ (diamond file) | $12–$15 | Replace |
| Heavy rust or pitting | Not practical | $12–$15 | Replace |
| Loose or cracked handle | Not practical | $12–$15 | Replace |
Here's a simple decision rule. If the blade's edge is unbroken and free of corrosion, sharpen it. If you're setting up a sharpening stone for a knife that cost less than the stone, reconsider.
Zyliss blades are entry-level steel. They're meant to be used hard and replaced. When you upgrade later, you can justify a whetstone investment.
Frequently Asked Questions
Can every Zyliss knife be sharpened at home?
Yes, every Zyliss knife can be sharpened at home with the right tool. Serrated models need a tapered ceramic rod. Straight-edge models need a whetstone.
Avoid pull-through sharpeners entirely. The only exception is severe physical damage, where replacement is cheaper and safer.
Do Zyliss knives actually self-sharpen?
No knife truly self-sharpens. Zyliss markets certain sets with rolling sheaths that realign the edge slightly. That's edge maintenance, not sharpening.
Eventually the steel dulls and those sheaths can't restore it. A proper manual sharpen is the only fix.
How often do Zyliss knives need sharpening?
It depends on use. A home cook using one daily should sharpen every three to four months. Light users can go six months or longer.
The paper test tells you visually. When the blade tears instead of slicing, it's time to sharpen.
Will sharpening void the Zyliss warranty?
Sharpening does not void the warranty under normal use. Per Zyliss's official policies, damage from misuse, such as using carbide pull-through sharpeners, may void coverage. Hand sharpening with a rod or stone counts as normal maintenance.
Keep the original receipt if you're concerned.