How to Restore & Season a Rusty Cast Iron Pan
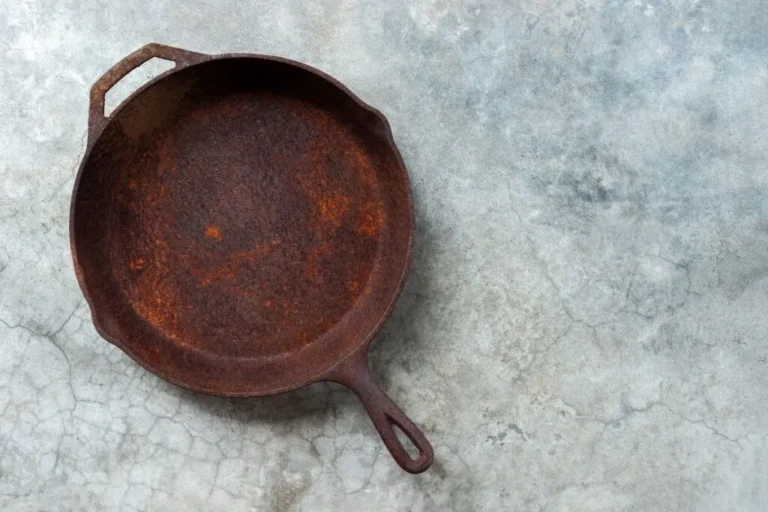
If you've got a rusty cast iron pan sitting in a garage or cupboard, don't throw it out. Learning how to season a rusty cast iron pan turns that crusty mess back into a slick, nonstick workhorse. Rust looks dramatic, but it's only surface-level damage.
With the right steps, the pan comes back better than the day you found it.
The real fix is polymerization. That's the chemical process where oil heats past its smoke point, bonds to the iron, and forms a hard, protective layer. Manufacturer specifications indicate that a standard home oven running 400°F to 450°F triggers the reaction cleanly.
As of 2026, even budget-friendly cast iron is built to last generations once you get the seasoning right. Here is how to walk through the whole restoration without second-guessing every step.
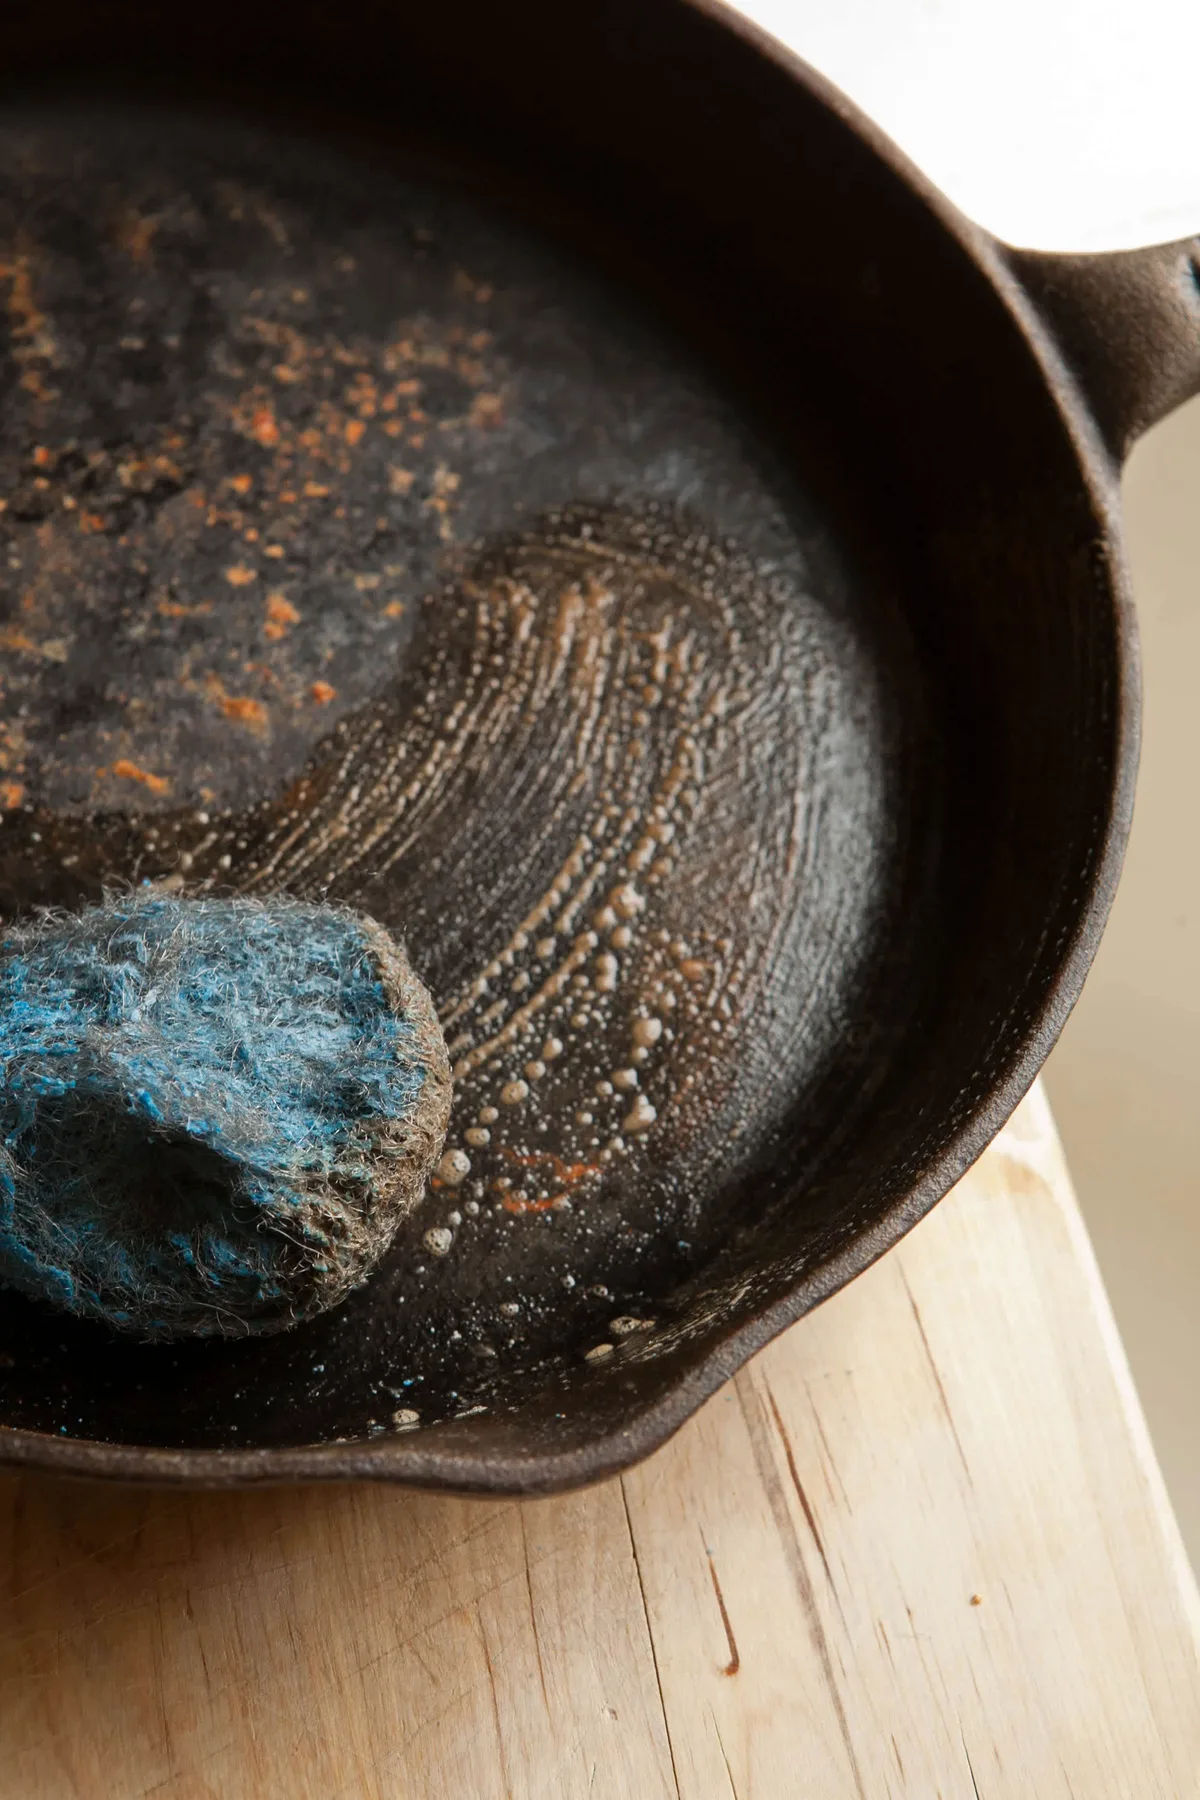
Image source: Web (Bing) / thekitchn.com (Web image (fair-use with source credit))
Why Your Rusty Pan Is Worth Saving
Cast iron doesn't expire. The iron itself can last centuries, and rust is just the top layer that turned into iron oxide. Remove that oxidized layer and you're back to the original pan, ready for the same kind of cooking your grandparents did.
There are practical reasons to save it. A restored pan gives you better heat retention and a true nonstick surface once the seasoning builds. Aggregate reviews from home cooks and chefs consistently show a well-seasoned cast iron skillet outperforms many modern coated pans, with zero synthetic chemicals.
There's a cost factor too. A pre-seasoned new pan from Lodge Cast Iron costs real money. A rusty one at a flea market might cost five dollars.
When a few hours of work restores it, those savings add up.
One rule: don't waste time on damaged iron. Deep cracks, warping, or a hole are structural failures, not seasoning problems. If the pan is broken, it's a permanent problem.
Recycle that one and put the effort into a piece with solid bones.
The First Step: Diagnose Your Rust Level
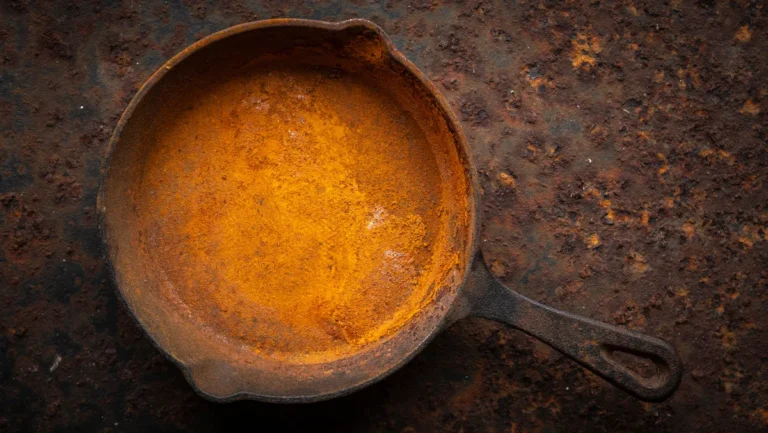
Before you pick a cleaning method, figure out how far the rust has gone. Run your thumbnail across the bottom of the pan. If your nail catches and leaves a line, you're past light dust.
If the surface feels smooth under the orange powder, you're in lucky territory.
Use the table below to match what you see with the right restoration path.
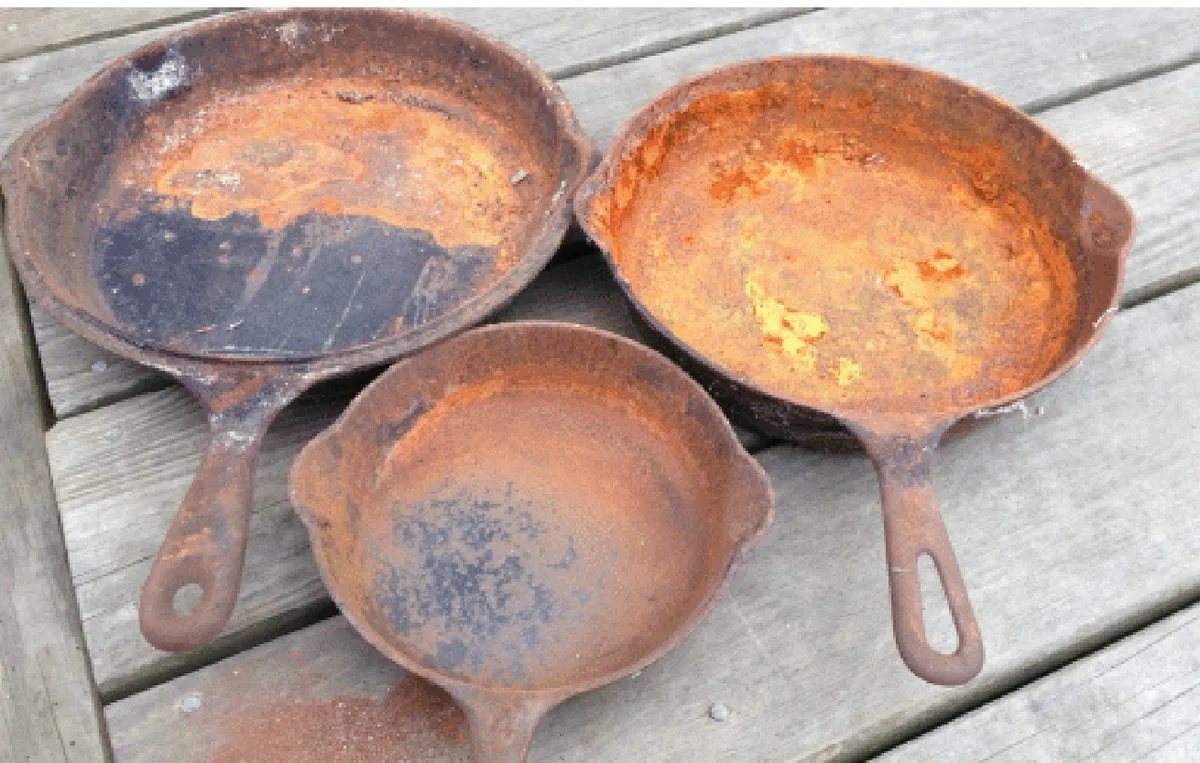
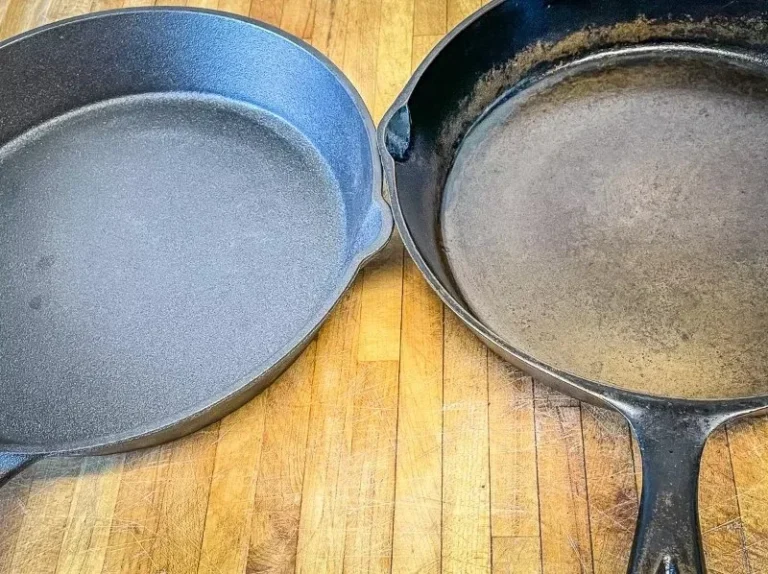
Image source: Bing (Web (fair-use with source credit))
| Rust Level | What It Looks Like | Best Removal Method | Route |
|---|---|---|---|
| Light surface rust | Orange dust, powdery, smooth iron beneath | Fine steel wool + warm water | Quick path |
| Moderate rust | Flaky or rough patches, some pitting starting | Steel wool + short vinegar soak | Either path |
| Heavy rust | Thick crust, deep orange-red flakes, obvious pits | Vinegar soak or electrolysis | Full restoration |
| Pitted iron | Dark craters under loose rust | Remove rust, season over pits | Full restoration |
Pay attention to color too. Light orange dust scrubs off quickly. Dark red or brown patches often mean the rust is deeper and thicker than it looks.
When in doubt, start with the quick path. It's faster and safer. If the rust doesn't come off in ten minutes, move to the vinegar soak for heavy rust.
Removing Light Rust (Your Quick Path)
Light rust is a morning project. You need fine steel wool (0000 grade), a drop of dish soap, warm water, a clean towel, and your seasoning oil.
Here's the step-by-step:
- Wet the pan with warm water. Add a small drop of dish soap. Soap cuts leftover grease without stripping the iron.
- Scrub the rusty area with fine steel wool. Work in circles and press firmly until the orange dust disappears.
- Rinse the pan completely. Soap left behind can leave a bitter film.
- Dry it with a towel right away. Then set it over low heat for two minutes. This removes the moisture bare iron hates.
- Let it cool, then apply a paper-thin coat of oil to every surface.
The key is speed. Bare iron rusts in minutes when it's wet. That process is called flash rust, and it looks like a faint orange haze appearing before you dry.
If you see it, just repeat the scrubbing step and finish faster.
Once the pan is clean and oiled, skip ahead to the oven seasoning section. That step locks in the protection and makes the pan ready for cooking.
Removing Heavy Rust (The Full Restoration Path)
Heavy rust needs an acid bath. A 1:1 mix of distilled white vinegar and water will dissolve thick oxidation without harming the iron, as long as you don't overdo it.
Fill a large bucket or tub with the solution and submerge the pan. Let it sit for 15 to 30 minutes. Check it halfway through and rub a test spot with steel wool.
If the rust is gone there, pull it out.
Once you've soaked it, scrub the entire pan under running water. Use steel wool for loose patches and chainmail for the heavy crust. If stubborn rust remains, repeat the soak for another 15 minutes.
Do not leave it overnight. Vinegar is an acid, and prolonged exposure can pit the surface.
After cleaning, dry the pan immediately. Your new enemy is flash rust, so dry with a towel, then place it on a low flame for two minutes to evaporate any trapped moisture.
What about electrolysis? It's a more advanced rig using a battery charger, a sacrificial steel anode, and washing soda. It's slower but gentler, and collector forums recommend it for vintage pans.
For most people, vinegar works fine.
One safety check: if the pan is old or from an unknown source, test it for lead before cooking in it. Some vintage skillets were used to melt lead for fishing weights and bullets. Seasoning locks in nothing.
Lead stays dangerous.
If you find dark pits under the rust, don't worry. Pitting looks rough, but a several-coat seasoning will fill them in over time.
Seasoning Your Pan No Matter Which Path You Took
Once the pan is clean and rust-free, the oven method gives you the most durable, even coating. It's the same process for a pan you scrubbed lightly or one you rescued from a barn.
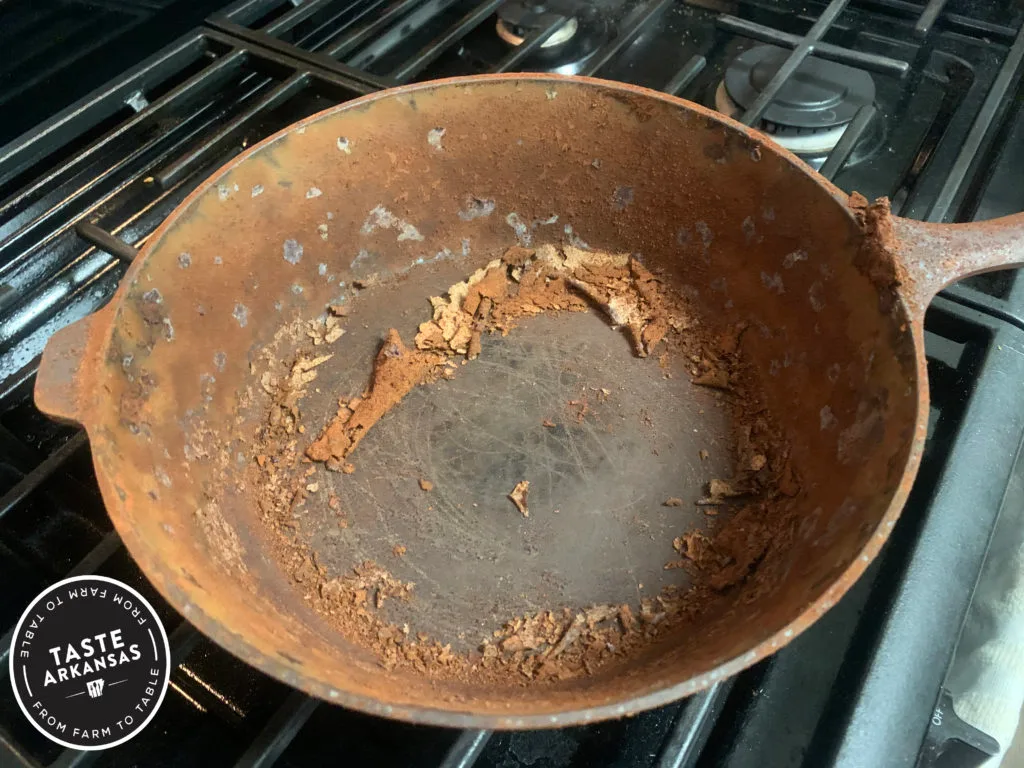
Image source: Bing (Web (fair-use with source credit))
| Step | What to Do | Time / Temp |
|---|---|---|
| 1. Preheat | Place clean, dry pan in a 200°F oven | 10 minutes |
| 2. Oil | Apply a thin coat of oil, then wipe it off like you made a mistake | 1 minute |
| 3. Bake | Turn oven to 400–450°F, pan upside down, foil on lower rack | 60 minutes |
| 4. Cool | Leave pan in the oven until completely cool | 30–50 minutes |
| 5. Repeat | Repeat steps 1–4 for a total of 3–5 coats | 1–2 hours per coat |
Use an oil with a smoke point around or above 400°F. Grapeseed, canola, and vegetable oil all work well. Shortening and refined lard also hold up.
Flaxseed oil gives a beautiful hard finish at first, but it tends to chip and flake under normal use, so skip it unless you like reseasoning often.
After the first coat, repeat the process at least three times. Each coat adds a thin layer of polymerized oil. That build is what gives you that dark, smooth, nonstick cooking surface.
This is where most people mess up: using too much oil. Excess oil pools and turns into sticky spots. Wipe the oil on, then with a fresh paper towel, wipe it off like you didn't mean to leave any behind.
That's the habit that separates a smooth pan from a sticky one.
Mistakes That Mess Up a Fresh Seasoning
A freshly seasoned pan is fragile. The polymerized layer is thin, and the wrong move can undo hours of work.
The biggest mistake is using too much oil. Thick oil pools in the corners and drips down the sidewalls. It bakes into sticky, uneven patches that never cure right.
The solution is simple: wipe the oil on, then wipe it off with a clean cloth until the surface looks almost dry.
Another common error is cooking acidic foods too soon. Tomato sauce, vinegar, or citrus juice will strip a new seasoning in one meal. Stick to fatty foods for the first several uses.
Fry eggs, cook bacon, sauté vegetables in butter. Give the seasoning a chance to build.
Cranking the heat too high is another problem. Cast iron distributes heat evenly, but a fresh seasoning can't handle a blast on high. Start with medium or medium-low heat for the first few weeks.
Let the pan slowly darken with each use.
Then there is the soap debate. Modern dish soap is mild. A quick wash with a little soap won't hurt a well-seasoned pan.
The real danger is soaking. Never leave cast iron sitting in soapy water. That softens the seasoning and invites flash rust.
Avoid metal utensils early on. Metal spatulas will scrape thin seasoning right off. Use wood, silicone, or nylon tools until the pan has a few months of cooking behind it.
Skip the self-cleaning oven cycle too. The extreme heat warps pans and burns seasoning into ash. If you need to strip a pan, use vinegar or oven cleaner instead.
Long Term Tips to Keep Your Pan Rust Free
Once you have a good seasoning, maintenance is easy. The goal is to prevent moisture contact and keep a thin oil layer on the surface.
Dry your pan completely after every wash. Towel dry it first, then set it over low heat for two minutes. Any leftover water evaporates before it can form rust.
Apply a thin oil coat after drying. Rub in a few drops of oil, then wipe it off. This is called a maintenance seasoning.
It fills micro gaps and keeps the protective layer intact.
Store the pan in a dry place. Humidity is the enemy. If your kitchen gets steamy, store the pan in the oven or on a rack away from the sink.
A layer of paper towel inside the pan absorbs moisture too.
Cook fatty foods regularly. Bacon, steak, and fried chicken all deposit new layers of oil into the seasoning. The more you cook with fat, the darker and slicker the pan gets.
Reseason only when needed. If food starts sticking or the pan looks dull, add a quick oven seasoning coat. One hour at 400°F with a thin oil layer is enough.
Avoid the dishwasher completely. High heat, harsh detergent, and long wet cycles destroy seasoning. Hand wash only.
Don't worry about small rust spots either. A quick scrub with steel wool and a maintenance coat fixes them fast.
Frequently Asked Questions
Can I use olive oil to season cast iron?
Olive oil has a low smoke point around 375°F. It burns before the polymerization process finishes. Use oils with a smoke point above 400°F.
Grapeseed, canola, and vegetable oil work much better for oven seasoning.
How long does a full restoration take?
Plan for four to six hours spread across one day. The vinegar soak and scrubbing take about an hour. The oven seasoning takes one hour per coat with cooling time.
Three to five coats means most of an afternoon.
Do I need to season a pre seasoned pan?
Check the surface first. New pans from Lodge and Field Company arrive preseasoned. If the surface is smooth and dark, just wash it and start cooking.
If it looks patchy or rough, add one or two oven seasoning coats for insurance.
Why does my pan look brown instead of black?
A brown color means the seasoning is thin or the oil baked at too low a temperature. Fix it by adding more seasoning coats at 400°F or higher. Each coat darkens the color slightly.
After several uses, the pan turns black naturally.
Can I season a pan without an oven?
Yes. Use the stovetop method instead. Apply a thin oil coat, then heat the pan on medium until it stops smoking.
Let it cool, then repeat. The coating is thinner than oven seasoning, so expect to do more maintenance coats.
Is it safe to cook in a restored vintage pan?
Yes, if the pan passes the lead test. Use a home lead testing kit from a hardware store. If the test is negative and the pan is structurally sound, it is safe.
Cast iron itself is food safe and has been used for centuries.